How the guide is organized: Player development is grouped by the system it improves; player events are separated from alliance events; alliance core/territory is separate from alliance leadership; automation is centralized; combat mechanics are explained once and then applied where needed.
PLAYER — FOUNDATIONS
Player Fundamentals — Learn the Game in the Right Order
Use this guide by stage, not by random topic. Your Furnace drives progression; your alliance drives acceleration and access; events determine when you spend; later, seasonal heroes and war mechanics determine where you specialize.
Stage 1 · Build Furnace 1–15: learn the city, join an active alliance, unlock systems, establish gathering and hero habits.
Stage 3 · Compete Furnace 23–30: optimize combat stats, seasonal events, rallies, Castle/Fortress/Stronghold play and resource banking.
Stage 4 · Tundra Alliance territory expands into Tundra; positioning, higher resource nodes, facilities and coordinated teleporting matter much more.
Stage 5 · Seasons New hero generations replace old investment priorities. Save selectively, compare roles, and stop overbuilding heroes you are about to replace.
Always Keep construction, research, training, gathering and alliance activity moving. Do not chase Power for its own sake.
The basic daily loop
Collect city production and check the next Furnace prerequisite.
Start construction/research and request Alliance Help.
Dispatch gathering and event marches.
Complete Daily/Intel/Exploration/Alliance tasks that fit your current stage.
Check alliance announcements before joining rallies or moving cities.
Bank the resources, speedups, gems and hero materials needed for the next event or progression gate.
Free Resources — Gift Codes, Monument Gems & Easy Claims
Do this early and keep doing it. Gift codes are temporary, while Monument achievements can quietly add Gems and other progression rewards. Check both instead of leaving free resources on the table.
Gift codes — use live lists, not an old code list
Gift codes expire quickly and can have publisher claim limits. Rather than putting a stale list in the guide, bookmark a live tracker and check it whenever a new code is announced.
Never trust a random “code generator.” Use public codes from the game/developer or established community trackers. Gift codes are case-sensitive and can expire or hit claim limits.
Monument — free Gems hiding in progression milestones
Once the Monument is unlocked, open it regularly. Monument achievements cover personal, alliance and state milestones, and rewards can include Gems, recruitment keys, manuals, speedups and Fire Crystals. Some achievements complete because the state/alliance progresses, so you may have rewards waiting even when you did nothing special that day.
Check it after major milestones. Furnace growth, Beast hunting, alliance territory and other state/alliance achievements can advance Monument objectives.
Claim available rewards. Do not leave earned Gems sitting unclaimed.
Use the extra Gems toward your real priorities. Early progression commonly values the second Builder and other high-return account upgrades before vanity spending.
Current community Monument references document 25 achievement objectives and multiple Gem rewards; exact objectives/rewards should be checked against the Monument screen in your client because event/state progression can change.
1Furnace / progression gates Do not stall your core Furnace progression for cosmetic power.
2Strong combat core Build one serious hero of each troop type before spreading resources.
3Battle stats Hero Gear + Chief Charms supply valuable Health/Lethality; Chief Gear supplies broad Attack/Defense and set bonuses.
F2P resource rule
Do not level every hero because the materials are available.
Do not spend rare Essence Stones casually. Save them for your priority Hero Gear.
Use event windows for major spending whenever the event rewards that resource.
For Bear Trap, better Marksman damage can improve your contribution and therefore improve access to Hero Gear resources.
Progression Roadmap — What to focus on as the Furnace rises
Stage
Main goal
What to focus on
Do not do
Furnace 1–9
Unlock the core city systems
Furnace progression, construction speed, resource flow, basic heroes, troop training and active gathering.
Do not spread hero EXP/shards across the whole roster.
Furnace 10–14
Build a sustainable economy
Keep Research running, improve Growth/Economy, unlock better troop tiers, build your core five and prepare for Hero Gear.
Do not spend rare resources on cosmetic Power or weak heroes.
Furnace 15–21
Start real combat development
Hero Gear opens at 15. Build one Infantry Health set, one Marksman Lethality set and one Lancer Lethality set. Keep research moving toward the military gates.
Do not create full gear sets for every hero.
Furnace 22–24
Build universal combat stats
Chief Gear opens at 22. Establish Infantry first, then Marksman/Lancer according to role. Continue Hero Gear and Battle research.
Do not confuse Chief Gear with Hero Gear. They serve different systems.
Furnace 25+
Add Health/Lethality depth
Chief Charms open at 25. Keep improving main combat gear, charms and Battle research. Use event timing for expensive upgrades.
Do not spread Essence Stones, Mithril or other scarce materials across low-impact heroes.
Fire Crystal era
Optimize your role
Choose whether you are primarily a rally lead, garrison/defense player, Bear specialist or general F2P fighter, then concentrate rare resources accordingly.
Do not copy a whale build onto a F2P account. Resource efficiency changes with spending level.
Simple growth rule: Furnace progression opens the next systems, Research compounds the time saved, Heroes determine your combat core, and Gear/Charms turn that core into real battlefield stats. Build in that order instead of chasing raw Power.
Day 1 → End Game — Server Timeline & Power-Shift Roadmap
Use this as a roadmap, not a stopwatch. State age, rollout and patches can move unlocks. The live Furnace, event, shop and hero screens are the final authority.
State age
Major shift
Player plan
Protect
0–40
Gen 1 → Gen 2; core city and Hero Gear systems.
Rush Furnace gates, join an active alliance, keep construction/research/training/gathering running, learn troop roles.
Gems, universal shards, speedups.
~53–60
Sunfire and Fire Crystal Age begin entering the roadmap.
Stop thinking only in Furnace levels. Start banking for scoring windows and permanent FC gates.
FC and long speedups.
~80–120
SVS/KOI and Gen 3; more event systems.
Build event discipline: save the material for the day that scores it.
Hero shards, Gems, speedups, stamina.
~140–220
FC4–5/Lab, Gen 4, Legendary Chief Gear, War Academy.
Crystal Lab becomes a routine; specialize your first serious combat role.
FC, research speedups, Chief Gear materials.
~270–500
Gen 5+, FC8 and later FC9–10; RFC enters the economy.
Plan Furnace/Camps/RFC/War Academy as one pipeline instead of isolated upgrades.
RFC and high-value event currencies.
~680+
Current roadmap reaches Gen 10 and Flame Tech/T12 era.
Never chase Power for its own sake. Ask: “What does this Power let me do better?” If the answer is nothing useful, it is probably not the next upgrade.
Farm Account — Start One From Scratch and Build It for Resources
A farm is a second character whose primary job is to generate Meat, Wood, Coal and Iron for your main. Build it for resource throughput, gathering and useful support — not as a second PvP main.
Step 1 — Create the farm in your main's state
Open your main city and tap your Profile picture.
Open Settings.
Open Characters / character management.
Tap Create New Character.
Search for and select the same State number as your main.
Confirm and start the new character. You will go through the opening tutorial again.
Finish the early tutorial and join your alliance's farm/academy alliance if one exists. If your state permits another arrangement, follow your R4/R5 rules.
Do not confuse this with State Transfer. Create New Character starts a completely separate city. It does not move your main, copy heroes, or copy resources. Current community references consistently place the path at Profile → Settings → Characters → Create New Character, with the target State selected during creation.
Step 2 — Get the new city moving
Push the Furnace. Do the normal prerequisite buildings, but do not waste resources building a combat account you do not need.
Unlock march queues. The official game support says you begin with 1 queue and can unlock up to 6 through technology and VIP. For a farm, more simultaneous gathering marches are one of the biggest efficiency gains. Official March Queue FAQ
Prioritize Economy research. Gathering speed, resource production and march/load efficiency are the farm's core engine.
Take Growth research that accelerates the farm. Research Speed, Construction Speed and useful development gates compound over the life of the farm.
Take only necessary Battle research. Get the military prerequisites and troop/deployment capacity you actually need. Do not turn the farm into a second main unless you have a specific reason.
Keep the research queue active. An idle farm research queue is lost production time.
Farm milestones — what are you actually building toward?
Milestone
Farm goal
Why it matters
Early game
Furnace + basic economy + first extra march capacity
Get enough march capacity to gather while the city continues developing.
Furnace 13+
Unlock the ability to promote lower-tier troops and continue economic growth
Lets you keep troop requirements manageable without training every old tier from scratch. The official FAQ confirms promotion becomes available when Camps reach Lv. 13.
Furnace 18
Common community farm milestone
Often used as a practical target for a useful multi-queue farm. It is a community target, not an official farm requirement.
Furnace 22
Common mature-farm target
Gives the farm more developed systems and stronger long-term gathering capacity. Stop here or continue only if the extra output justifies the work.
Research priority for a dedicated farm
1 · Economy Gathering Speed, resource production and other direct RSS improvements.
2 · Growth Research/Construction Speed and development efficiency that gets the next farm milestone online sooner.
3 · Battle Only enough to unlock useful troop tiers, deployment capacity and required gates. Combat is not the farm's purpose.
Gathering heroes — build these for the job
Use heroes whose Expedition skills increase the resource your march is collecting. Community references commonly identify Cloris for Meat, Eugene for Wood, Charlie for Coal and Smith for Iron. Their value is in the gathering Expedition skill; keep those skills developed rather than spending farm resources on unrelated combat upgrades. Community gathering reference
Farm rule: If an upgrade does not increase your resource output, march capacity, gathering efficiency or the minimum progression needed to unlock those things, question why you are buying it.
Daily farm routine
Collect city production and complete free daily activity.
Send every available march to the best legal resource nodes you can reach.
Use the correct gathering hero for the resource being collected.
Keep construction and research running.
Return to the farm on a predictable schedule so marches are not sitting idle.
Keep the farm close enough to the main/hive that resource transfers are practical.
Moving RSS from the farm to the main
Bring the farm's gathering marches home.
Scout the farm before attacking it. Confirm there are no troops, reinforcements or surprises in the city.
Send the farm's troops out of the city before the resource-transfer attack if your state uses city looting for farm transfer. This prevents the main from accidentally fighting the farm's defending troops.
Check the farm's lootable/unprotected RSS and attack only under your state's rules.
After the transfer, repair the Barricade and return the farm to its normal gathering routine.
Do not treat farm looting as an automatic right. NAP/state rules may prohibit city attacks even on your own farm. Some alliances instead use an academy/separate alliance or another approved transfer method.
Farm + Brothers in Arms
This is a separate routine from RSS transfer. During Brothers in Arms, a farm can be used as a controlled source of troop-fight points when the state rules permit it.
Keep the farm's troops healthy and available.
If the main and farm are in the same alliance and attacks are restricted, move the farm out before the fight only if leadership/state rules allow it.
An academy or other separate alliance can be cleaner when the farm needs to remain separate from the main for the event.
Attack the farm deliberately and understand that city combat can create permanent troop losses.
Batch-heal between rounds: heal manageable batches, use Alliance Help, let the timers fall, then start the next batch. This is a community efficiency method, not a reason to overflow the Infirmary.
Rejoin the normal alliance after the exchange if required and permitted.
Stop when the desired BiA points are reached. The farm is an asset; do not destroy its long-term gathering engine for a few extra points.
Remember the distinction:RSS transfer = empty the city, make lootable resources available, then collect them under state rules. BiA farming = deliberately create a troop fight for event points. They are not the same procedure.
What not to spend on
Do not chase a full combat hero roster.
Do not spread scarce Hero Gear/Essence materials across heroes you will never use.
Do not train huge armies merely to increase farm Power.
Do not let the farm consume your main's event resources unless the farm directly returns more value than it costs.
Battle Report Deep-Dive — Diagnose the Exact Failure
Front line died too fast Check Infantry tier/count, Infantry Health/Defense, defensive hero skills, tech and formation.
Front line lived but damage was poor Check the damage class Attack/Lethality, Expedition skills, counters and troop share.
Similar headline stats, different result Open Battle Details. Hero skills, target selection, troop tier and captain effects can explain the difference.
Rally won, your contribution was weak Compare your tier/composition with other joiners. A bigger march is not automatically a better march.
Reading the supplied report example
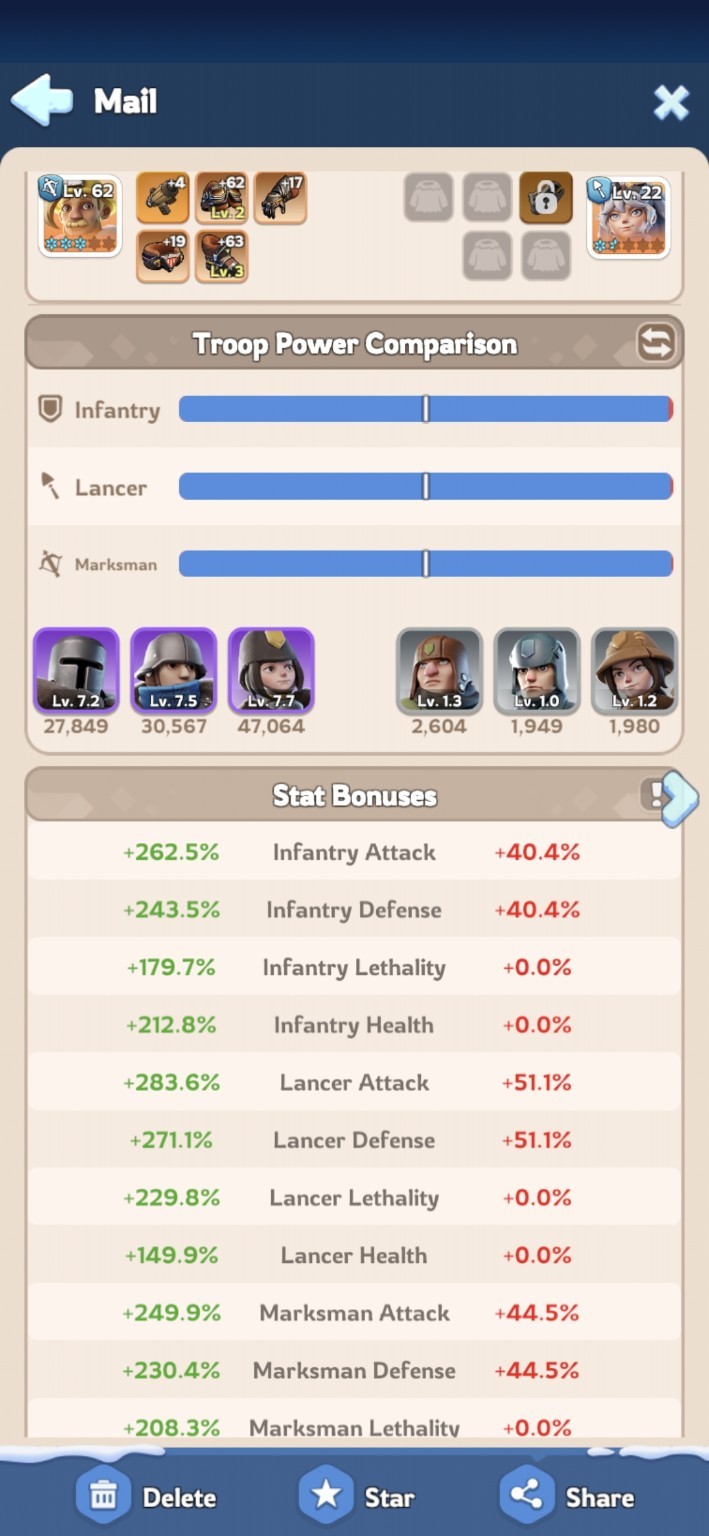
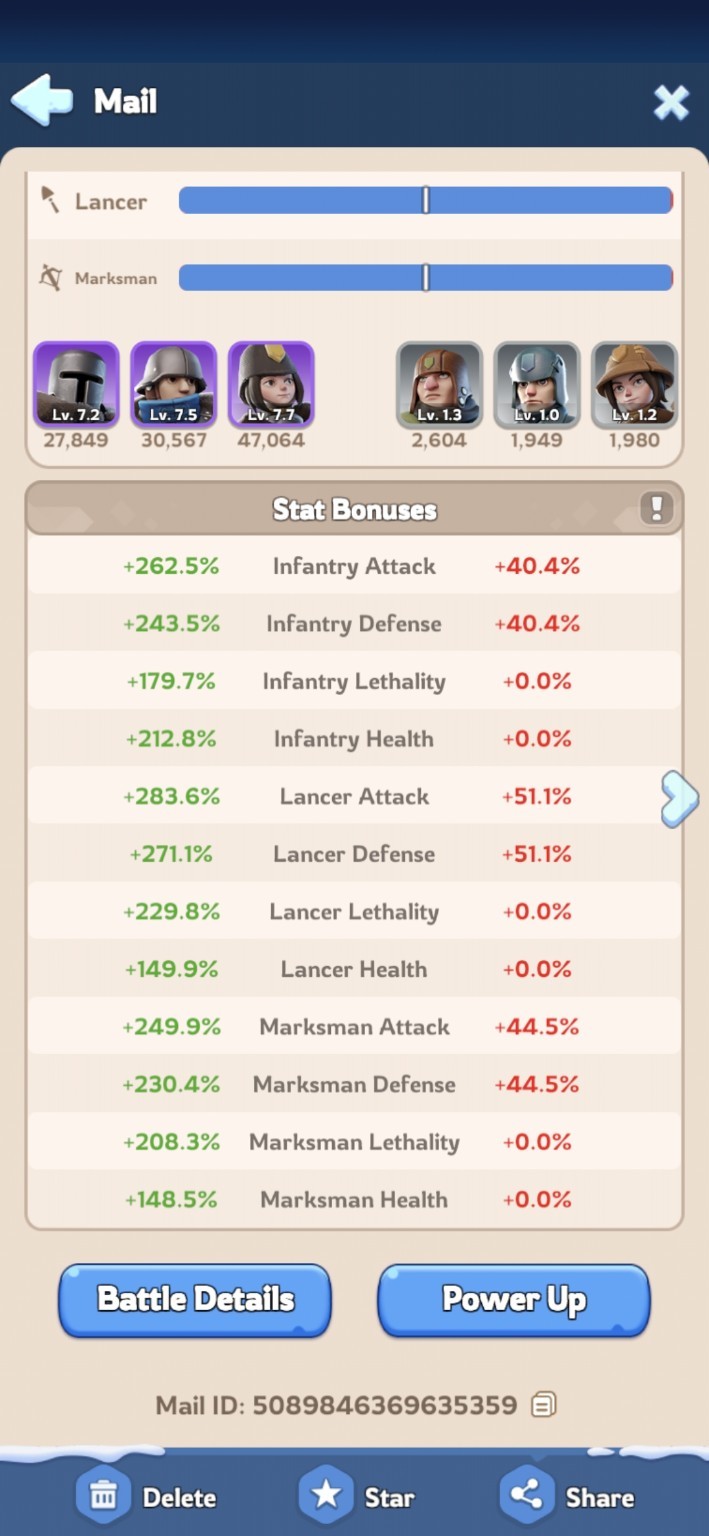
The green side shows roughly 150–284% across the visible rows while the red side is around 0–51%. That is a structural stat gap. A small troop-ratio adjustment will not erase it; the weaker account needs permanent combat development before expecting an even fight.
Attack/Defense vs Lethality/Health
Do not add the four percentages together. Damage pressure comes from Attack plus Lethality; staying power comes from Defense plus Health. When one relevant stat is already far ahead of its partner, improving the weaker partner can produce better practical value than stacking the already-high stat.
Eight-step report audit
Identify solo, rally, reinforcement or garrison combat.
Identify the actual rally/garrison captain and heroes.
Compare troop tier and total troops.
Compare Infantry/Lancer/Marksman composition.
Compare all 12 visible stat rows.
Open skill details and Battle Details; the headline rows do not show every hero-skill effect.
Check casualties and whether the trade was sustainable.
Change one major variable for the rematch so the next report teaches you something.
Verification: Official support confirms new characters are separate progression and that march queues can reach 6 through technology/VIP. Current community guides and discussions support the Profile → Settings → Characters → Create New Character path, farm/academy use, gathering-focused research, resource-transfer preparation and farm use in controlled BiA scoring. State rules always override community practice.
Troop Training — Capacity, Speed & SVS Promotion
Training Speed ≠ Training Capacity. Speed reduces completion time. Capacity increases how many troops fit in one training batch.
Permanent training improvements
Keep all three troop camps upgraded with Furnace progression.
Research Camp Expansion for more troops per queue.
Research Training Tools to reduce training time.
Use state and Minister buffs during planned high-volume training.
200% Training Capacity Enhance
The Training Capacity Enhance lasts 2 hours and increases Training Capacity and Training Time by 200%. That means roughly 3× the normal batch size, not 3× faster training.
Use it when the goal is to load very large batches with fewer taps, especially around a training event. It does not create free training time.
Train high tier or bank one tier below?
Early account: train your highest available tier until you have enough troops to fill useful marches.
After your army is large enough, a common event strategy is to train one tier below your maximum between events.
On the Training/Promotion scoring day, promote that stored pool to the highest tier. Promotion scores the difference between the two troop levels and lets you process a large troop pool efficiently.
Do not use this strategy if it leaves you short for Bear Trap, hunting, Crazy Joe, garrison or war.
When a new top tier is close, stop overbuilding the lower tier and prepare for the new promotion path.
Training-day setup
Coordinate Mobilize, Minister of Education, Training Capacity Enhance and other available training buffs. Start batches early when the event's scoring rules reward troops that finish/are credited during the scoring window. Always verify the current event rule first.
Enlistment Office — Your Hidden Troop Reserve
Purpose: The Enlistment Office stores reserve troops and can recruit reserves when severely injured troops exceed Infirmary capacity.
Current references list reserve capacity at 4× Infirmary capacity.
Loyalty is spent to enlist reserves and begins accumulating again after reserve use.
Loyalty accumulates faster when it is low, when severely injured troops are fewer, and when more reserves remain.
Loyalty stops at its cap. Before a major war, do not leave it permanently capped.
Daily Mission rewards and gathering can provide Loyalty while reserves are available.
Maintain this system before SVS/war. It is backup capacity, not a replacement for a healthy Infirmary.
Research Center — Optimize Growth, Economy & Battle
The Research Center has three separate trees: Growth, Economy and Battle. Nodes have prerequisites/gates, so the best route is not “max everything.” Research is permanent account power, and Research Speed is a compounding stat: every hour saved early can save more time on every later technology.
Growth Build efficiency, research efficiency, queues and development flow.
Economy Gathering, production and resource efficiency that keeps future upgrades funded.
Battle Troop combat stats and later military gates for PvP and event performance.
Research tree map — follow the gates
🌱 Growth
Research Speed Compounding priority
↓
Gate Construction Speed
↓
March Queue / development
↓
Training Capacity + Speed
⛏ Economy
Gathering Speed Long-term resource return
↓
Gate Production / resource output
↓
Resource efficiency
↓
Advanced economy nodes
⚔️ Battle
Battle prerequisites
↓
Gate Infantry combat block
↓
Marksman combat block
↓
Lancer + advanced military blocks
The diagram is a priority map, not a claim that every account sees these nodes in exactly this order. Research Center prerequisites and node gates are shown by the live client and can vary with progression/state age. Current references confirm the three-tree structure and the early value of Research Speed, Construction Speed and March Queue.
How the gates work
You cannot simply jump to the strongest leaf. Earlier nodes and prerequisite gates must be completed first.
Research Center level and Furnace progression also gate what you can research.
Read the live prerequisite panel before spending resources; node requirements can change with state age and game updates.
Do not spend universal speedups just to reach a dead-end node if the next useful gate is still blocked.
Optimal F2P route — early account
Priority
Route
Reason
1
Growth: Research Speed
Compounds across the entire account. Current community guides place this at the top of the early route.
2
Growth: Construction Speed
Faster Furnace/building progression unlocks more content and reduces long-term downtime.
3
Growth: March Queue / development gates
More available marches improve gathering and event participation.
4
Growth: Training Capacity / Training Speed
Improves troop production once your economy can support continuous training.
5
Economy: Gathering Speed
Strong long-term return because it helps fund every future upgrade.
6
Economy: resource production/efficiency gates
Take efficient economic nodes when they are on the required path rather than skipping growth to chase small gains.
7
Battle: unlock the useful military path
Once growth and economy can sustain you, shift toward the battle stats your alliance needs.
Current research references support Growth-first, especially Research Speed, Construction Speed and March Queue, followed by Economy gathering and then Battle.
F2P battle priority
Do not permanently skip Battle. Growth gets the account moving, but competitive events eventually require Battle research. Once the key Growth/Economy gates are efficient, push the military path instead of endlessly farming economic percentages.
Take the Battle prerequisites needed to open the next useful military block.
Prioritize the troop type and stats that match your actual role. A normal F2P player benefits from a balanced core rather than trying to become a three-march specialist immediately.
For a Bear-focused player, Marksman-related offensive investment has unusually high practical value because your Bear formation is Marksman-heavy.
For defensive/garrison roles, do not ignore Infantry survivability.
When a major SVS/war period approaches, temporarily favor Battle research that contributes to the planned event instead of starting a long economic detour.
Whale / high-spender route
Get the compounding Growth gates early, but do not remain Growth-heavy after the account has enough development speed.
Move into Battle earlier because high-spender accounts already have stronger resource income, troop capacity and gear to exploit military stats.
Prioritize the military branch around your role. A rally leader has more reason to push combat stats than a pure joiner.
Use event windows. If Research is a scoring category, queue expensive research before the event and finish it during the scoring window when allowed by the event rules.
Keep the queue active. Idle research time is permanently lost account progression.
Research during events
Normal days Start the highest-value long research you can sustain. Avoid leaving the Research Center idle.
Research scoring day Time completions and speedups for the scoring window. Do not burn a valuable long queue early if the points can be safely collected later.
Research checklist
Research Center queue never idle.
Check the next gate before spending speedups.
Take Research Speed and Construction Speed early because they compound.
Use Economy to keep the account supplied, especially Gathering Speed.
Transition into Battle before competitive events demand it.
Coordinate major research pushes with SVS/Hall of Chiefs/event scoring days.
Follow alliance-specific research priorities when leadership assigns a state strategy.
The exact “best” node can change with your Furnace level, state age, available resources and current event. The guide therefore gives the priority logic, not a fake universal click-by-click tree. Use the gates shown by your live Research Center as the final authority.
Fire Crystal → Refined Fire Crystal → Flame Tech
This is the permanent progression spine of the later game. FC eventually stops being “one more upgrade material” and becomes a scheduling problem involving Furnace, Camps, research, War Academy, RFC and later Flame Tech.
Phase
Reference
What changes
Strategy
FC1–3
~Day 60
First Fire Crystal Furnace tiers.
Keep all three Camps aligned with your combat progression; do not create a high-Furnace/weak-troop account.
FC4–5 + Lab
~Day 150
Crystal Laboratory enters the loop.
Run the Lab consistently; convert spare RSS according to the live Lab rules.
War Academy
~Day 220 roadmap
Helios/T11-era research layer.
Choose research based on role and the next gate. Rally leaders value capacity/offense differently from general players.
FC6–8 + RFC
~Day 315
Refined Fire Crystal becomes a gating material.
Plan RFC before starting the next permanent upgrade. Do not let a temporary event consume the RFC needed for a major gate.
FC9–10
~Day 500+
Very large FC/RFC requirements.
Budget for multiple buildings and research steps at once.
Flame Tech / T12
~Day 680+ roadmap
Another combat research layer; Exalted/T12 era.
Save Steel, FC Shards, RFC and RSS for research instead of treating FC as the only late-game currency.
FC budgeting system
Bucket 1 — Permanent gatesFurnace, Camps and required buildings.
Bucket 2 — ResearchResearch Center / War Academy / later Flame Tech.
Bucket 3 — RFCKeep a future-upgrade reserve; do not zero the account for one upgrade.
Bucket 4 — EventsOnly spend the amount required for the reward/VP objective you actually want.
Crystal Laboratory — the sustainable FC/RFC routine
The Crystal Laboratory has two separate jobs: normal refinement converts RSS into Fire Crystals, while Super Refinement converts Fire Crystals into Refined Fire Crystals. Treat them as separate budgets.
Normal Lab stage
Daily attempts
Expected FC / attempt
Expected FC / week*
FC5
5
2.10
~73.5
War Academy unlocked
6
2.10
~88.2
FC8
7
2.10
~102.9
FC10
8
2.10
~117.6
*Expected value from the current community probability table (1 FC 40%, 2 FC 30%, 3 FC 15%, 4 FC 10%, 5 FC 5%). Actual weekly results vary. Missing a daily attempt means losing that day's normal refinement opportunity.
Super Refinement — do it for the discount, not because you can
Tier
FC / attempt
RFC range
Expected RFC
20-attempt expected RFC
1
20
1–3
1.45
29.0
2
50
2–3
2.15
43.0
3
100
3–6
3.18
63.6
4
130
3–9
3.44
68.7
5
160
3–12
3.71
74.2
There are 100 Super Refinement attempts in the full weekly cycle: 20 at each tier. The first Super Refinement each day is 50% off, so the cheapest long-term strategy is to spread attempts across days rather than burn the whole weekly allowance at once.
Low-cost weekly routine 1 Tier-1 attempt/day × 7 days = 70 FC/week for an expected ~10.2 RFC/week.
Tier-1 completion 20 Tier-1 attempts spread across 20 days = 330 FC for an expected 29 RFC.
Full weekly cycle 100 attempts is an enormous FC sink. Do it only when external FC income comfortably supports the spend.
How to choose your RFC rate
F2P / low spender: prioritize the discounted Tier-1 attempts and never sacrifice a Furnace/camp/research gate just to push Super Refinement.
Active mid-game: use the cheap tiers first, then decide whether the next tier is worth its FC cost against your next permanent upgrade.
High-income account: a deeper weekly refinement cycle can make sense, but calculate the RFC you need for the next Furnace/War Academy/Flame Tech gate first.
Do not chase the maximum roll. The expected value is the planning number; a lucky 10–12 RFC result is not a sustainable budget assumption.
FC savings timeline — use a target, not a feeling
Furnace milestone
Furnace-only FC
Furnace-only RFC
At 100 FC/week
At 150 FC/week
30 → FC1
660
0
~6.6 weeks
~4.4 weeks
FC1 → FC2
790
0
~7.9 weeks
~5.3 weeks
FC2 → FC3
1,190
0
~11.9 weeks
~7.9 weeks
FC3 → FC4
1,400
0
14.0 weeks
~9.3 weeks
FC4 → FC5
1,675
0
~16.8 weeks
~11.2 weeks
FC5 → FC6
900
60
9.0 weeks + RFC
6.0 weeks + RFC
FC6 → FC7
1,080
90
10.8 weeks + RFC
7.2 weeks + RFC
FC7 → FC8
1,080
120
10.8 weeks + RFC
7.2 weeks + RFC
FC8 → FC9
1,260
180
12.6 weeks + RFC
8.4 weeks + RFC
FC9 → FC10
1,575
420
15.8 weeks + RFC
10.5 weeks + RFC
These are planning timelines, not promises. The weekly FC rate is a chosen savings rate, not guaranteed income. Events, SVS rewards, shops, Monument, daily activity and other sources can shorten the real timeline. More importantly, the table is Furnace-only; the required Embassy, camps, Command Center/War Academy and other prerequisite buildings create additional FC/RFC and RSS costs.
The big FC walls
30 → FC5 Furnace-only: 5,715 FC and no RFC.
FC5 → FC10 Furnace-only: 5,895 FC + 870 RFC.
30 → FC10 Furnace-only: 11,610 FC + 870 RFC.
FC9 → FC10: the Furnace alone requires 1,575 FC + 420 RFC. Do not arrive at FC9 with an empty RFC stockpile.
FC planning rule
Save in this order: next permanent Furnace/camp gate → required research/War Academy gate → RFC reserve → event spending. If an event can score the same FC/RFC spend later, wait. If spending now delays a permanent gate, do not spend it just to make the Power number bigger.
Community guides currently report weekly refinement discounts and specific cheap-refine routines. These are useful optimization ideas, but discounts/costs can change. Use the live Crystal Lab screen before committing.
Flame Tech material rule
Official support confirms Flame Tech Research can require Steel, Refined Fire Crystals, Fire Crystal Shards, Meat, Wood, Coal and Iron; quantities vary by technology. Official Flame Tech material requirements
Late-game lesson: permanent account-wide layers generally age better than a single hero investment. Build a strong core hero lineup, but do not starve FC/research/pets/Experts just to make one portrait look impressive.
Platinum Keys open Advanced Recruitment chests. Gold Keys open Epic Recruitment chests.
Recruitment can give Heroes, Shards, Exploration/Expedition Manuals, Hero XP, speedups and resources.
Do not automatically open every key. If the current event rewards Hero Development or recruitment-related actions, banked keys can be more valuable during that window.
Check the scoring rules before ascending heroes. Some events score named Hero Shards while general/universal shards may not count.
Do not chase every new Hero immediately. Protect resources for the generation and role you actually want.
Drill Camp — Stop Wasting Hero EXP
Unlock: Drill Camp unlocks at Furnace 13. Your five highest-level heroes outside the Camp act as instructors, and drilled heroes match the level of the lowest instructor.
Keep the five instructors close in level. One lower instructor lowers the effective level of every drilled hero.
Drill Slots let secondary heroes use that level without spending their own Hero EXP.
There can be up to 15 Drill Slots as your Furnace progresses.
Removing a hero from a Drill Slot normally has a 24-hour cooldown before that slot can be reassigned.
Level Reset
Reset is the EXP-moving tool. You can reset a manually leveled hero and recover the leveling investment, then move that Hero EXP to a better instructor. This is useful when your core five changes.
Open the hero and use Reset in the Drill Camp Level Reset area.
Confirm the reset and recover the leveling investment.
Put the recovered EXP into the five instructors you actually want to maintain.
Deployed heroes cannot be reset. After a hero is leveled again, a normal 24-hour reset cooldown applies.
Do not manually level your whole roster. Level the five instructors and let Drill Camp do the rest.
Hero Generations — Open the Generation You Need
Early hero visual ID: Use these cards to quickly recognize the heroes referenced throughout the guide.
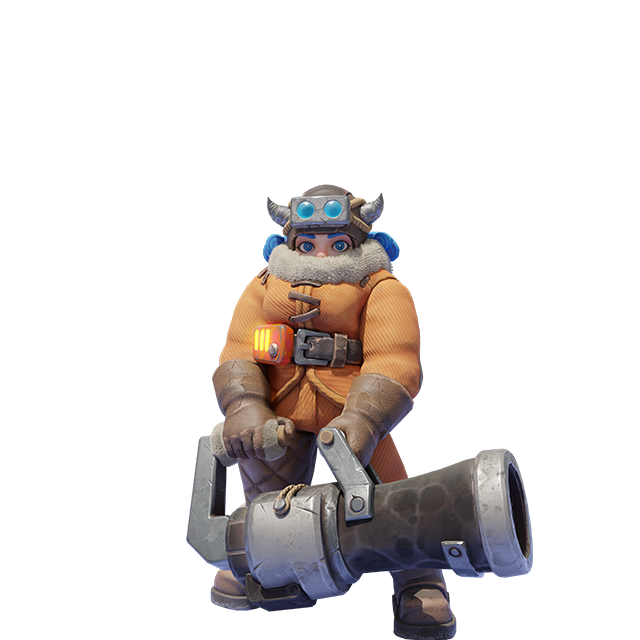
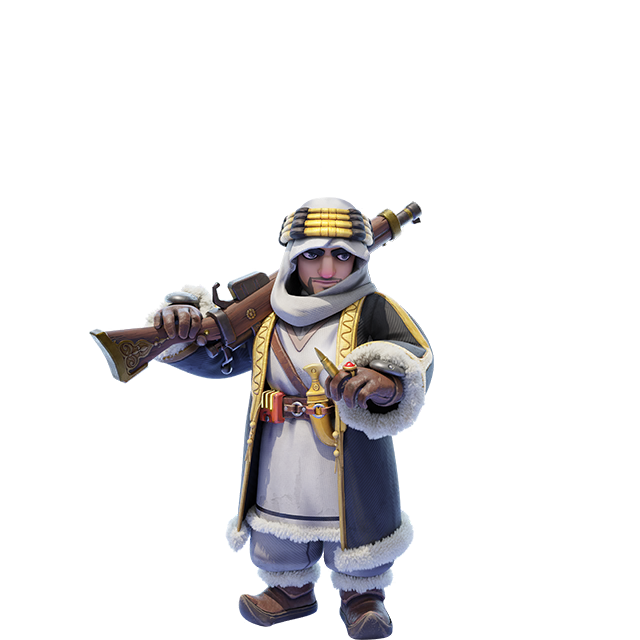
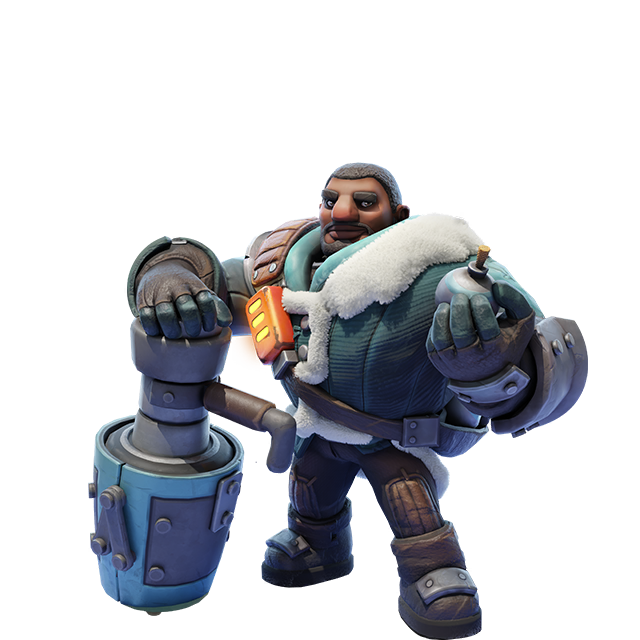
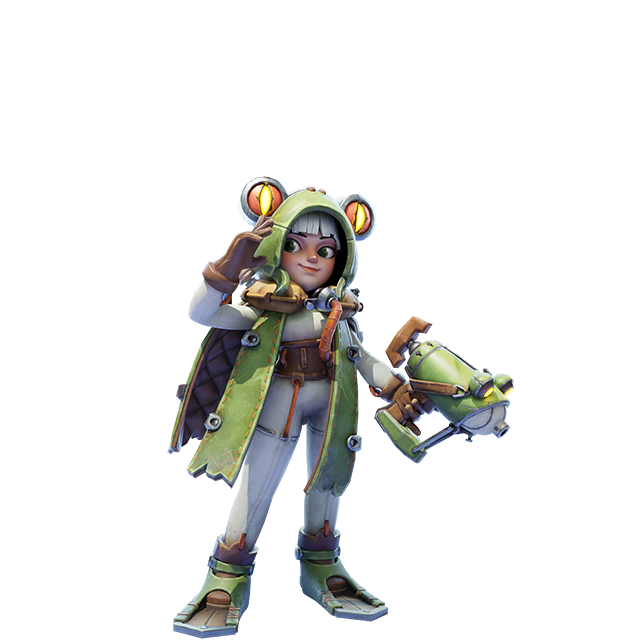
Patrick Epic Lancer • defensive/support joiner • chef with frying pan.Sergey Epic Infantry • defensive hero • blue coat and large shield.Jessie Epic Lancer • offensive rally joiner • orange coat and heavy cannon.Seo-yoon Epic Marksman • attack-support joiner • blue/white outfit and drum.Molly Early Mythic Lancer • recognizable starting-generation combat hero.
How to use this section: Hero generations arrive as your State ages. Do not try to build every hero. Build the generation and role that replaces what you actually use. Stats shown here are combat profiles (troop type, role and primary job), not fixed Power numbers; Power changes with level, stars, skills, gear and exclusive weapon. Use the in-game hero screen for the exact live numerical stats.
Investment rule: A new 1★ hero is not automatically better than a fully developed older hero. Compare stars, skills, weapon, role and the job you need before moving resources.
New combat and utility options; do not reset a strong developed core blindly.
Gen 9
~Day 600
Magnus
Fred
Xura
Higher-end combat roster; role specialization becomes increasingly important.
Gen 10
~Day 680
Gregory
Freya
Blanchette
Strong late-game combat options and improved specialized roles.
Gen 11
~Day 760–800
Eleonora
Lloyd
Rufus
Eleonora is the Lucky Wheel Infantry wall; Lloyd is the Lancer option; Rufus is the Marksman damage option.
Gen 12
~Day 840
Hervor
Karol
Ligeia
Late-game stat growth; compare complete builds rather than base Power.
Gen 13
~Day 920
Gisela
Flora
Vulcanus
Very strong late-game combat cycle; Vulcanus is a notable Marksman carry.
Gen 14
~Day 1000
Elif
Dominic
Cara
Strong defensive and offensive specialization.
Gen 15
~Day 1080–1130
Hank
Estrella
Viveca
Estrella is a strong Arena/debuff option; Viveca is more single-target focused.
Gen 16
~Day 1160
Seigel
Ursar
Aisling
Seigel is a major wall; Aisling is a practical F2P Marksman carry.
Gen 17
~Day 1240*
Aiden
Bertha
Eleanor
Current next-generation planning target; Aiden is the Lucky Wheel pickup.
*Generation timing is approximate and can vary with State development and updates. Current community roadmaps place Gen 17 roughly 80 days after Gen 16.
Generation details
Gen 1 — Foundation
Jeronimo · Natalia · Molly · Zinman Combat profile Jeronimo: Infantry rally leader. Natalia: Infantry / beast-Bear specialist. Molly: Lancer / F2P combat and Arena. Zinman: Marksman / construction and city growth. Best investment Build the combat hero that matches your role; keep Zinman primarily for construction if that is his job. Jessie, Jasser and Seo-yoon remain important specialist joiners.
Gen 2 — Flint / Philly / Alonso
Flint · Philly · Alonso Stats / role Infantry tank and frontline progression · Lancer healing/support · Marksman offensive damage. Good at Flint is the major F2P frontline target; Alonso is a strong offensive Marksman option; Philly is primarily utility/healing. Save Gems for Flint's Lucky Wheel cycle if you are F2P and need the Infantry replacement.
Gen 3 — Logan / Mia / Greg
Logan · Mia · Greg Stats / role Infantry frontline · Lancer damage/support · Marksman damage. Good at Mia is particularly valuable for Bear and offensive Lancer work; Logan strengthens the frontline; Greg improves Marksman output.
Gen 4 — Ahmose / Reina / Lynn
Ahmose · Reina · Lynn Stats / role Infantry defensive specialist · Lancer combat · Marksman combat. Good at Stronger garrison/defensive options plus another combat replacement cycle. Build the hero that fills your weakest troop type.
Gen 5 — Hector / Nora / Gwen
Hector · Nora · Gwen Stats / role Infantry combat/frontline · Lancer combat/support · Marksman damage. Good at Hector is a strong F2P-friendly Infantry investment; Gwen is a high-value Marksman combat option.
Gen 6 — Wu Ming / Renee / Wayne
Wu Ming · Renee · Wayne Stats / role Infantry · Lancer · Marksman combat progression. Good at Higher-generation combat replacement. Do not abandon a fully built prior hero for a low-star copy without comparing the complete build.
Gen 7 — Edith / Gordon / Bradley
Edith · Gordon · Bradley Stats / role Infantry · Lancer · Marksman combat progression. Good at Late-game combat replacement and specialized event roles. Bradley is the Marksman option to evaluate for damage/rally roles.
Gen 8 — Gatot / Sonya / Hendrik
Gatot · Sonya · Hendrik Stats / role Infantry · Lancer · Marksman combat progression. Good at Stronger combat roster with specialized kits. Compare expedition skills before assigning them to rally or garrison jobs.
Gen 9 — Magnus / Fred / Xura
Magnus · Fred · Xura Stats / role Infantry · Lancer · Marksman combat progression. Good at High-generation combat roles. Invest according to rally lead, garrison, Arena or Bear requirements instead of collecting all three automatically.
Gen 10 — Gregory / Freya / Blanchette
Gregory · Freya · Blanchette Stats / role Infantry · Lancer · Marksman combat progression. Good at Strong late-game combat specialization; Blanchette is a notable Marksman investment for offensive roles.
Gen 11 — Eleonora / Lloyd / Rufus
Eleonora · Lloyd · Rufus Stats / role Infantry · Lancer · Marksman combat progression. Good at High-generation combat replacement. Verify hero naming/order in your current client because community databases can display this generation in different class order.
Gen 12 — Hervor / Karol / Ligeia
Hervor · Karol · Ligeia Stats / role Infantry · Lancer · Marksman combat progression. Good at Late-game combat and specialized expedition roles. Compare skill effects rather than relying on generation number alone.
Gen 13 — Gisela / Flora / Vulcanus
Gisela · Flora · Vulcanus Stats / role Infantry · Lancer · Marksman carry. Good at Vulcanus is a major Marksman carry option; the generation is a strong late-game combat replacement cycle.
Gen 14 — Elif / Dominic / Cara
Elif · Dominic · Cara Stats / role Infantry · Lancer · Marksman combat progression. Good at Strong offensive/defensive specialization. Dominic is especially relevant when comparing Lancer rally and Bear roles.
Gen 15 — Hank / Estrella / Viveca
Hank · Estrella · Viveca Stats / role Infantry durable fighter · Lancer debuff/Arena specialist · Marksman single-target damage. Good at Estrella is excellent for Arena/debuff utility; Viveca is more single-target focused and can be valuable for Bear.
Gen 16 — Seigel / Ursar / Aisling
Seigel · Ursar · Aisling Stats / role Seigel: Infantry wall. Ursar: Lancer rally/support. Aisling: Marksman damage/control/heal. Good at Seigel is the defensive specialist; Aisling is the practical F2P Marksman carry and a strong Arena/Bear option when built.
Gen 17 — Aiden / Bertha / Eleanor
Aiden · Bertha · Eleanor Stats / role Aiden: Infantry defensive/Arena. Bertha: Lancer rally support. Eleanor: Marksman offensive/rally. Good at Aiden is the Lucky Wheel pickup. Bertha's first Expedition skill is useful as a rally joiner. Eleanor provides offensive damage and enemy-defense reduction; she is a spender-oriented Hall of Heroes project. Bear Keep Aiden out of Bear joining. Evaluate Bertha and Eleanor by their first Expedition skills and your rally's existing joiner stack.
Mechanics-only tips worth knowing
Squad presets Recent updates expanded saved Squad presets and added troop-ratio saving. Use dedicated formations for Bear, rally join, defense, gathering and event work instead of rebuilding marches every time.
Deployment preview The deployment screen can show arrival timing and troop/formation warnings. Check it before sending a critical rally or reinforcement march.
Auto-Garrison On servers where the feature is unlocked, Auto-Garrison can assign the strongest available heroes based on troop power. Treat it as a convenience setting, not a substitute for an assigned defensive lineup.
Alliance Auto-Help The feature is tied to the Ultra Value Monthly Card and operates while you are online. Use it for routine Help requests, but keep combat marches available when leadership assigns them.
Secured alliance gathering nodes Current game updates include placement reminders for R4/R5 and member notifications when a secured node is placed. Watch the alliance mail/notification system so the resource opportunity is not missed.
Troop ratio display Current deployment and battle interfaces can display troop-type ratios. Use this to verify that your saved formation matches the alliance's event plan before sending.
Do not turn convenience features into combat assumptions. Auto-Help, Auto-Garrison, Balance and deployment previews are useful tools, but organized Bear Trap, Fortress, Stronghold, Castle and SVS formations should follow the alliance's assigned plan.
What to save before the next generation
Gems: bank for the Lucky Wheel hero you actually intend to build.
Mythic General Hero Shards: do not dump them into an old hero just because you can. Hold them for the next high-value hero your acquisition path cannot cover.
Hero EXP: keep enough to level the replacement without starving your current combat core.
Hero Gear / Essence Stones: finish high-value pieces rather than scattering materials across every new hero.
Event currencies: check the next generation's exchange shops before spending generic currency.
Do not hoard blindly: if a current upgrade improves your event performance or unlocks a major progression gate, use it. The goal is efficient timing, not permanent hoarding.
Bear Trap — next-generation joiner rule
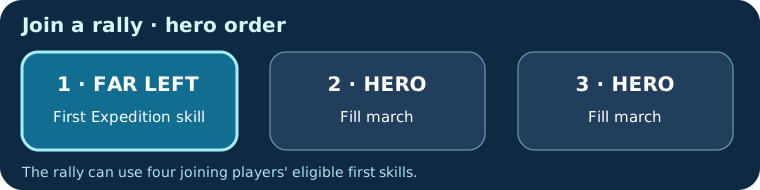
The skill matters more than the hero's name. When joining a rally, only the leftmost hero's first Expedition skill contributes to the rally's joiner-skill pool. As generations advance, replace an older joiner only when the new hero's first skill provides a better offensive buff or useful defense shred for the specific rally.
Generation
Bear joiner watch
Use / avoid
Gen 1
Jessie · Jasser · Seo-yoon · Jeronimo
Primary offensive joiner pool for this guide. Jeronimo is usually better as a captain when you have a strong rally.
Gen 2–3
Check first Expedition skill before replacing Gen 1 joiners
Do not replace Jessie/Jasser just because the hero is newer. Keep the best first-skill buffs.
Gen 4–16
Use the strongest first-skill offensive buffs available to your account
Higher generation does not automatically mean better joiner skill.
Gen 17
Bertha / Eleanor are the important new offensive candidates
Bertha provides Squad Lethality support; Eleanor provides enemy Defense reduction. Aiden is defensive and is not a Bear joiner priority.
Hero verification: Generation timing and roster cross-checked against current 2026 community hero databases and roadmaps. Exact numerical stats should always be read from the live in-game hero screen because level, stars, skills and weapon change them. WoS Guru hero database · WSCO hero guides · WOS Forge hero database
Hero Portraits by Generation
All 65 heroes through Gen 17, including the complete Gen 1 roster. All portraits use the same WOS Heroes icon series; artwork loads from that community host.
Pets are a long-term stat layer. They are useful for combat, events and utility. Your best investment is the pet/skill that fixes your current bottleneck.
Core mechanics
Current community references place the Beast Cage around Furnace 18 / state age ~60 days; confirm the live unlock panel.
Only one of each pet type can be captured.
Pets can be leveled, advanced and refined. At important milestones, skills/talents add another layer of value.
Treasure Hunt should become a routine, not a catch-up activity.
Investment rules
Pick a role first: Bear/PvE, rally offense, garrison/defense, gathering/utility or general play.
Prioritize useful skill breakpoints: a cooldown-based buff can be worth more when it is timed to a major event than when activated randomly.
Do not spread refinement: one strong event-relevant pet is usually more useful than several half-built pets.
Check event scoring: Pet advancement/refinement can be high-value in certain Alliance Showdown stages, so bank materials when appropriate.
Watch mode rules: current battlefield systems may treat pet skills/stats as active by default; manual activation does not necessarily create a second stack.
Useful pet ladder
Pet group
Use
Decision
Early pets
Learn capture/level/refinement flow.
Build the one whose skill helps your current account.
Mid pets
More specialized combat/event roles.
Replace an old pet only when the new skill/stat layer actually improves your job.
Later combat pets
Capacity, Attack, Defense, Lethality and event-specific effects become increasingly important.
Coordinate with your hero/gear build rather than treating the pet as a separate project.
Endgame pets
Large account-wide combat multipliers.
Refine around your primary march and event role.
Hidden advantage: pet buffs are best thought of as windows. If a pet gives a time-limited combat bonus, line it up with the action that earns the most value—Bear, a major rally, a war objective or another scoring window.
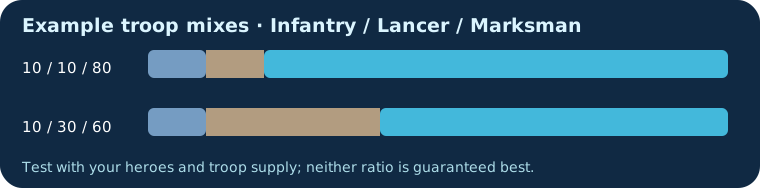
Labyrinth covers heroes, pets, charms, research, chief gear and a combined Sunday challenge. Ratios below are community starting points, written Infantry / Lancer / Marksman. Scout each stage with the magnifying glass, inspect the battle report, and adjust for your own stats and hero skills.
Zone
Open
What counts
Starting ratio
Land of Heroes
Mon–Tue
Heroes, Hero Gear, Exclusive Gear; up to 3 armies
50 / 20 / 30 per march
Cave of Monsters
Wed–Thu
Pets and Pet Skills; multiple fights
52 / 13 / 35; try 60 / 12 / 28 if Marksmen fall early
Charm Mine
Wed–Thu
Chief Charms
50 / 10 / 40 or 60 / 5 / 35
Research Center
Fri–Sat
Research and War Academy technology
50 / 10 / 40 or 60 / 5 / 35
Gear Forge
Fri–Sat
Chief Gear
50 / 10 / 40 or 60 / 5 / 35
Gaia Heart
Sun
Combined expedition stats; your own troops, up to 3 armies
50 / 20 / 30 per march
Against a roughly even enemy mix, test 55 / 17 / 28. For an enemy near 5 / 2 / 3, test 60 / 40 / 0; for 5 / 3 / 2, test 55 / 14 / 31. If Infantry dies first, increase its share; if Marksmen die first, try more Marksmen. A stat gap cannot always be solved by changing the ratio.
Most zones provide level 10 Labyrinth Explorers, while Gaia Heart uses your own troops. Clear stages 1–10 to unlock Raid next time that zone opens. Check live unlock requirements; a zone may be locked by furnace level or state age. Community ratios are suggestions, not guaranteed clears.
Estimated unlocks: Agnes and Cyrille near Gen 3 (~day 120); Holger and Romulus may follow near day 150; Baldur, Fabian, Valeria and Ronne near Gen 4 (~day 195); Kathy near day 240; Gareth near Gen 5 (~day 270). Justus is planned after Gen 6 and October 2026 for eligible states. State age requirements changed in 2026. Check your state timeline and submit an unlock screenshot to confirm local timing. Portraits below are from the official game wiki.
Experts are infrastructure, not ordinary heroes. Build them around the activities you actually perform.
Expert
Primary value
Best fit
Agnes
City / intel / shop utility
General F2P anchor
Cyrille
Bear / beast performance
Bear specialists
Holger
Arena / hero combat
Arena-focused players
Romulus
Military / rally capacity
Rally leaders
Baldur
Alliance event / shop value
Active alliance members/officers
Fabian
Foundry / Tundra Arms combat
War-focused players
Valeria
SVS / state-war value
Serious SVS players/officers
Ronne
Tundra Trade Route / trucks
Truck-active players
Kathy
Frostfire Mine
Frostfire players
Justus
Upcoming late-game Expert
Prepare only after live release details are confirmed
Gareth
Troop survivability / late-game combat
Heavy combat / endgame players
Expert investment rule
Use gifts to reach meaningful Affinity breakpoints.
Use Books of Knowledge and Sigils on an anchor Expert before spreading them thin.
Pause when the next skill level is poor value for your role.
Do not exchange common/specific Sigils blindly—confirm the destination first.
Officers should give different Expert advice to rally leads, Bear specialists, truck players and casual F2P members.
General F2PAgnes → Cyrille → Baldur, then specialize.
BearCyrille first, then the systems that improve your combat/gear pipeline.
Rally leadPrioritize military/capacity Experts after an economy anchor.
Truck playerRonne becomes more valuable when Trade Route is a regular activity.
Current 2026 community references list Gareth in the later Expert generation and Justus as a future rollout after Gen 6. Treat unreleased Expert kits and dates as planning information only; the live Dawn Academy is authoritative.
Daybreak Island — Permanent Buffs, Clearing Strategy & Efficient Development
Daybreak Island is account development, not decoration.
It is a permanent progression system built around the Tree of Life, Life Essence, Prosperity, Lumber Camps and island decorations. Treat it like another long-term power engine: push the progression that improves the account first, then decorate.
Unlock & the core loop
Unlock: Daybreak Island opens through the Dock at Furnace 19. Confirm the live unlock panel on your account because state progression can affect newer island features.
Clear: Lumber Camps send workers into the forest and clearing trees creates the space and resources needed for development.
Collect: Life Essence is the island's main currency. The Tree of Life has a 12-hour storage cap, so letting it sit full wastes production.
Build: Prosperity from decorations is used to reach Tree of Life and other progression requirements.
Upgrade: Tree of Life first, then the production/utility pieces that accelerate the next milestone.
What actually matters
System
Why it matters
Priority
Tree of Life
Core progression, unlocks, Life Essence production and permanent account-wide bonuses.
#1 until maxed
Lumber Camps
Clear the forest and accelerate the early Life Essence/clearing cycle. The official system allows up to 2.
High early
Buff decorations
Permanent account bonuses plus Prosperity. Different eligible decoration types can stack; type limits matter.
After core progression
Timbermill
After the forest is fully cleared, the Lumber Camp system transitions and a Timbermill becomes the passive Life Essence source.
Late island
Starry Lighthouse
Long-term endgame combat progression unlocked after Tree of Life 10; it uses its own blueprints/contracts.
Long-term
The Lumber Camp trick — steer the clearing
This is one of the most useful non-obvious island tricks.
Workers do not let you manually select a tree, but you can influence where they start by moving the Lumber Camp close to the trees you want cleared. Community testing also reports that water, fences and other placement obstacles can be used to narrow the workers' pathing. The official help confirms that workers start with trees near the Lumber Camp.
Look across the island for blocked chests / unopened areas / dense tree clusters.
Move the Lumber Camp toward the side you want cleared.
Re-enter the island and watch the workers' starting direction.
Use water, fences or other harmless obstacles to discourage them from taking an unwanted route.
When the useful area is open, move the camp again and repeat.
You are steering the workers, not directly commanding them. Their exact target selection and online/offline calculations are not fully disclosed by the developer. The official help confirms that moving the camp toward desired trees influences where workers start.
Online vs. offline clearing
Offline: the Lumber Camp still processes clearing; you do not have to stare at the island continuously.
Online island screen: the developer says Lumber Camp efficiency is higher while you are viewing Daybreak Island.
Important: online display and offline processing use different calculations. Do not judge your real output only by watching the workers.
Best habit: when actively farming the island, leave the island screen open during periods when you can check it; when you are away, let the system continue processing.
Tree of Life — progression before pretty buildings
Default rule: if you can afford the next Tree milestone, do not spend that Life Essence on cosmetics just because they look better.
Higher Tree levels increase the island's progression ceiling and improve the value of the system.
Community-maintained current tables report cumulative benefits that include substantial healing speed, troop deployment and Attack / Defense / Health / Lethality bonuses at higher levels.
At Tree of Life Level 10, current community references report cumulative +5% Attack, +5% Defense, +5% Health, +5% Lethality and +4,000 troop deployment, plus the accumulated healing-speed benefit.
Treat those figures as planning references; the live island interface is authoritative if the game changes a value.
Buff priority — what is actually useful?
Buff type
Why you want it
Who should prioritize it
Healing Speed
Turns directly into faster recovery after war and events. Extremely valuable during Castle/SVS periods.
Everyone; especially war-active players
Troop Deployment
More troops per march changes gathering, rallies, reinforcements and combat efficiency.
Everyone
Attack / Defense / Health / Lethality
Permanent combat power that applies across the account's relevant battles.
Combat players and everyone preparing for later game
Research Speed
Saves time across months of development; particularly valuable for players pushing the tech tree.
Long-term F2P/low spend
Construction Speed
Compounds over many buildings and prerequisites.
Developing accounts
Rally Capacity / event utility
Useful when you regularly lead rallies or need more event throughput.
Rally leaders / active officers
Decoration rules — don't waste Life Essence
Check the Type Limit before buying. Once the active limit for a decoration type is reached, adding another copy does not give the same additional benefit.
Different eligible decoration types can stack. Variety is normally better than buying five copies of one capped source.
Upgrade useful copies instead of blindly duplicating them. The official Help Center confirms higher-bonus decorations receive priority when a type limit is reached.
Retrieve carefully. Removing decorations lowers Prosperity and active stat bonuses until they are placed again.
Do not confuse Prosperity with combat value. A cheap decoration can be useful for a Tree requirement, while a combat decoration can be worth far more for your account even if it is not the cheapest path.
Free / earned island progression
Tree of Life: core progression available through normal island play.
Lumber Camp #1 and #2: earned through island progression/shop unlocks; the official Type Limit is 2.
Life Essence: earned through Tree/Lumber Camp activity and island progression.
Ally assistance: helping allies with their Trees provides extra Life Essence; current official help states a player can receive help once every 6 hours. Community guides report three help actions/receives per day under their current rules, so follow the live island counters.
Free/event decorations: seasonal and event rewards can provide useful combat buffs without direct purchase.
Mark of Revival Shop: the July 2026 update added this system; when the required Tree level and State Progress are met, Marks of Revival can be purchased from Daybreak Island Supplies and exchanged for decorations/accessories. Shop contents unlock in phases with State Progress.
Post-clearance Timbermill: once all trees are cleared, the Lumber Camp stops producing wood from trees and becomes a normal decoration; the game awards a Timbermill for ongoing Life Essence production.
Paid / premium additions — spend with a plan
Premium does not change the correct order. If you spend, use it to accelerate a system you were already going to build rather than buying random decorations for Prosperity.
Premium island currency / event purchases: use these for decorations or upgrade materials that produce a meaningful permanent buff, not cosmetic clutter.
Accessory Construction Contracts: after Tree of Life Level 10, the Daybreak Island Shop offers General Accessory Construction Contracts with a weekly purchase refresh. These feed the accessory/Lighthouse progression.
Starry Lighthouse: its blueprints become available after Tree of Life Level 10. It is a long-term premium/F2P-mixed progression project; do not sacrifice core Tree progression to rush it early.
Limited/event decorations: paid event paths can accelerate access to stronger decorations, but compare the actual permanent stat gained against the cost before buying.
Starry Lighthouse — the long game
Unlock condition: Tree of Life Level 10.
The official system uses Starry Lighthouse Blueprints for its levels and the island shop provides related construction contracts.
Current community guides report strong endgame combat bonuses from the Lighthouse, but exact blueprint/contract requirements have changed across versions. Use the live shop and upgrade screen as the final authority.
F2P/low spend rule: collect the weekly free/earned contract opportunities and build it over time instead of treating it as a reason to stop Tree progression.
Island daily / weekly checklist
When
Do this
Reason
Every reset / morning
Collect Tree Essence before storage caps.
Prevents passive production waste.
When clearing
Move Lumber Camp toward the next valuable forest area.
Steers clearing toward chests/open space.
Daily
Check ally help opportunities.
Extra Essence for both sides.
Before spending
Check Tree requirement and decoration Type Limit.
Prevents dead spending.
Weekly
Check Daybreak Shop and limited/event rewards.
Do not miss contracts or new progression materials.
Tree 10+
Evaluate Lighthouse, accessories and Mark of Revival content.
This is where long-term island optimization changes.
Island mistakes to avoid
Do not spend your early Life Essence on aesthetics while a Tree milestone is waiting.
Do not buy duplicate capped buff buildings assuming every copy stacks.
Do not leave the Tree at its storage cap for hours.
Do not leave the Lumber Camp in a cleared area when there are still useful trees/chests elsewhere.
Do not assume watching workers move is the same thing as measuring actual production.
Do not spend premium currency on a decoration before checking its active limit, buff type and upgrade path.
Exploration and Arena are hero-only modes. Your troop count, rally bonuses and Chief Gear do not decide these fights. The important inputs are your five heroes, their Exploration skills, levels, stars, Hero Gear and lineup positions. Community testing consistently puts a tank-heavy front line and a damage/control back line ahead of simply choosing the five heroes with the highest Power.
Season 1 F2P / low-spend five
Position
Hero
Why
Focus
Front 1
Sergey
Reliable Infantry tank and early defensive anchor.
Level, stars and Exploration skills.
Front 2
Jessie
Strong early F2P second front option and useful long-term rally joiner.
Exploration combat skills; keep Expedition 1 ready for rallies.
Back 1
Molly
Strong Gen 1 damage/control and one of the best efficient Mythic investments.
Exploration skills first for Arena/Exploration.
Back 2
Bahiti
Accessible Marksman damage and strong early progression value.
Exploration skills and enough stars to stay competitive.
Back 3
Gina
Accessible ranged damage plus excellent account utility.
Exploration combat skills; keep her Expedition utility for hunting.
This five is a Season 1 F2P baseline, not a permanent lineup for every generation. A fully developed newer Mythic can replace an older hero when its Exploration kit and stars are actually stronger. Do not replace a developed hero with a new 1★ hero just because the new hero is Mythic.
Season 1 spender five
Jeronimo + Natalia are the premium Infantry options for the front line, with Molly, Bahiti and Zinman forming a strong Gen 1 back line. Arena guides commonly list this as the Gen 1 spender lineup.
Arena positioning rules
Front slots: normally use Infantry because they take the initial pressure.
Back line: use your strongest damage/control heroes. Molly's positioning can change depending on the enemy lineup.
Counter system: Infantry has an advantage over Lancer, Lancer over Marksman, and Marksman over Infantry. Use the counter when it actually improves the matchup; do not blindly follow class order.
Only Exploration skills are active. Do not choose a hero for an Expedition-only skill and expect that skill to work in Arena.
Scout the enemy lineup before changing yours. Small position changes can change who gets targeted first.
Exploration stage progression
Early stages: concentrate EXP and skill resources on five heroes. Do not level the whole roster evenly.
When the Hero Level Camp unlocks: use it to keep secondary heroes usable while your main five receive the direct investment.
When a stage stalls: first check hero levels, stars, Exploration skills and Hero Gear before replacing the whole lineup.
Against heavy frontline: increase sustained back-line damage and use the class counter where practical.
Against burst/control: change positioning and test a different target order before spending rare resources.
Do not chase Power alone. A properly built five with good Exploration skills can outperform a higher-Power but poorly configured team.
What to level first
1. Main 5 Keep the five core Arena/Exploration heroes close in level.
2. Exploration skills These are the skills that actually operate in these modes.
3. Hero Gear Use your strongest gear on the heroes you actually field.
Community cross-check: Season 1 F2P lineup references consistently identify Sergey/Jessie/Molly/Bahiti/Gina, while Arena references distinguish the F2P and spender lineups and confirm that only Exploration skills operate in Arena.
Hero Gear — What to Focus On
Unlock: Hero Gear becomes available at Furnace Level 15. The four slots are Headgear, Gloves, Belt and Boots.
Hero Gear is not the same as Chief Gear. Hero Gear is attached to individual heroes and supplies hero stats plus Command stats. For battlefield investment, focus your gear on a small number of main heroes rather than spreading it across the roster.
Hero troop type
Priority pieces
Priority stat
Practical rule
Infantry
Gloves + Belt
Health
These are the two priority pieces for your main Infantry hero.
Marksman
Headgear + Boots
Lethality
These are the two priority pieces for your main Marksman hero.
Lancer
Headgear + Boots
Lethality
These are the two priority pieces for your main Lancer hero.
The 3-hero gear rule
For most F2P/low-spend accounts, seriously gear one Infantry, one Marksman and one Lancer.
Move the gear to the newer/better hero of the same troop type instead of building a second full set unnecessarily.
Other heroes can use placeholder gear. Do not let Arena-only considerations destroy your main combat progression.
Enhancement vs Mastery
Enhancement raises the base gear stats.
Mastery Forging uses Essence Stones and adds multiplier-style progression. Essence Stones are the scarce resource.
Keep Enhancement and Mastery progression coordinated instead of dumping all resources into random pieces.
For F2P, do not spend Essence Stones on low-priority heroes simply because you have enough stones today.
Bear Trap gear priority
If Bear Trap score is a major objective, your Marksman Lethality gear is an especially strong early target because Marksmen make up the largest share of common Bear Trap formations. This is a progression strategy, not a rule that Infantry gear is worthless.
Exclusive Gear
Exclusive Gear is hero-specific and is much more resource-gated. Treat it as a targeted investment for your best long-term heroes. Do not scatter Widgets across a large roster. For a rally-focused player, prioritize the Expedition-side effects of the hero you actually use as a lead.
Chief Gear & Chief Charms
Chief GearSix pieces; broad troop Attack/Defense coverage plus set bonuses.
Chief CharmsThree charm slots on each Chief Gear piece; Health/Lethality for that troop type.
Chief Gear priority
Infantry — Jacket + Pants.
Marksman — Ring + Cane.
Lancer — Helmet + Watch.
Infantry-first is a sound general-purpose order because Infantry are the frontline. If Bear Trap scoring is your immediate priority, pushing Marksman investment earlier is also defensible because Marksmen are your primary Bear damage component.
Chief Gear & Chief Charm Fast-Track — unlock the material exchanges
Do not reforge your gear just to fix progression. Reforging Hero Gear Mastery can return only 50% of invested Essence Stones. This guide does not recommend using gear reforge as a normal optimization technique.
The useful fast-track is the material-exchange unlock. Chief Gear and Chief Charms have separate exchange systems. Push the required milestone on one item, unlock the exchange, then use surplus materials to correct your material balance instead of wasting resources on unnecessary gear resets.
Chief Charms — get one charm to Level 11
Furnace 25: Chief Charms unlock.
Fast-track one charm to Level 11. Level 11 is the key breakpoint because reaching it unlocks the Chief Charm Material Exchange.
Once the exchange is unlocked, use it to convert excess Charm Designs/Guides into the material you are short on. This is the correct way to fix an uneven material inventory.
Do not rush every charm past 11 just because the exchange is unlocked. After Level 11, Jewel Secrets enter the cost at Level 12 and higher, so plan the next levels around your role and event timing.
For most PvP accounts, build Infantry first, then Marksman/Lancer according to your current troop and hero meta. For Bear-focused accounts, Marksman can move ahead.
Chief Gear — build toward the Chief Gear Material Exchange
Furnace 22: Chief Gear unlocks. Keep improving the six pieces rather than spreading resources into unrelated systems.
Build the quality/set structure first. Three matching-quality pieces activate the Defense set bonus; six activate the Attack set bonus.
Long-term exchange breakpoint: reaching Mythic T2 with three stars on one Chief Gear piece unlocks the Chief Gear Enhancement Material Exchange.
Once unlocked, use the exchange to rebalance Hardened Alloy/Polishing Solution and other Chief Gear materials when needed instead of chasing power by upgrading random pieces.
For normal PvP progression, Infantry is the usual first priority, followed by Marksman and Lancer. If your account is specifically built around Bear Trap damage, Marksman investment can take priority.
F2P fast-track
At Furnace 25, pick one sensible Chief Charm slot and push it to Level 11 to unlock the Charm Material Exchange.
Use the exchange to correct material shortages, then bring your priority charms up in a controlled spread rather than dumping everything into one slot.
For Chief Gear, work toward the Mythic T2 3-Star exchange breakpoint on one piece while maintaining useful set progress across the six pieces.
Save rare materials for event windows when the upgrade scores points, but do not delay an upgrade that unlocks an important permanent account breakpoint if waiting would slow your overall progression.
Whale / heavy-spender fast-track
Unlock both material exchanges as early as your account progression allows.
Use the Charm Level 11 breakpoint to convert excess materials and accelerate the entire charm system rather than overfeeding one slot.
Push Chief Gear quality and the three-star Mythic T2 breakpoint efficiently, then use the material exchange to smooth bottlenecks.
Keep the upgrade target tied to your actual combat role: Infantry survivability, Marksman damage/Bear performance, or Lancer investment based on the current generation meta.
Remember the systems are different
Chief Gear gives broad Troop Attack/Defense and set bonuses. Chief Charms add Health/Lethality to the troop type associated with each gear piece. Hero Gear Mastery/Reforge is a separate system and should not be mixed into this Chief Gear/Chief Charm fast-track.
What to prioritize by role
Infantry charms for broad combat survivability.
Marksman charms for offensive/Bear Trap performance.
Lancer charms after the first two groups are established.
The important distinction: Chief Gear gives Attack/Defense and set bonuses; Hero Gear and Chief Charms provide valuable Health/Lethality paths. Do not treat all three systems as interchangeable.
Endgame Readiness — Build the Account You Will Need Later
The endgame is a layered stat problem. You eventually have to make troops, heroes, Chief Gear/Charms, Hero Gear, pets, Experts, Fire Crystal Tech/Flame Tech, buildings, VIP, skins, alliance tech and event buffs work together.
Before a major war week, run this audit
Layer
Check
Why
Troops
Best available tiers trained; camps aligned; wounded under control.
Raw troop count and tier determine whether your buffs can actually be converted into battlefield power.
Heroes
Correct generation for the job; key expedition skills leveled.
Newer does not automatically mean stronger when the old hero is fully developed.
Gear
Chief and Hero Gear assigned to the march that will actually fight.
Stats sitting on the wrong hero are not helping the intended march.
Pets
Role-appropriate pet and relevant skill window ready.
Pet stats and skills are now part of many battlefield calculations.
Experts
Affinity/skills at useful breakpoints.
Permanent multipliers compound over months.
FC / research
Permanent upgrades complete; no idle queues.
These are account-wide layers that follow you into every generation.
Healing
Infirmary capacity, Embassy help, speedups and rotation plan.
A powerful march that cannot recover is a one-fight march.
Mobility
Advanced/Alliance/Territory Teleports and presets ready.
Late-game objectives are often decided by arrival timing.
Information
Battle reports, enemy stats, target coordinates and alliance calls understood.
Good information prevents you from spending troops to discover what a scout/report could tell you.
Prepare 7 days before a major event
Stop non-essential spending.
Check the next event's scoring categories.
Refill stamina, teleports, healing supplies and march presets.
Move important heroes/gear into dedicated presets.
Ask leadership which resources are reserved for the state/alliance push.
Keep one reserve march available for emergency reinforcement.
Prepare 24 hours before
Finish long timers only when their completion will score where intended.
Bring gathering marches home if they are needed for the event.
Activate buffs immediately before the activity they affect.
Check that the correct troop ratio, heroes and pets are in the selected preset.
Do not start a personal push that conflicts with the alliance's state-wide plan.
What actually makes an account “strong”?
Usable power per objective. A player with fewer total Power but correct rally heroes, strong troop tiers, a deep first march, good healing, teleports, correct buffs and discipline can be more valuable than a larger account with scattered upgrades.
PLAYER — FIELD, MOBILITY & COMBAT
Healing & Batch Healing — General Game Strategy
This is not a Foundry mechanic. Batch healing is a general healing-management tactic. Foundry's separate mechanic is leave → heal → 12-minute return.
Why batch healing can help
Healing in controlled batches can let alliance healing-assist bonuses trigger repeatedly instead of waiting on one enormous heal.
Use the smallest practical batches that make sense for your hospital and alliance assistance activity.
Do not confuse this with a reduction in the underlying healing time; it is a management strategy for assistance and throughput.
Travel / event recovery
For long event sessions, plan healing around the event clock instead of waiting until every troop is injured.
Keep enough healthy troops available for the next objective.
Teleporting — Move Your City Without Wasting the Good Items
Rule: use the cheapest teleport that gives you the position you actually need. Save Advanced Teleporters for exact placement, combat staging and emergencies.
Teleport
Where it sends you
Best use
Key limitation / cost
Advanced
You choose a valid location.
Exact hive/event/PvP positioning.
If no item is available, the game can offer the move for 4,000 Gems. Cannot normally place directly in enemy Alliance territory.
Alliance
Near your current R5.
Following the leader to an objective.
Destination follows the R5, so check the leader's location first.
Territory
Near your alliance's highest-level HQ; current versions let you adjust the landing location before confirming.
Return to your hive/alliance territory.
Best when returning home; current versions prioritize Territory Teleport when the chosen destination is within Alliance territory.
Random
Random valid location in the state.
Emergency escape or cheap repositioning.
No control over the exact landing location.
How to use an Advanced Teleporter
Recall active marches when the game requires it.
Open the World Map and tap the destination.
Select Teleport and choose Advanced Teleporter.
Move the placement until the city's required tiles are valid, then confirm.
For combat, leave room around the landing area and know your exit plan before jumping.
How to get back to the hive
Territory Teleporter: best default for returning near the alliance HQ.
Alliance Teleporter: use when leadership has deliberately moved the R5 to the staging area and you want to follow.
Advanced: use when you need an exact tile instead of the general HQ/R5 area.
How many should you keep?
There is no universal magic number because event frequency and your role change demand. A practical player reserve is several Advanced Teleporters plus a few Alliance/Territory Teleporters; active R4/R5 combat players should maintain a larger reserve. Prioritize discounted shop purchases rather than routinely paying the 4,000-Gem fallback.
Teleport mistakes
Do not spend an Advanced Teleporter when Territory or Alliance Teleport would accomplish the same move.
Do not follow an R5 blindly with an Alliance Teleporter; the R5 may be staging somewhere far from the hive.
Do not land on a crowded objective without checking whether your city placement will block allies.
Do not assume a normal state teleport moves you into an event battlefield; special battlefields can use separate movement rules.
Current mechanics: Territory Teleporters can be adjusted before confirmation. If the destination is inside Alliance territory, the Territory Teleporter is used first. Repeated Advanced Teleports can have escalating item consumption during the relevant cooldown, so read the in-game prompt before chaining them.
March Presets — Make Bear Trap Fast
Preset goal: remove hero-selection mistakes during Bear Trap. Your first-slot hero controls the joiner skill; the other two heroes mainly increase your march capacity when you are joining.
Recommended preset order
Preset
Slot 1
Slots 2–3
Purpose
Bear Lead
Your strongest Bear captain
Your other two strongest captain heroes
Starting your own rally
Bear Join 1
Jessie
Any two heroes
Primary offensive joiner
Bear Join 2
Jasser
Any two heroes
Second offensive joiner
Bear Join 3
Seo-yoon
Any two heroes
Third offensive joiner
Bear Join 4
Jeronimo, if available
Any two heroes
Use only when Jeronimo is not needed as your stronger captain
Troops Only
None
None
Extra march after approved joiner heroes are committed
How to build the presets
Open your Profile.
Go to the Troops tab.
Tap Squads. This is the screen where you set and save your march formations.
Build the squad first: choose your heroes, troop types and troop amounts.
Tap Save. The game asks which preset to use and gives you a 3-character preset name.
Use short names that are easy to recognize during a battle. A simple Bear Trap system is BT1, BT2, BT3, BT4 and so on.
For rally presets, use a consistent naming system such as RjA = Rally Join Attack and RjD = Rally Join Defense.
For each joiner preset, put the approved hero in Slot 1 before saving it.
Use the same troop ratio in every Bear joiner preset so you do not have to rebuild your troops between rallies.
Keep lead presets separate from joiner presets. A captain needs a full combat lineup; a joiner needs the correct first-slot skill.
When Bear starts, use the strongest rally first. Then use the next approved joiner preset as marches return or become available.
Easy naming system:BT1–BT4 for Bear Trap formations; RjA for Rally Join Attack; RjD for Rally Join Defense. Keep the names short so you can identify the correct squad quickly on a phone.
Important: Do not save Jessie, Jasser, Seo-yoon or Jeronimo in the wrong first slot. The game reads the first hero's first Expedition skill when you join another rally.
Rapid Deployment — The Lazy Man Way
Fast rule: Use a saved preset for the hero selection, then tap Balance on the deployment screen before sending. This is the quick way to get several marches moving without manually rebuilding every troop count.
Rapid Deployment
Use this when speed matters more than exact composition.
Preset + Balance workflow
Open the target, rally or deployment screen.
Load the correct saved preset for the heroes you need.
Tap Balance.
Check the troop counts and the game's deployment warning.
If it says Succeed, send it.
If it says Difficult, understand that the march may be a poor fight even though the game allows it.
If it says Won't go, do not force it. Reduce the deployment, change the target or wait for troops to return.
Important: Balance is a convenience button. It does not know your alliance's Bear Trap ratio, PvP counter plan or defensive SOP. For organized combat, use the saved formation your leadership assigned.
Manual formation method
For exact control, set the Infantry / Lancer / Marksman percentages yourself or enter troop counts manually, then save that formation. Community formation guides recommend saved formations for fast event deployment and clear separation of offense and defense presets. Formation guide · WSCO formation guide
Combat Doctrine — Pick the Right Hero for the Job
Hero choice changes what a rally does. Do not use the same Slot 1 hero for every situation. When you join a rally, only the first Expedition skill of your Slot 1 hero contributes to the joiner-skill pool. When you lead a rally or command a garrison, your own heroes and their Expedition skills matter. This distinction is critical in Castle, Fortress, Stronghold, HQ and normal PvP battles.
Quick hero rule
Attack rally joiners use the approved offensive Slot 1 hero. Defensive/garrison joiners use the approved defensive Slot 1 hero. Bear Trap has its own fixed Gen 1 joiner list in the Bear Trap section. Do not mix attack and defense joiner roles.
Battle Technique — Steady Garrison Refill
Heavy battle rule: Do not wait for a Castle, Fortress, Stronghold or HQ garrison to become empty before reinforcing it. In a prolonged fight, keep a steady flow of refill marches moving toward the same garrison as troops are lost.
Start with the right garrison heroes. The march already inside the garrison keeps its heroes while it remains there.
Keep refilling. As troops die or become injured, send additional marches to the same garrison. These are troop refills, not hero swaps.
Use a consistent troop ratio. Send refill marches using the ratio assigned by your alliance. A common defensive starting point is 60% Infantry / 20% Lancer / 20% Marksman, but the alliance's tested ratio takes priority.
Do not randomly change the garrison heroes. Sending another reinforcement march does not replace the heroes already defending.
Hero swap: if the garrison needs different heroes, send the replacement hero march first. When it is close to arrival, recall your own old garrison march so the replacement takes over with minimal downtime.
Keep the flow staggered. In a heavy Castle battle, several players can rotate refill marches so troops arrive continuously instead of everyone sending at once and leaving a later gap.
Watch your own troop pool. Refill duty consumes real troops. Stop or change rotation when your available troops are too low to support the next wave.
Refill march Troops sent to keep the existing garrison supplied. The existing garrison heroes stay in place.
Hero swap Replacement hero march arrives first, then the old garrison march is recalled. The new heroes take over the garrison.
Castle example: Your defensive heroes are holding Castle. Keep sending refill marches as losses occur. If you need to change the heroes, send the new defensive lineup toward Castle, time its arrival, then recall your own old lineup. Continue the refill stream after the swap.
Castle, Fortress, Stronghold and HQ battles
Attacking a facility: join the attack rally with Jessie in Slot 1. The rally captain should use the strongest appropriate combat heroes.
After capture: immediately switch the operation from attack to defense. Defensive players should reinforce the structure with Patrick in Slot 1.
HQ defense: reinforce the threatened HQ instead of sending disconnected solo attacks. Use Patrick in Slot 1 for the defensive joiner role.
Castle defense: keep reinforcement flowing and use Patrick in Slot 1 when joining the defensive garrison.
Castle attack: use Jessie in Slot 1 when joining the attack rally. The captain should be the player with the strongest relevant combat stats and rally capacity.
General rally: always know whether the rally is trying to destroy something or hold something before selecting your hero.
Scout before you commit
Do not attack blind. Scout important enemy cities, facilities and defensive positions first. Read the troop count, troop composition, troop tier, defending heroes where visible, reinforcements and other available information. Then decide whether to attack, counter the formation, rally, reinforce, or walk away.
Scout. Never assume the visible Power number tells the whole story.
Check counters. Infantry counters Lancers, Lancers counter Marksmen, and Marksmen counter Infantry. Use the counter system when the situation allows it.
Check reinforcements. A city that looks weak can become a completely different target once allies reinforce it.
Check your own losses. Do not start a fight that can overflow your Infirmary or leave your alliance without enough troops for the next objective.
Use a rally when the target is beyond your safe solo range. Coordinated power is safer than repeatedly feeding individual marches.
Abort bad attacks. A scout report that makes the target unattractive is a successful scout, not a reason to attack anyway.
How to Read a Battle Report — Turn the Loss Into a Counter
A battle report is not just a win/loss screen. It is your post-fight diagnostic. Read it in order: troops → casualties → stat bonuses → hero skills → battle details → next decision. Do not change five things at once; identify the largest mismatch first.
Your supplied example: Troop Power Comparison + Stat Bonuses. This is the first page to study.Your supplied example: the Stat Bonuses panel. Compare each troop class separately.
1. Start with the troop numbers and tier
Compare Infantry, Lancer and Marksman counts on both sides.
Compare the troop level/tier being fielded. A higher stat percentage cannot magically make a severely outnumbered or lower-tier force equivalent.
Look at survived, wounded, lightly wounded and dead. A win with catastrophic losses can still be a bad trade.
In a rally, inspect your individual contribution as well as the total result. A rally can win while one participant contributes poorly.
2. Read the Stat Bonuses row by row
The report compares Attack, Defense, Lethality and Health for Infantry, Lancers and Marksmen. The official Help Center confirms the report can include buffs/penalties, Position Perks, Pet skills, Chief Gear, Hero Gear, Tech Research, Alliance Territory buffs, castle skin, Hero Exclusive Gear and Hero Talent bonuses. Hero skill bonuses are not shown in these stat rows.Official Battle Report bonus reference
Row
What it tells you
How to use it
Attack
Offensive stat for that troop class.
Look for a meaningful deficit in the troop class doing your damage. Do not judge the entire fight from one row.
Defense
Survivability against incoming damage.
If your frontline collapses quickly, examine Infantry Defense/Health before blindly adding more DPS.
Lethality
Offensive combat pressure that helps convert attack into kills.
Large lethality gaps can matter, especially when the affected class is attacking the opponent's vulnerable class.
Health
How much punishment that troop class can absorb.
Low frontline Health can cause your backline damage to disappear because the fight reaches the rear too quickly.
Do not use “most green rows = automatic win.” The rows are inputs, not a simple scorecard. Troop count, tier, formation, hero skills, rally/garrison mechanics and battle type all affect the result.
3. Open the ! next to Stat Bonuses
Use the special-bonus detail to find where the difference actually came from: gear, research, pets, territory, skins, position perks and other temporary or permanent bonuses. If your raw hero investment looks similar but the report is far apart, this panel often exposes the missing source.
4. Open Battle Details — this is where hero performance becomes visible
The Battle Details page shows hero skill activity and trigger counts. Community battle-report analysis uses these trigger counts to judge how long the fight lasted and whether a skill was actually contributing. Remember that the official report stat rows do not include Hero Skill bonuses; the battle details are therefore a separate piece of the diagnosis.
Look at your heroes and the opponent's heroes. A hero you did not expect may be changing the fight.
Look at trigger counts. A skill that barely triggers in a short fight is not equivalent to one that repeatedly contributes.
Look at skill kills where shown. This helps identify which damage skill is actually converting into kills.
In rallies, remember joiner skills. The official combat FAQ says the rally initiator's nine hero skills plus four primary hero skills from rally members are included. This is why Slot 1 joiner choice matters.
5. Apply the counter triangle — but only after reading the report
Infantry → Lancer Infantry has the favorable counter relationship against Lancers.
Lancer → Marksman Lancers have the favorable counter relationship against Marksmen.
Marksman → Infantry Marksmen have the favorable counter relationship against Infantry.
Use the triangle as a decision framework, not a guaranteed calculator. Community doctrine uses Infantry → Lancer → Marksman → Infantry, while the official combat FAQ explains that units normally target the front row first and that some Lancer/hero skills can hit the back row directly. Community troop-counter reference
You have multiple advantages and enough margin to absorb variance.
One major weakness but otherwise close
Consider a rally
More troops and additional rally/joiner skill effects can close the gap.
Enemy frontline greatly outlasts yours
Do not feed solo marches
Once your front line disappears, the fight can move rapidly into your damage rows.
Enemy has a strong counter formation or major stat advantage
Rally or disengage
A bad solo fight rarely becomes good because you are impatient.
Target is a defended facility/garrison
Follow the alliance rally plan
Rally/garrison mechanics and assigned heroes matter more than a generic solo template.
There is no honest “you will win at X% Power” rule. Power is a broad account metric. Use scouting, troop tier/count, the counter relationship and the actual battle report. If the target is important and the margin is not obvious, rally.
7. Build the counter from the report
Find the first collapse. Which troop class ran out first?
Find the biggest stat mismatch for that class. Attack? Defense? Lethality? Health?
Find the cause. Open the special-bonus details and Battle Details.
Fix one major variable first. Example: improve the weak troop class's gear/research, change the formation, or use the appropriate hero.
Run the next fight with the new setup. Compare the second report to the first.
Save the lesson. If the same opponent or objective appears again, your alliance now has a tested counter instead of a guess.
Example — how to read your supplied report
In the supplied screenshot, the left side has substantially higher displayed Stat Bonuses across the troop classes, while the Troop Power Comparison also shows a large difference in troop counts. That is useful evidence, but it is not enough by itself to reverse-engineer a universal win formula. The next questions should be: what were the actual troop tiers, what were the casualties, what did Battle Details show, and which special bonuses created the stat gap? That is how you turn this specific report into a repeatable counter.
Battle-report habit: Save important reports before they age out. Current developer feedback announced an increase in Battle Report capacity from 350 to 500, but older reports can still be removed when the storage limit is reached.
Verification: Official Whiteout Survival Combat FAQ and Battle Report bonus documentation were cross-checked with current community battle-report analysis and troop-counter guides. The supplied screenshots are used as worked examples and are not treated as universal combat formulas.
Reinforcement strategy
When an ally is under attack, reinforce the threatened city/objective instead of sending random counterattacks.
Prioritize the strongest defensive destination and keep a reserve for the next incoming rally.
Do not strip every nearby city of troops just to fill one defense if the enemy can then hit the empty cities.
For major battles, designate who reinforces the Castle, facility, HQ and key players before combat begins.
When the operation changes from attack to defense, switch from offensive to defensive hero presets and redeploy your march.
Ghost City Strategy — Hide Troops When You Are Low on Shields
Ghosting means taking your troops out of your exposed city. When you are low on shields, send troops to alliance banners, Alliance HQ, or trusted allied cities as reinforcements. The goal is to leave your city empty or nearly empty so enemy attacks have little or nothing to hit.
Alliance banners: garrison troops in a banner that is currently safe under the active war rules. Re-check the map if enemy territory advances toward it.
Alliance HQ: garrison troops in the HQ when it is a safe parking location. This keeps troops out of your exposed city while leaving them available for the fight.
Trusted allied city: reinforce a shielded or otherwise protected ally. This is useful for parking large numbers of troops away from your own city.
Empty your city: move as much of your army as practical. Leave only what you intentionally need at home.
Split your army: when practical, use more than one safe location so one threatened building or city does not expose your entire army.
Watch the map: a banner or HQ is only useful as a hiding place while it remains protected by the current rules.
Shield discipline: attacking, scouting, and joining rallies can remove your shield. Reinforcing an ally does not.
If your city burns out: when Barricade durability reaches zero, your city is randomly teleported and the troops you had hidden in banners, HQ, or allied cities are automatically returned to your city. Be ready to move them again if the battle is still active.
Simple rule: Low on shields? Do not leave your whole army sitting at home. Park troops in a safe alliance banner/HQ or reinforce a trusted protected player, keep your city light, and keep enough mobile troops available for the next call. The safety of the hiding location depends on the current territory and attack rules, so always verify the map first.
You are attacking? Scout → choose counter/formation → offensive Slot 1 → rally → reassess before committing more marches.
Facility captured? Stop thinking like an attacker. Switch to garrison defense and keep reinforcements moving.
Enemy rally incoming? Identify target → reinforce or evacuate as ordered → do not feed isolated marches into the rally.
The rule to remember:Jessie for offensive rally joining. Patrick for defensive/garrison rally joining. The actual rally leader uses a different decision: use the strongest complete three-hero combat setup for the job.
⚡ Quick-Switch: Attack → Defense Without Leaving a Gap
In Castle, Fortress, Stronghold and HQ fights, capturing the objective is only the first half of the job. The moment your side takes the building, the operation changes from attack to hold. Your next priority is getting defensive joiner skills into the garrison without creating an avoidable empty window.
Method A — One at a time Recall your own offensive march, change the lead hero to Patrick, and resend. Do this when the battle tempo allows it. It is the safest method for players who are still learning the timing.
Method B — Seamless hot-swap Send the defensive march toward the same garrison first. Watch its arrival timer. When it is roughly 1–3 seconds from landing, recall the offensive march already inside the garrison. The defensive march then arrives immediately after the old march leaves, minimizing the gap.
Practical sequence: Attack with Jessie → capture the objective → send your Patrick defensive march toward the garrison → wait until Patrick is about 1–3 seconds from arrival → recall your own Jessie march → let Patrick enter → continue reinforcing the defense. The exact timing depends on march travel time, lag and server ticks, so practice before using it in a decisive battle.
Do not recall too early. A premature recall can create an empty garrison and hand the enemy an opening.
Do not wait until the last instant. Lag can make a 1-second window unreliable. A 1–3 second target window is a practical technique, not a guaranteed exact tick.
Use saved formations. Keep an Attack preset and Defense/Garrison preset ready so the hero change is fast.
Use this after every successful capture. Castle, Fortress, Stronghold, HQ and other objectives can be counter-rallied immediately after capture.
Keep reinforcement waves moving. The first defensive swap is not the end of the job; continue sending defensive troops as the garrison takes losses.
Advanced coordination: Attack players use Jessie; defense players use Patrick. This lets the alliance change modes quickly instead of having everyone decide during the battle.
PLAYER — EVENTS
Event Master Book — What to Do, What to Save, What to Ignore
Never play an event in isolation. The strongest accounts make one action pay twice or three times: a troop train can score a development event, Alliance Mobilization and KOI/SvS; a Beast kill can score stamina events, Intel and alliance objectives; a hero upgrade can wait for a Hero Development scoring day.
System / event
Best habit
Save for
Common mistake
Hall of Chiefs / King of Icefield
Match spending to the day theme; claim thresholds first.
Nothing that is stated to carry over; use expiring fuel during the event.
Opening fuel supplies you cannot spend.
Fishing Tournament
Upgrade the fishing kit and learn the cast/reel pattern.
Fishing Tokens and collection progress.
Ignoring collection/permanent rewards while chasing one score.
Mercenary Prestige
Pick the highest difficulty you can reliably clear and manage stamina.
Stamina and enough time to finish all personal targets.
Choosing a tier you cannot finish.
Tundra Trade Route
Use free refreshes/vouchers; evaluate cargo against raid risk.
Truck Vouchers.
Chasing rarity while ignoring the probability of a successful escort/raid.
Pets / Treasure Hunt
Capture consistently and refine around your actual role.
Pet food/marks/books as applicable.
Spreading refinement across every pet.
Experts / Dawn Academy
Pick one or two role anchors and use breakpoints.
Books, gifts, Sigils and time.
Maxing every Expert evenly.
Seasonal / mini-events
Read carry-over wording before hoarding.
Only currencies/items explicitly marked to persist.
Assuming an event token survives its event.
Universal event rule: bank → align → execute
Bank: keep resources until you know what the next scoring window rewards.
Align: choose the event, daily theme, alliance call and account bottleneck.
Execute: spend the minimum amount needed to reach the reward breakpoint you actually want.
Recover: refill marches, healing, stamina and queues immediately so the next event does not catch you empty.
Events worth learning even if you are not competitive
Learn the rules of SVS, KOI, Alliance Showdown, Bear Trap, Foundry, Canyon Clash, Sunfire, Frostfire Mine, Tundra Trade Route, Mercenary Prestige, Mia's Fortune, Snowbusters and Fishing Tournament. You do not have to rank highly in all of them. Understanding them prevents accidental waste and makes you useful to your alliance.
Player Event Dossiers — Snowbusters, Mia's Fortune & More
Category: Player-facing and mixed events. Alliance-controlled battle events are grouped under Alliance Events & War.
Snowbusters — play the mini-game for account value
Official Help Center: each event lasts 3 days; you start with 200 Fuel; progress resumes when you exit and return.
Rescue Survivors early: each survivor increases Snowbuster weapon range.
Manage Health. At zero, you drop Coal and only part can be recovered.
Coal can feed the Fire for health regeneration, but community strategy is to consider saving Coal until the end of the level when surplus can convert to Fuel.
Useful tools include Super Snowbuster, Ultra Magnet, Infini-Fuel, Portable Snowshield, Medkit and Rocket. Stack compatible tools instead of firing them randomly.
Snowbuster Gear improves different parts of the mini-game: weapon/range, health/fuel use, mitigation/fuel recovery and movement/regen.
Unused event Fuel does not carry to the next event. Fuel Supply Chests from packs are different and can remain in the backpack.
Snowbusters secret: do not spend your best temporary tools on a bad section. Use the easy milestone stages to move quickly and conserve Fuel for the harder stages.
Mia's Fortune — token economics, not “just luck”
Recurring 2-day monthly event in current community references.
Pick the Wish Reward, then reveal a 10-orb board. Costs escalate across the board; the current community reference lists 1/2/3/4/5/8/12/15/20/25 tokens for a full 10-orb clear.
2×/3×/4× multipliers apply to the next orb outcome, not every future orb.
Preview the prize pool before committing tokens.
Choose the Wish Reward that fixes the account's current bottleneck: FC, Essence Stones, Speedups or Gems depending on state age and your build.
Do not assume a full board is always the best use of tokens. Community guides recommend controlling pull depth and stopping when the expected value falls.
Mia's rule: free tokens first → choose the bottleneck → inspect the board → use multiplier windows intelligently → stop when the next pull is no longer worth the token cost.
Fishing Tournament — learn the kit, then farm the collection
Monthly 3-day solo mini-game with rotating seasons.
Upgrade the fishing kit rather than treating each event as a fresh start. Current guides commonly prioritize the Hook for more catches, then Line for depth, then Sinker.
Collection progress matters because it can produce permanent rewards/skins in addition to event score.
Use the event's retry/retreat behavior when available rather than wasting a poor cast.
Find the listed items in groups of three to clear each section.
Hints/time extensions have costs and the hint does not carry into the next chapter.
Learn the layout and use a hint only when it prevents a failed chapter.
Seasonal-event carry-over rule
Never assume a currency carries over. Read the event's own “carry over / reset” wording. Snowbusters Fuel, for example, resets; some supply chest items persist. Apply the same rule to every mini-game.
This is a 30-minute individual battlefield. Your troops are not permanently lost. The goal is Orichalcum, not city destruction. Existing wilderness/gathering march-speed bonuses do not apply; Frostfire skill march speed does.
Current reference points: Furnace 16+; same-day registration/fight; seven commonly listed time slots (02, 05, 11, 14, 16, 18, 21 UTC); three mine zones; two Vein Outbursts; Smelter opens for the final 7:30. Use the live event panel if your state/client shows different scheduling or rules.
The 5 skill stages — know what every choice does
Stage
XP
Left choice
Right choice
Default route
1
200
+1,080 Orichalcum/min
+1,500 Orichalcum per defeated patrol
RIGHT for Hunt / patrol strategy
2
500
+12,000 troops per march
+25% battlefield march speed
RIGHT
3
900
+5,000 when you occupy a common vein, once/min
+5,000 when you fail to occupy a common vein, once/min
LEFT for most players
4
1,500
+15% Orichalcum gathering efficiency in veins
-30% hero recovery time
LEFT for gathering / standard RRLLR
5
2,300
Mine Armory: +66% troop damage for 60s; 5m cooldown
Mine Armory: +50% gathering speed for 60s; 5m cooldown
RIGHT for the standard RRLLR route
Most common community route: RIGHT → RIGHT → LEFT → LEFT → RIGHT (RRLLR). This is a strategy choice, not a permanent game rule. It favors patrol points early, movement, reliable vein points, gathering efficiency and the final gathering-speed active skill. Community players also use alternate routes when their account strength or preferred strategy makes the other branch more valuable.
Ratios and march setup
Default formation: 33/33/33 Infantry/Lancer/Marksman is the documented standard starting formation. Frostfire is not a Bear-style DPS test, so do not blindly copy 10/10/80.
Patrol/Hunt strategy: use enough troops to clear patrols quickly; the exact ratio matters less than speed, march count and finding uncontested patrols.
Gather strategy: use a normal full march on the best vein you can safely hold. Your score is driven by time gathering, outbursts, loot and skill triggers—not a universal troop ratio.
Six marches: community players consistently report that a sixth march materially improves ranking potential. If you only have five, prioritize patrol uptime and outbursts instead of trying to imitate a six-march rotation.
Do not treat a ratio as a guarantee: Frostfire combat is heavily about objective timing, skill route, march count, teleporting and whether you can hold the resource you chose.
30-minute plan — stage by stage
Time
What to do
Why
Before start
Use the 2:30 preparation window to identify nearby patrols, mine density and strong players. Pick a low-congestion area.
Your first minute should not be spent searching.
0:00–skill 1
Attack Mine Patrols continuously. Take RR at stages 1–2 if using the standard Hunt route.
Patrols give XP and the first two right skills immediately improve scoring/movement.
After skill 2
Keep hunting patrols. Do not abandon patrols just to sit on low-value veins.
Community testing consistently finds patrols to be the reliable F2P/low-spender point engine.
Skill 3
Take LEFT in the standard route. Occupy a vein or otherwise trigger the 5,000/minute mechanic when practical, then return to patrols.
The trigger is once per minute, not once per attack. Do not spam attacks expecting multiple bonuses in the same minute.
8–10 min
Recall marches before the first Vein Outburst and be ready to occupy multiple outburst veins.
Outbursts are one of the largest point windows.
10–18 min
After the outburst, return to patrols or a safe L2/L3 vein. Teleport if your area becomes crowded.
Dead travel time and contested mines cost points.
18–20 min
Repeat the outburst routine: recall early, position, take as many short outburst gathers as you can safely secure.
The second outburst is another major scoring window.
20–22:30
Rebuild XP/score rhythm. Strong players can contest L3; weaker players should prefer reliable L2/outskirts.
A safe continuous score beats repeated failed attacks.
22:30–30:00
Smelter opens for the final 7:30. Strong players can fight for it; weaker players should not burn the entire endgame trying to hold it.
Smelter occupation ranking can add a large bonus, but losing repeatedly can destroy your scoring rhythm.
Final minute
Use remaining marches immediately. Grab nearby loot/orichalcum and do not leave queues idle.
Small recovered points can decide close rankings.
Three practical strategies
F2P / Hunt: Kill patrols for most of the match. Use the standard RRLLR path, exploit the once-per-minute Stage 3 trigger, hit both outbursts and only take veins you can safely hold. If an area is crowded, teleport away. This approach can score very well without owning the center.
Mid-power / Hybrid: Farm patrols until your key skills are unlocked, then keep most marches hunting while 1–2 marches gather. Pull everything back for outbursts. Take L2/L3 when uncontested and contest the Smelter only when the timing and matchup justify it.
Whale / Smelter: Use patrols and skill XP early, contest L3 and the Smelter, and use teleport/speed advantages to arrive first. Do not assume the Smelter is automatically correct: if a stronger player will immediately eject you, the patrol/outburst strategy may produce a better personal score.
Community-tested tricks worth knowing
Patrol uptime: if patrols disappear in your area, teleport rather than waiting. Several 2026 players report better scores by moving between patrol-rich areas.
Minute trigger: Stage 3 is a once-per-minute trigger. A failed/occupied vein attempt does not create a new 5,000 bonus every time you attack.
Outburst alarm: use the in-game 60-second/10-second warnings and recall marches before the spawn instead of reacting after it appears.
Congestion is a score killer: if several strong players are fighting over the same patrols/veins, relocate to an emptier area.
Loot piles: collect the Orichalcum piles created around defeated guards/contested veins when safe; they are separate scoring opportunities.
Teleport strategically: free/available relocators make repositioning part of the event. Do not save every teleport if moving will materially increase your point rate.
Do not fake certainty: community reports disagree on the ideal balance between veins and patrols. Your account strength and queue count should determine the split.
Cave of Monsters — Every Stage, Ratios & Battle-Report Method
Cave of Monsters is a Labyrinth zone focused on Pets and Pet Skills. It is a single-army fight with no heroes. The Labyrinth gives you multiple attempts because only losses consume an attempt, so use failed fights to tune the ratio rather than guessing.
Current Labyrinth references place Cave of Monsters on Wednesday/Thursday and report it as a one-army zone using the Pet/Pet Skill portion of your account. The exact live schedule and unlock timing can vary with state progression, so the client is authoritative.
Starting ratio
Start at 55 / 15 / 30 — Infantry / Lancer / Marksman. This is a starting point, not a guaranteed best ratio. Community guides agree that Lancers should generally stay relatively low, commonly around 10–20%, but your pet stat distribution can make a different mix win.
Stages 1–10 — practical ratio table
Stage
Start here
If you lose
What to check
1
55 / 15 / 30
Try again once; if it still fails, change one troop type by ~5%.
Pet attack/defense/health/lethality distribution; battle report casualties; which troop type is carrying damage.
2
55 / 15 / 30
Try again once; if it still fails, change one troop type by ~5%.
Pet attack/defense/health/lethality distribution; battle report casualties; which troop type is carrying damage.
3
55 / 15 / 30
Try again once; if it still fails, change one troop type by ~5%.
Pet attack/defense/health/lethality distribution; battle report casualties; which troop type is carrying damage.
4
55 / 15 / 30
Try again once; if it still fails, change one troop type by ~5%.
Pet attack/defense/health/lethality distribution; battle report casualties; which troop type is carrying damage.
5
55 / 15 / 30
Try again once; if it still fails, change one troop type by ~5%.
Pet attack/defense/health/lethality distribution; battle report casualties; which troop type is carrying damage.
6
55 / 15 / 30
Try again once; if it still fails, change one troop type by ~5%.
Pet attack/defense/health/lethality distribution; battle report casualties; which troop type is carrying damage.
7
55 / 15 / 30
Try again once; if it still fails, change one troop type by ~5%.
Pet attack/defense/health/lethality distribution; battle report casualties; which troop type is carrying damage.
8
55 / 15 / 30
Try again once; if it still fails, change one troop type by ~5%.
Pet attack/defense/health/lethality distribution; battle report casualties; which troop type is carrying damage.
9
55 / 15 / 30
Try again once; if it still fails, change one troop type by ~5%.
Pet attack/defense/health/lethality distribution; battle report casualties; which troop type is carrying damage.
10
60 / 10 / 30
If the Infantry-heavy milestone blocks you, try 65 / 10 / 25. If that still fails, use the battle-report loop instead of blindly adding Infantry.
Stage 10 is a milestone-style enemy and is commonly reported as much more Infantry-heavy than normal stages.
The 5% adjustment method — use this after every failed stage
Run 55/15/30 first. Do not start by copying somebody else’s extreme ratio.
Open the battle report. Look at your remaining troops and casualty pattern.
If Infantry collapses early, add Infantry and remove 5% from the troop type that is least useful in that fight.
If Marksmen are surviving but damage is low, add Marksmen in 5% steps.
If Lancers are doing little work, reduce them toward 10%. Do not assume 20% is mandatory.
Re-run the same stage. Because wins do not consume the daily attempt, keep pushing while you are winning.
When a ratio clears a stage, save it. The weekly reset means your tested ratio becomes reusable knowledge rather than something you have to rediscover.
Why your ratio may differ from another player
Your Cave score is driven by Pets and Pet Skills, not your hero lineup. A hero-era Marksman-heavy formation does not automatically transfer.
Pet stats can be distributed differently between accounts. If your pet bonuses are balanced, 55/15/30 may outperform a Marksman-heavy setup.
Later-generation players may use different anchors and stronger pet skills. Compare results by stage rather than assuming an older ratio is still optimal.
Milestone stages can use a different enemy troop mix. Treat Stage 10 as a checkpoint, not just Stage 9 with more power.
Do not spend your five losses repeatedly on the same failed ratio. Change one variable and learn from the report.
Quick Cave checklist
Before entering
Set 55/15/30. Make sure your strongest relevant Pet Skills are active/leveled. Do not waste time rebuilding heroes—the zone does not use them.
Stages 1–9
Push continuously while winning. On a loss, use Challenge, not blind Retry, if you intend to change the formation.
Stage 10
Expect a harder Infantry wall. Try 60/10/30, then 65/10/25 if needed, and use the battle report to make the final adjustment.
Weekly reset
Record the winning ratio for each milestone. Raiding saves time after the zone is cleared to the required stage, but it does not replace pushing new stages.
Keep all three Troop Camps training whenever you have the resources and army demand. See Troop Training for the exact training strategy.
Use Drill Camp for secondary heroes instead of manually leveling every hero. See Drill Camp.
Use saved March Presets for Bear, attack, defense and rally joining. See March Presets.
Use Preset → Balance → Check Warning → Send when exact troop ratios are not required. See Rapid Deployment.
Keep gathering marches moving, including overnight gathers.
Queue long Research and Construction before logging off.
For event pushes, stack the relevant state/alliance buffs before spending speedups. See Event Banking and Alliance Mobilization.
Automation systems — keep these separate
Auto-Help, Auto Hunting and Auto-Join are different systems. Keeping them together here prevents their controls and use cases from being scattered through alliance leadership material.
Auto-Help vs. Auto-Join — two completely different systems
Do not confuse these.Auto-Help is an alliance-support convenience feature. It automatically helps eligible alliance requests while you are online. Auto-Join uses your march queues to join eligible rallies. They solve different problems and should be managed separately.
Auto-Help Helps alliance members with eligible construction, research and healing requests. It reduces the waiting time those requests would otherwise require other members to help manually.
Auto-Join Automatically sends your selected formation into eligible alliance rallies. It uses march queues and has an active time limit.
Auto-Help — the monthly convenience package
Alliance Auto-Help is a premium convenience feature in the Ultra Value Monthly Card. It works while you are online. It is designed to keep routine alliance assistance moving without requiring you to tap every Help request manually.
What it helps Eligible alliance healing, construction and research requests.
What else comes with the card Auto Hunting is also included. Current game information lists up to 3 Auto Hunting queues for regular Beast hunts.
How Auto-Help works
Activate the relevant Ultra Value Monthly Card benefit.
Open the game's Auto-Help settings and enable the feature.
Choose the available Help mode offered by your current client: all available marches or a single pre-configured Squad.
If you choose a single Squad, create the formation first under Profile → Troops → Squads, then select that saved Squad in Auto-Help.
Leave Auto-Help enabled while you are online when you want routine alliance requests handled automatically.
Which Auto-Help mode should you use?
All available marches Best when you are online, actively supporting the alliance and do not need to protect specific marches from being used for Help.
Single pre-configured Squad Best when you want one controlled formation handling Help while keeping the rest of your marches available for gathering, scouting, rallies or combat.
When to turn Auto-Help OFF
When leadership needs you to keep every available march under manual control.
During a tightly coordinated battle when you are managing specific formations or reinforcement timing.
When you are about to reorganize or replace a saved Squad and do not want the old formation used.
When you are deliberately saving available deployment capacity for another task.
Important: Auto-Help does not join rallies. It is an alliance-assistance system. It also does not mean the game can keep helping after you are offline; the current feature is intended to operate while you are online.
Auto Hunting — part of the same monthly convenience package
Auto Hunting is separate from both Auto-Help and Auto-Join. It repeatedly sends selected marches against eligible regular Beasts while the game remains active. Current game history shows the number of Auto Hunting queues was increased to three.
Use it for routine Beast hunting and stamina spending.
Test the selected Beast level manually before leaving Auto Hunting running.
It can stop when you lose, run out of stamina, teleport or leave the game.
Do not treat it as an offline Beast-farming system.
Do not confuse normal Beast Auto Hunting with Polar Terror rally participation.
Auto-Join — automatic rally participation
Auto-Join is a separate feature that everyone can use. It is for automatically joining eligible alliance rallies. It uses your march queues, runs for a limited period and does not answer alliance Help requests.
What Auto-Join can be useful for
Gina's Revenge / Hero's Mission: when eligible rallies can award participation/help rewards, Auto-Join can keep you participating while you are away.
Mercenary Prestige: when supported mercenary rallies are available, Auto-Join can help fill and participate in them.
Polar and other eligible alliance rallies: use it when your alliance wants automatic participation.
Offline periods: the major advantage is continuing eligible rally participation while you are away from the game.
Rewards matter: Some events award additional participation/help chests or rewards for joining other players' rallies. Auto-Join can help you collect those rewards when the event supports them, but always follow the event's current rules.
How to set Auto-Join
Open Alliance → War → Auto-Join.
Select the rally types you want to join.
Choose All Troops or a custom/pre-configured formation, depending on the current client.
For a custom formation, choose the troop amount and heroes. For rallies where joiner skills matter, put the approved joiner hero in Slot 1.
Set the Queue Limit. This determines how many of your march queues Auto-Join may occupy.
Enable Auto-Join. Community references and the in-game system use an 8-hour active period; refresh it when you want another period.
Current clients also offer Only Auto-Join After Exiting Game. Use this when you want manual control while playing but want Auto-Join to take over after you leave.
How many Auto-Join queues?
Keep a reserve If you have 6 queues and want one free, set the Auto-Join limit to 5. If you need two free, set it to 4.
Why? Auto-Join can otherwise occupy marches you need for gathering, scouting, your own rally, healing-related movement or a timed event.
When to turn Auto-Join OFF
Bear Trap: manually control your approved Bear joiner formations. Do not let Auto-Join consume the marches/heroes you need.
Foundry/Frostfire and other battlefields: turn it off when troops need to be home or manually assigned.
Castle, Fortress and Stronghold operations: turn it off when leadership needs specific troops and heroes available at a precise time.
Gathering: turn it off if you need every march on resource tiles, or use the current exit-only option.
Before your own rally: stop Auto-Join if you need your queues available to launch or reinforce a planned attack.
When the wrong formation is selected: never assume Auto-Join will choose the right hero lineup for a specialized event.
Auto-Join formation rule
Do not use All Troops blindly. A custom formation is usually better for organized alliances because it limits troop consumption and lets you control the heroes used. For specialized rallies, follow the alliance's assigned formation rather than the default.
Refreshing and disabling Auto-Join
Auto-Join has a limited active period; current community references report 8 hours.
Return to Alliance → War → Auto-Join and disable/stop it when you need direct march control.
Re-enable it when you want another active period.
Already-deployed marches still have to return normally; turning Auto-Join off stops future automatic joining.
Simple rule:Auto-Help = help your alliance while you are online.Auto Hunting = automatically hunt regular Beasts while active.Auto-Join = automatically put your marches into eligible rallies. Keep them mentally separate and switch each one off when the next activity needs your marches under manual control.
Community-tested convenience strategies
Protect event marches: before Bear, Foundry, Castle or a coordinated facility fight, check both Auto-Join and Auto-Help so convenience features do not interfere with your assigned role.
Use a reserve queue: experienced players often leave at least one march free for unexpected movement or an urgent rally.
Use the current troop preview: the game now shows troop ratios and average troop levels in relevant deployment/garrison views. Check them before an important rally.
Use event-specific Auto-Join: participation can be valuable when an event awards rewards for helping/joining, but the event rules always take priority.
Use Gina intelligently for hunting: test your formation and Beast level first, then let Auto Hunting handle repetitive normal Beast hunts while you remain online.
Mechanics verification: Official game/update material introduced Alliance Auto-Help as an Ultra Value Monthly Card feature and describes it as operating while online. Current game information also documents Auto-Join queue controls, the newer “Only Auto-Join After Exiting Game” option and up to three Auto Hunting queues. Community guides verify the 8-hour Auto-Join period and recommend reserving queues for activities such as Bear, gathering and battlefields. Auto Hunting is documented as an active/online convenience feature for normal Beasts rather than an offline system.
Planning tools only: combat also depends on troop tier, composition, hero skills, counters and rally/garrison leadership.
Battle Stat Gap
Compare the same report row.
Upgrade Budget
Works for gear, charms, FC or other known costs.
Multi-piece Cost
Use 6 for Chief Gear or 18 for all Chief Charms.
Troop Formation
Percentages must total 100.
Chief planning: Chief Gear uses six pieces and primarily develops Attack/Defense; Chief Charms occupy 18 total slots and develop Health/Lethality. Enter the live next-level cost from the game or a verified cost table.
ALLIANCE — CORE & TERRITORY
Alliance Playbook — How the Team Fits Together
Your alliance is part of your progression engine. Help, Alliance Tech, gifts, rallies, territory, events and coordinated positioning compound the value of every active member.
Member responsibilities
Stay inside the approved hive/territory when practical.
Keep marches, research, construction and gathering running.
Follow state and alliance rules before attacking, scouting or relocating.
Use the correct rally joiner and preset instead of sending random heroes.
Read R4/R5 announcements before major events.
Leadership responsibilities
Maintain territory and resource income.
Schedule Bear Trap and event participation.
Plan facilities, Fortresses, Strongholds, Castle and SVS.
Keep shared missions, rally roles, teleport staging and communication organized.
Use the leadership channel for decisions that should not be buried in general chat.
Alliance territory rule that matters
Alliance resource locations generally need 75% or more of their footprint inside alliance territory to generate alliance resources. Use the World Map resource filter when planning banners and HQs.
ALLIANCE — EVENTS & WAR
Alliance Mobilization — Efficient Without Burning SVS Stock
R4/R5 can refresh normal Alliance/Event missions about every 30 minutes.
Prefer missions that overlap with normal play: troop training, beasts/Polar Terrors and gathering.
Use Exclusive Missions for their bonus when the cost makes sense. Do not burn large speedup, gear or Fire Crystal reserves just because a mission has a large point number.
Training missions are especially efficient because they grow the army while earning AM points.
Gathering is ideal for overnight marches.
Beast/Polar missions can overlap with Intel and alliance rally activity.
Before SVS, leadership should refresh or discourage missions that consume the stockpiles reserved for SVS.
Alliance rule: Mobilization should reward normal activity, not force members to empty their SVS bank.
Tundra Trade Route — Truck Strategy
Truck Vouchers are obtained from Alliance Showdown and refresh truck quality. The first refresh is free.
Use the free refresh before accepting a truck.
Higher-rarity trucks generally have better reward potential. Follow the live event panel for current costs/rules.
Use alliance assistance on valuable trucks when available. Allies can escort your truck to help protect it from raids.
When Trade Route and Alliance Showdown overlap, truck escorts and raids can create value in both systems.
Outside players can raid eligible trucks. Do not assume your truck is safe.
F2P: use free Truck Vouchers first and avoid large gem spending just to chase a perfect truck.
Mercenary Prestige — Personal Challenges & Alliance Boss Hunt
Mercenary Prestige has a personal mercenary track and a separate alliance Captain track. Treat personal targets and alliance bosses differently: the one-troop hold rule below applies to Captains, not to finishing your personal challenge.
Personal challenge strategy
Choose a difficulty you can finish; your choice is locked for this event. Complete the track to progress toward the next difficulty in a future edition.
Scout only when you can defeat the target before its countdown expires. Use solo attacks for targets you can beat, and alliance Help Requests or rallies for harder targets.
Use Mercenary Contracts before the event closes and help teammates clear their targets. Owner, rally caller, rally participant and support-item rewards are different; check the event reward panel.
Spread spending across the event so stamina regeneration helps. Gina's stamina-reduction skill can lower attack costs when active; check its level and your march's fighting strength.
Captain boss hunt: tag, confirm, then finish
R4/R5 activates unlocked Captains. Each successful Captain defeat is available once per event. Participants can receive rewards after the kill; a one-troop hit is the established way to register participation while preserving time for others. Captain loot can include Mythic general shards, gems, speedups, Hero XP and resource chests; use the live reward screen for amounts.
Announce a UTC start time and boss location. Activate when the expected group is online.
Each member sends one troop, no heroes, once. Verify the attack has landed before posting 👍 in alliance chat.
An officer checks names against the attendees for this Captain. A thumbs-up is a chat signal, not a game reward trigger; sending a march without landing is not confirmation.
Reserve enough time for travel and the final kill. Chase missing check-ins, then issue ALL CLEAR. Full marches start only after that order.
If someone missed the tag window, do not pretend they can claim a defeated boss later. A timed-out attempt can be activated again; a successful kill cannot be repeated for another payout that edition.
The goal is to include everyone available, not wait indefinitely for every offline member. Leadership should publish a cut-off and leave finishing time inside the displayed Captain timer.
Copy to alliance chat
MERCENARY BOSS: Send ONE troop with NO heroes. Wait until your hit lands, then post 👍 in alliance chat. Do not send full marches or hit again until R4/R5 gives ALL CLEAR. This gives everyone present a chance to earn rewards.
ALL CLEAR: Everyone on the boss check-in list has tagged it. Send full marches now and finish the Captain before the timer ends. Check that you hit THIS boss; a previous boss does not count.
STOP full attacks on the Mercenary boss. ONE troop, NO heroes until leadership says ALL CLEAR. Post 👍 only after your hit lands. Killing early can deny other members their participation rewards.
If leadership temporarily removes a member
Warn and request recall first when time permits. Explain the shared-reward impact privately, record the reason, and agree on return conditions. Removal cannot undo an early kill or guarantee that a moving attack stops; watch the march and boss health.
You were temporarily removed for ignoring the boss hold order. Early full attacks can deny teammates their reward chance. This is to protect the event, not an attack on you. Message R4/R5, confirm ONE troop then wait for ALL CLEAR, and request a reinvite.
Before changing Bear Trap times: check the personal cooldown first. A player’s Bear participation cooldown is separate from the trap’s own schedule/cooldown. Changing the alliance trap time does not erase a player’s personal lockout. Do not plan a time change from the assumption that every member will be immediately eligible. Check the live Bear screen for the exact cooldown shown on your account; current updates/community references use a natural-day reset model rather than relying on an old “46/48-hour” wording.
Joiner rule: when you join another rally, only the first hero in Slot 1 and that hero's first Expedition skill is used as your joiner skill. Your second and third heroes do not add joiner skills. Joiner Hero Gear does not increase the joiner skill.
Who should lead?
Use your strongest three-hero combat lineup when starting a Bear rally. The captain's three heroes, stats, gear and Expedition skills all matter.
Jeronimo is usually more valuable as a rally captain than as a joiner when you have a strong Jeronimo lead. If someone else is leading and your Jeronimo is available as a joiner, his first Expedition skill is still a strong joiner option.
If your own rally is much weaker than the alliance's strongest rallies, joining a stronger rally can be better for your personal Bear damage.
Best Season 1 Bear Trap joiners
Priority
Hero
First Expedition skill
Use
1
Jessie
Stand of Arms — +25% Damage Dealt at Lv.5
Primary offensive joiner. Put her in Slot 1.
2
Jasser
Tactical Genius — +25% Damage Dealt at Lv.5
Excellent offensive joiner. Put him in Slot 1 when Jessie is already committed elsewhere.
3
Seo-yoon
Rallying Beat — +25% Troop Attack at Lv.5
Excellent offensive joiner. Her Attack buff is a different effect type from Damage Dealt.
4
Jeronimo
Battle Manifesto — +25% Damage Dealt at Lv.5
Strong joiner when he is not being used as your better rally captain.
Season 1 practical setup: Jessie, Jasser and Seo-yoon are the standard dedicated joiner heroes. Add Jeronimo when he is not needed to lead a stronger rally. If your alliance uses a fixed joiner order, follow that order so the four best eligible skills are placed into the rally.
Why the four joiner skills matter
Only the first Expedition skill of each joiner's Slot 1 hero is considered.
A rally can activate four primary hero skills from rally members.
Higher-level eligible skills can replace weaker ones. A Level 5 joiner skill is therefore worth prioritizing.
Matching joiner effects can stack. The official Help Center confirms that four rally-member skills matching the captain's skill can stack.
For Gen 1 Bear Trap, the common high-damage joiners are Jessie, Jasser, Seo-yoon and Jeronimo. Do not replace these with a defensive, healing or unrelated utility hero just because that hero has higher Power.
Later joiners without a generation chart
As your state unlocks new heroes, check the first Expedition skill before changing joiner presets. Reliable all-troop damage, attack and lethality, or target damage-taken effects are useful for Bear. Later examples include Reina (normal attack damage), Gwen (target damage taken), Bradley (troop attack) and Sonya (all-troop damage). Compare skill levels against Jessie/Jasser/Seo-yoon. Chance-based and smaller buffs such as some Philly, Norah, Mia and Lynn builds are more situational. Do not promote a new hero purely because of their generation.
JessieJasserSeo-yoonReinaGwenBradleySonya
Bear Trap troop formation
Community testing also uses 10/30/60 when Marksmen are limited, and some later-state accounts go even more Marksman heavy. These are test presets, not guaranteed optimal ratios. If your troops cannot fill them, send the troops available and compare damage reports. A claimed fixed minimum of 10,000 Infantry or Lancers is not established as a universal rule.
Start with 10% Infantry / 10% Lancer / 80% Marksman if your alliance does not already use a tested ratio. This is a practical Gen 1 default, not a universal rule. If you lack enough Marksmen, use the closest Marksman-heavy ratio your account can support.
The Bear does not fight back like a player target, so Marksmen can make up a much larger part of the formation.
Do not copy a late-generation ratio blindly. Your troop tiers, total troop count and alliance strategy matter.
Join the strongest rallies first when your own rally is not competitive.
If your alliance staggers rallies, return troops from the strongest rally and use them in the next approved rally instead of leaving marches idle.
Event timing and rally flow
The event runs for 30 minutes. A player's participation becomes eligible again after two UTC day resets, separately from the trap's own cooldown. Pre-save formations, place cities close enough to reduce travel, check the four selected yellow skills in the rally, and keep marches cycling. A one-troop captain rally is only a useful tactic if your alliance can fill it and the captain's troops gain more by joining other rallies during the five-minute launch wait.
Bear Trap gear
For rally leaders, use your strongest combat gear and chief stats because the captain's full setup matters.
For rally joiners, do not move Hero Gear around just to make the joiner march stronger. Your joiner skill is what matters.
If Bear Trap is a major goal, Marksman-focused Hero Gear and Chief stats are an important offensive investment because your formation is Marksman-heavy.
Bear Trap preset setup
Preset 1 — Bear Lead: save your strongest three Bear rally heroes. Keep your best combat gear on these heroes.
Preset 2 — Jessie Join: Jessie in Slot 1. Use any two heroes in Slots 2 and 3 to maximize deployment capacity.
Preset 3 — Jasser Join: Jasser in Slot 1. Use any two heroes in Slots 2 and 3.
Preset 4 — Seo-yoon Join: Seo-yoon in Slot 1. Use any two heroes in Slots 2 and 3.
Preset 5 — Jeronimo Join: Jeronimo in Slot 1 only when he is not being used to lead your own strong rally. Otherwise make this a troop-only preset.
Extra marches: use troop-only marches once your approved joiner heroes are already committed. Do not put a random hero in Slot 1 just to make the march look stronger.
Fast rule: Lead with your strongest three heroes. Join with Jessie, Jasser or Seo-yoon. Use Jeronimo as a joiner only when he is not better used as a rally captain. Put the approved joiner in Slot 1 and fill the other two slots for capacity.
What not to send as a Bear joiner
Do not use a defensive, healing, gathering or unrelated utility hero in Slot 1 for Bear Trap just because the hero has high Power. The first-slot Expedition skill is what matters for the joiner contribution.
Season 1 F2P checklist
Max the first Expedition skill on Jessie first.
Build Jasser and Seo-yoon as your additional dedicated offensive joiner options.
Use Jeronimo as a joiner only when he is not needed for a stronger captain lineup.
Use a Marksman-heavy troop formation; start with 10/10/80 if you need a simple default.
Join the strongest rallies first.
Keep your rally-lead heroes and joiner heroes in separate saved presets.
Alliance Event Dossiers — Objectives, Timing & Point Strategy
These events belong with alliance operations because success depends on registrations, assignments, objectives, rotations, scoring and coordinated timing.
Frostfire Mine — objective timing beats random fighting
Frostfire Mine: This is an individual battlefield event, so the complete player strategy is kept in the Player Event Dossiers section. See Frostfire Mine — Complete Strategy for the skill tree, timing windows, ratios, F2P/whale approaches and minute-by-minute plan.
An alliance can send up to 2 legions, and each legion can use a different time slot.
Current official eligibility guidance requires the alliance to be high enough on the Alliance Power leaderboard and enough registrants for the legion.
Objective: move people and troops where points are generated. A fight that wins nothing is often worse than holding the right building.
Alliance Showdown — the alliance's resource chess game
Current community references describe 6 stages / 13 Victory Points, with the final stage carrying the largest VP weight.
Common stage themes: City, Hero, Pet, Gear, Trade, then Full-Scale Competition.
Use the stage as a shopping list: save Mithril for the Gear/late window, Wild Marks for Pet, hero shards for Hero, and FC/RFC for the stages that score them.
Do not automatically fight every stage. If leadership chooses a conservation plan, save resources for the high-value VP days.
Members must be in the alliance before matchmaking for participation eligibility; the current official reference gives Sunday 23:00 UTC for matchmaking.
Alliance Showdown officer trick: announce CONTEST / FARM / SAVE for each stage. Members should never have to guess whether their resources are wanted now or later.
Wild Brawl — short fight, objective-first
Current community guide: 10-player PvP brawl, roughly 10 minutes, with a central Citadel and side objectives.
Do not leave early; current rules report early exit gives zero points.
Buildings, trucks and airdrops can matter more than chasing one enemy march.
It is a practice ground for reading battle reports and learning to move quickly without permanent troop loss.
Foundry Battle
Foundry and batch healing are separate mechanics. Foundry has an official leave-and-return battlefield recovery mechanic. “Batch healing” is a general hospital/healing-management strategy and should not be described as a Foundry feature.
Signup
Checkmark
Meaning
Use it when
Left check ✓
Playing
You are assigned as an active combatant and intend to participate.
Right check ✓
Substitute
You are reserve/rotation personnel.
The official 12-minute return mechanic
Leave the Foundry battlefield.
Your injured troops can be healed outside the battlefield.
Returning to the battlefield takes 12 minutes.
The Foundry battle lasts 1 hour, so leaving is a trade: healing without speedups versus losing active battlefield time.
Do not call this “batch heal in Foundry.” The 12-minute mechanic is Foundry's leave/return system. A player may repeat the process when the event and roster make it worthwhile, but “leave three times” is a rotation tactic, not a universal game rule.
Practical rotation strategy
Use substitutes to keep pressure on objectives while injured players recover.
Leave early enough that a returning player still has meaningful time to score.
Do not send everyone out at once; you can lose the objective while everyone is on the return timer.
In the final scoring window, active battlefield presence is often more valuable than starting another long recovery cycle.
Three practical Foundry playbooks
Objective-control Assign teams to high-value buildings and fight to protect or flip objectives, not for random kills.
Rapid-response Keep a mobile team available to reinforce, intercept weak captures and move to newly valuable objectives.
Recovery rotation Stagger the official leave/return recovery while substitutes cover objectives. Never send the whole roster out together.
Alliance point optimization
Register active players and dependable substitutes, not just the highest Power names.
Pre-assign rally leads, garrison leads, objective squads and a mobile response team.
Move before an objective becomes valuable instead of reacting after it is full.
Do not feed repeated solo attacks into a stronger garrison; rally, rotate or force the opponent to split.
The official return timer is 12 minutes, so every recovery exit costs real battlefield time.
Point play
Prioritize objectives and building occupation over random fights.
Follow the alliance's assigned building rotation.
Do not abandon a high-value objective simply to chase an enemy march unless the shot-caller calls it.
Crazy Joe — Ultimate Score Guide
🚫 DO NOT HEAL DURING CRAZY JOE. Keep wounded troops in the Infirmary until the event is finished. Healing returns troops to your city and disrupts the empty-city/reinforcement setup. Do not put out fires during the event either. Heal after Joe ends.
The scoring principle: Crazy Joe rewards kills, not simply having a huge army sitting at home. The strongest alliance strategy is coordinated troop swapping: send your useful defenders into other members' cities, let their reinforcements defend yours, stay online for the special waves, and standardize HQ formations so Joe's finite kills are not wasted.
Before Joe starts — 5-minute setup
Choose a difficulty the alliance can actually finish. Higher difficulty gives more potential points, but repeatedly failing late waves—especially HQ 20—can cost the alliance more than a clean clear one level lower.
Stay online for the event. Waves 7, 14 and 17 target online players and are major scoring opportunities.
Lock your strongest 3 heroes in your city barricade/garrison. Do this before sending marches so your home defense heroes are not accidentally pulled out.
Empty Infantry and Lancers from your city as far as march capacity allows. Reinforce alliance members. If you cannot empty everything, send Infantry first, then Lancers, and leave Marksmen home.
Use nearby partners. Short reinforcement travel makes HQ recalls and redirects much easier.
Do not heal once Joe begins. Keep the troop layout stable until the event ends.
City reinforcement meta — where most points are built
Your city Strongest 3 barricade heroes locked. Ideally 0 Infantry / 0 Lancers left home after marches are sent; Marksmen can remain when you cannot fully empty.
Your reinforcement marches Prioritize Infantry + Lancers. Community starting point for special online targets is roughly 50/50 or 60/40 Infantry/Lancer; adjust for your troop inventory and reports.
The purpose is a troop swap. Your Infantry/Lancers score kills while defending someone else's city, while their reinforcements score on Joe when he attacks yours. Leaving large amounts of your own frontline troops home competes with the reinforcements you asked allies to send.
Which cities should I reinforce?
Members who have successfully emptied most of their Infantry/Lancers.
Online members, especially approaching waves 7, 14 and 17.
Under-filled cities before already-crowded cities. Spreading capable defenders gives the alliance more complete defenses.
Weaker active members who need help surviving later waves.
If a city has failed twice, Joe stops attacking that city for the run. Recall from it and move to a live target.
Wave-by-wave plan
Wave
Target
What to do
1–6
Member cities
Run the troop-swap setup. Watch which cities are under-filled and redistribute.
7
Online-player wave
Be online. Reinforce selected online targets quickly.
8–9
Member cities
Resume city reinforcement. Prepare the designated HQ march after wave 9 lands.
10
Alliance HQ
Recall the assigned march and fill HQ using the alliance's standardized Wave-10 formation.
11–13
Member cities
Leave HQ after scoring resolves and send troops back to city-defense targets.
14
Online-player wave
Be online. Move to attacked online members if your current target is skipped.
15–16
Member cities
Maintain swaps; redirect from double-failed cities.
17
Online-player wave
Be online. This starts the high-value late-event stretch.
18–19
Member cities
Protect remaining live targets. After 19 scores, recall the designated HQ march immediately.
20
Alliance HQ
Use the tested Wave-20 formation. This is the hardest HQ check; use reports rather than blindly copying Wave 10.
Heroes — city, reinforcement and HQ
Crazy Joe is unusual: community testing increasingly treats the important HQ problem as killing Joe's finite army, so offensive expedition joiner buffs can outperform simply stacking defensive joiners. Hero generation matters, so use the current hero's Expedition skill—not just the hero's Power number.
Job
Recommended approach
Examples
Home barricade
Lock your strongest three appropriate heroes.
Your best developed combat trio.
City reinforcement joiner
Use useful Expedition attack/damage buffs where the receiving city is already safe; use stronger personal heroes when reinforcing a much weaker member.
Jessie, Jasser, Seo-yoon are common early offensive joiners.
HQ joiners
Offensive/Bear-style joiners are strongly represented in recent high-difficulty community testing.
Jessie, Jasser, Seo-yoon; later generations can provide stronger equivalents.
HQ garrison/bonus source
The strongest player should lead with the best current combination for the formation. Later-generation community testing frequently uses a strong Infantry lead + Molly + best Marksman.
Examples reported at later generations include Hector + Molly + best Marksman. Earlier states must substitute their strongest available heroes.
Patrick warning: Patrick is excellent for many true defensive garrisons, but do not automatically make him the Crazy Joe HQ joiner. Recent community testing favors offensive joiner buffs such as Jessie/Jasser/Seo-yoon for maximizing Joe kills. Test your own HQ report because generation, difficulty and lead stats change the result.
HQ Wave 10 & 20 — ratios are generation/difficulty dependent
There is no single universal HQ ratio. Community sources currently disagree because different alliances are testing different Joe difficulties and hero generations. The guide therefore gives tested starting profiles rather than pretending one ratio is always correct.
Situation
Community-tested starting point
Use when
Wave 10 · traditional
30% Infantry / 70% Lancer / 0% Marksman
Common published damage-oriented Wave-10 setup.
Wave 10 · simple/safe
Infantry-heavy or even 100% Infantry
Lower difficulties where HQ 10 is already an easy clear and simplicity/fairness matters more than optimization.
Wave 20 · traditional
60% Infantry / 40% Lancer / 0% Marksman
Published survival-oriented setup for alliances using the older frontline model.
Wave 20 · high-difficulty modern meta
Marksman-heavy to 100% Marksman
Recent 2026 high-difficulty testing increasingly reports stronger results when Joe survives long enough for Marksman damage to matter.
Best rule: standardize the formation for everyone, record the HQ battle report, and change one variable at a time. If one member sends a completely different troop type, that member can capture a disproportionate share of Joe's finite kills and make the test—and personal-score comparison—misleading.
How to optimize HQ fairly
Cap each member's troop count so more members can fit into HQ when participation is the goal.
Use the member with the best relevant stats/capacity as the HQ lead.
Do not blindly copy ratios from a Gen-10+ alliance into a Gen-1/Gen-2 state.
Compare enemy troops killed, clear percentage, troop-type kills and hero buffs in the report.
If Wave 20 is already being killed completely, optimize participation/fair point distribution rather than chasing theoretical extra damage that cannot create more kills.
If Wave 20 is not clearing, test a Marksman-heavy formation and offensive joiner mix against your current formation.
Farm / alt strategy
Farm accounts can be valuable reinforcement targets. An online, lightly defended farm lets a main account place a strong reinforcement march where it can take a large share of the kills. Keep farms close enough for fast march movement and ensure they remain valid Joe targets. This is a community optimization tactic, not a requirement for normal play.
Do not turn farm optimization into alliance sabotage. The alliance objective is still to clear the event and keep enough viable cities/HQ defenders. Personal-score farming should follow leadership rules.
Common score killers
Healing during Joe. It repopulates your city and disrupts reinforcement kill sharing.
Going offline before 7, 14 or 17.
Leaving all Infantry/Lancers home instead of swapping them into allies.
Reinforcing a city that has already failed twice.
Forgetting to recall the assigned march after waves 9 and 19.
Random HQ troop ratios that make kill distribution inconsistent.
Using a higher difficulty merely for prestige when the alliance cannot clear the late waves.
Putting out fires mid-event instead of leaving the setup alone.
R4/R5 maximum-score plan
Post the difficulty, city-swap rules, online requirement and NO HEALING rule before start.
Assign reinforcement partners or zones so five marches do not pile into one city while another has none.
Announce 7 / 14 / 17 ONLINE and HQ 10 / 20 in alliance chat.
Publish an exact HQ troop cap + ratio for that run.
After Joe, collect Wave-10 and Wave-20 reports from the lead and top scorers.
Only raise difficulty when the alliance is reliably surviving the late waves and HQ 20.
Quick alliance post
CRAZY JOE: DO NOT HEAL OR PUT OUT FIRES until event ends. Lock your 3 strongest home heroes. Send Infantry + Lancers to reinforce others; leave Marksmen home if you can't empty everything. STAY ONLINE for 7/14/17. HQ ONLY on 10/20—follow the posted troop cap/ratio. If a city fails twice, recall and move to another target.
Strategy basis: current community guides and player testing. Crazy Joe HQ ratios vary by difficulty, hero generation and alliance stats, so HQ formations above are starting profiles to verify against your own battle reports rather than permanent game constants.
Polar Expedition
1-troop trick: downtime reduction, NOT march speed. Sending a single troop can make the attack/death cycle resolve quickly so you can begin the next cycle sooner. It does not make the march travel faster.
Why it works
A full march that dies can create a longer interruption before you can attack again.
A one-troop march resolves the death cycle with minimal troop commitment.
Over a fixed event window, that can give you more attack attempts.
Use it correctly
Use one-troop cycles for objectives where repeated attack attempts are the goal.
Do not use the trick when the objective requires a full combat march to survive.
Do not describe it to members as a “march-speed buff.”
Fortress, Stronghold & Facility Capture — Rally First
Reserve the opening NPC clear for a coordinated rally. A solo arriving first can consume the participation opportunity that a rally would share. Reinforcing afterward does not recreate that opening reward.
Fortress / Stronghold rewards are separate buckets
Reward / condition
Who benefits
Leadership action
Opening participation
Eligible participants in the first successful NPC-clearing attack; use a rally to include several members.
Keep solos away until the planned opening rally lands.
First occupation alliance reward
Eligible members of the alliance achieving initial occupation.
Being first matters; do not equate this with personal rally participation.
Allocatable reward pool
Members selected by R4/R5, within the game's allocation limits.
Publish a fair distribution policy; joining does not guarantee every item.
Control / successful holding rewards
Eligible members under the target's control and event rules.
Secure the hold; an opening clear alone is not final ownership.
Check View → rewards/rules on the actual target. Reward chests, materials, buffs and hero shards can vary with building and state progression. Do not promise a fixed item list or treat battle points as participation loot: defeating enemies is a separate scoring condition.
Facilities are a different system
Facilities provide alliance buffs. The official wiki describes rewards for the controlling alliance on the facility's first contention. It does not establish the same personal rally-participation payout as Fortress Battles. Rallying remains the alliance's coordination policy; check that facility's first-capture rewards and territory/hold requirements before announcing loot.
Opening rally checklist
R4/R5 names one rally leader, target and arrival time. Confirm registration or territory eligibility.
Make room for eligible members; use a troop cap that lets more players join while keeping enough strength to win. A rally has finite slots, so it cannot reward the whole alliance as participants.
Check for faster solo marches. Order recall before they hit; never tell a solo to speed up ahead of the shared rally.
After the opening clear, reinforce and follow the hold plan. Check mail and distribute the leadership-controlled pool according to policy.
Copy to alliance chat
FORTRESS / STRONGHOLD: Do NOT solo the opening NPCs. Join the marked leadership rally so its participants can share the first-clear reward opportunity. Later reinforcement is not the same reward. Wait for R4/R5 orders.
FACILITY FIRST CAPTURE: No unauthorized solos. Join the assigned rally and follow R4/R5 orders. Leadership will check the target reward screen and hold requirements. Facility rewards differ from Fortress/Stronghold rewards; do not rush the capture.
Do not spend every speedup the moment you receive it.
Coordinate Construction, Research, Training, Hero Development and Power Boost spending with the current scoring day.
Use alliance announcements to tell members exactly what to spend and what to save.
High-value players should coordinate their major power pushes rather than competing internally for the same resource pool.
Battle Phase
Follow the state commander's target list.
Know the difference between killing for points and fighting for an objective.
Protect key players and rally leaders; a zeroed player is no longer useful to the operation.
Do not attack outside approved targets or NAP arrangements.
Sunfire Castle is the central objective during the Castle portion of the Battle Phase.
SVS Castle timing
When the Castle portion begins at 12:00 UTC in the standard schedule, the current 5-hour Castle window ends at 17:00 UTC. The 14:30 UTC point is the practical clean-win deadline: after that, a new 2.5-hour consecutive hold cannot finish.
Sunfire Castle — Current Rules & Battle Plan
5 hoursCurrent maximum Castle Battle duration.
2.5 hoursContinuous occupation required for an immediate win.
14:30For a 12:00 start, the latest possible start of a full 2.5-hour clean win.
Important update: current 2026 sources report the Castle Battle at 5 hours with a 2.5-hour consecutive-hold win condition. Older material — including older official Help Center text — can still show 6 hours / 3 hours. Do not build the plan around the old numbers.
Victory conditions
Hold Sunfire Castle for 2.5 consecutive hours and win immediately.
If nobody reaches that consecutive hold during the 5-hour battle, the alliance with the longest total occupation time wins.
The two battle phases
Before the clean-win deadline Break an enemy's continuous hold before it reaches 2.5 hours. Even a successful recapture resets their consecutive occupation.
After the clean-win deadline A new 2.5-hour hold is impossible. Total occupation time becomes the key objective, so pointless flipping becomes less valuable.
Opening plan
Have the rally, garrison, turret and shot-caller roles assigned before battle.
Move active fighters into useful positions before the fight; respect the Alert Zone's teleport/shield rules.
Do not burn every major march in the first push.
Capture and contest Turrets rather than treating them as decoration.
Attack plan
Use coordinated rallies rather than isolated solo attacks.
Double rally pressure can make a defender choose which incoming rally to absorb and can keep pressure continuous.
Use Jessie as the attack rally joiner.
Use your strongest current-generation rally captain for the actual lead. Jessie is not automatically the best captain simply because she is the joiner.
Save teleports for the phase where positioning decides whether a rally lands in time.
Defense / garrison plan
Keep the Castle garrison continuously reinforced.
Use Patrick in Slot 1 when joining the defensive/garrison rally.
Keep a reserve of players able to reinforce instead of putting every player into one attack.
Rotate damaged marches and communicate who is available for the next rally.
Turrets
Four Turrets surround the Castle.
Turrets can pressure the Castle holder when controlled by the opposing side.
The longer a Turret remains occupied, the more frequent its attacks become.
If your side holds the Castle and a Turret, that Turret does not damage your Castle garrison.
Infantry are especially important around Turrets because turret targeting prioritizes Infantry.
Storm / Alert Zone
Cities inside the Alert Zone can be randomly teleported by the storm before the battle.
After the storm stops, players can teleport into the Alert Zone.
Entering the Alert Zone affects shielding. Treat the battlefield as an active combat zone, not a safe parking area.
Sunfire quick call
Before 2.5h is impossible: break enemy holds. After that: maximize total Castle occupation. Turrets, reinforcement volume, rally timing and positioning decide whether your alliance can sustain the hold.
ALLIANCE — LEADERSHIP & CONDUCT
Alliance Leadership & R4/R5 Operations
R4 is a job, not a decoration. Strong alliances generally divide officer work into named responsibilities so one R5 does not have to run every event, roster, territory decision and diplomatic issue alone. Current WOS community officer guides identify recruiting, Bear Trap, SvS/war planning, fortress rotations, events, territory and communications as common R4 responsibilities. WoS Guru R4/R5 · WSCO officer ops
Core R4 responsibilities
Role
What the R4 owns
Recruitment / HR
Review applicants, welcome new members, monitor activity, handle routine promotions/demotions within rank permissions, and flag inactive players for leadership review.
Bear Trap Manager
Set the schedule, post reminders, keep the trap organized, explain rally-lead/joiner rules, and watch attendance.
War / SvS Officer
Coordinate battle assignments, rally leaders, defensive reinforcements, target priorities and real-time updates. Work from the R5/state commander's plan rather than inventing a second war plan.
Handle sign-ups and reminders for Foundry, Canyon, Championship, Crazy Joe, Mobilization and other alliance events. Keep a single reliable event clock.
Territory Officer
Maintain banner paths, HQ placement, facility connections, territory cleanup and construction assignments.
Technology Officer
Monitor alliance technology donations, keep the current priority technology visible, and start research when requirements are met if the alliance's SOP assigns that task to R4.
Diplomacy Officer
Communicate with other R4/R5 leaders, maintain NAP/alliance agreements, document disputes and prevent members from turning minor incidents into wars.
Communications Officer
Keep alliance announcements, reminders and event instructions short, accurate and time-stamped. Put longer strategy in Discord or the alliance guide.
Academy / Mentor
Help newer players with heroes, formations, Bear Trap, events and basic combat so the main alliance gains stronger members instead of repeatedly replacing them.
What good R4 conduct looks like
Follow the chain of command. R5 sets alliance direction; R4 officers execute it and coordinate with each other.
Do not start wars by yourself. No attacking another alliance, retaliating, or changing a state-level agreement without the required leadership approval.
Document first, punish second. Save battle reports, screenshots and relevant chat messages when a dispute occurs.
Do not use rank as a reward for friends. Assign responsibility based on reliability, activity, judgment and communication.
Give members a clear answer. If you do not know a rule, verify it rather than guessing and creating a second problem.
Stay neutral during disputes. An R4 should de-escalate first and let leadership decide punishment or retaliation.
Keep event instructions consistent. One officer should own the event clock and another should be able to cover that role when the primary officer is offline.
Small alliances can combine jobs. Large or highly competitive alliances should assign clear owners and backups. Community officer checklists also emphasize roster checks, territory/facility checks, technology priorities, event assignments and communications as recurring officer work. WSCO officer ops
R4 daily checklist
Check roster activity and urgent member issues.
Check the next alliance event and who is responsible for it.
Check territory, vulnerable facilities and current construction needs.
Check alliance technology and the current donation priority.
Post only the reminders members actually need.
Check diplomacy messages or state-rule changes.
Before a major fight, confirm rally leaders, joiners, defensive assignments and the refill plan.
Leadership principle: The best R4s make the alliance easier to run. They prevent confusion before it happens, keep members informed, and solve routine problems without forcing the R5 to micromanage every decision.
Alliance operating standard
R4/R5 operating standard
Assign event roles before the event begins.
Publish exact rally times and the approved Slot 1 joiner heroes.
Maintain a clear attack/defense chain: members → R4 → R5/state leadership.
Keep battle reports and logs available when an incident occurs.
Use short, time-stamped announcements during active events.
Attack rule
Do not attack another alliance without leadership approval. If you are attacked, send the battle report/log to leadership before retaliating.
Tundra HQ Operations
When to move the Alliance HQ into Tundra
Do not move just because Tundra opens. Move when the alliance has the required resources, a planned destination and enough coordination to make the relocation useful. The goal is to improve access to Tundra resources and important facilities without destroying a useful Icefield setup.
Prepare before unlock. Build the alliance-resource stockpile and extend territory toward the Tundra side so the alliance can reach the resources needed for the move.
Scout the destination first. Identify higher-level resource areas, Alliance Iron Mines, Fortresses, Strongholds and facilities that actually matter to your alliance.
Use the Tundra/Fertile border intelligently. The HQ must be on legal Icefield/Tundra territory, not Fertile Land. A border position can give useful access without pushing the HQ unnecessarily deep into Tundra.
Build around objectives. Plan banner routes from the HQ toward the facilities and resource areas you intend to use. Do not choose an HQ location merely because it looks central.
Keep the hive practical. Members still need short, useful travel paths for rallies, gathering and defense. A strategically perfect HQ is not useful if the hive becomes scattered.
Coordinate before construction. R4 territory leadership should publish the HQ location, first banner route and initial hive plan before anyone starts teleporting.
Why move Better access to higher-level resources and selected Tundra objectives, while creating a long-term operating position for the alliance.
Critical: The Alliance HQ cannot be built on Fertile Land. The HQ location must satisfy the game's current territory-placement rules.
Community territory map reference. Use the live World Map for your state's actual facility positions and boundaries; this image is a planning reference only.
Jump-start the Tundra move
Stockpile alliance resources before the move becomes available.
Extend territory toward useful Tundra resource areas and Iron Mines where the map permits.
Have the territory officer pre-mark the HQ location and first banner route.
Keep useful Icefield connections instead of demolishing everything simply because the Tundra HQ exists.
Pre-plan the hive and Bear Trap positions so members do not scatter after the move.
State Culture & Custom Signals
State custom — not an official WOS rule. Some states use a “one lancer salute” as a joke or greeting between players or alliances.
Send one Lancer with no heroes.
It is normally used as a harmless greeting or inside joke between players who understand the custom.
Because it is still a march toward another player, do not use it against another alliance unless the custom is clearly agreed upon.
An unannounced one-unit attack can be interpreted as hostile action, especially in a state with NAP or war rules.
The point is entertainment, not damage. It is not a scouting method or a reliable combat test.
Best practice: If your state has not explicitly adopted the salute, ask leadership or the other alliance first. “It's only one troop” does not automatically make it acceptable.
Leadership — Stop Unauthorized Solos Without Losing the Team
Make the no-solo rule clear before capture time, explain the reward reason, and assign one officer to watch incoming marches. This is an alliance policy: the game allows some solo attacks, but a legal attack can still undermine a shared opening rally.
Send a direct recall now instruction and identify the target. Check for language or notification problems before assuming defiance.
For a Fortress or Stronghold, participation requires the alliance to have registered for the target and the member to meet the event's membership cut-off before reset. If someone ignores the recall order and sends a solo ahead of the assigned rally, R4/R5 can temporarily remove them from the registered alliance: removal takes away their eligibility to participate and prevents the unauthorized solo capture. This is an event-eligibility mechanism, not a general claim that every kind of march is recalled when someone is kicked.
Explain privately why they were removed. Keep the reason factual: ignored hold/recall order, endangered shared reward opportunity, or killed a Captain early.
Offer a reinvite after acknowledgement when allowed, but explain that returning does not automatically restore Fortress/Stronghold eligibility for the current round. The registration and membership cut-off still apply. Do not promise an immediate return to the battle.
Act before the solo lands; removing someone after the capture cannot restore the opening rewards. Apply the same policy consistently, record repeated violations, and avoid public humiliation. Do not extend the Fortress/Stronghold eligibility rule to Facilities or Mercenary Captains.
Recall order
RECALL your solo march now. Do not speed it up. The opening capture is reserved for our assigned rally so more teammates can qualify for rewards. Reply when recalled. R4/R5 may temporarily remove members who ignore the order.
You were temporarily removed to stop your unauthorized Fortress/Stronghold solo and protect our rally rewards. Leaving the registered alliance removes battle eligibility. Message R4/R5 and confirm you will follow orders for a reinvite; this round's eligibility may not return.
Objective-ready marches, refined FC/Flame Tech, gear, pets, Experts and coordination
Build a high Power account that cannot deploy, heal or arrive on time
Combat decision tree
Scout → inspect stats/report → identify counter → choose solo/rally/reinforce → verify march → commit → read the report → adjust. Do not use raw Power alone as a win guarantee.
Event decision tree
BANK → ALIGN → EXECUTE → RECOVER. Bank resources until the scoring category is known. Align with the alliance/state plan. Execute only to the reward breakpoint you actually want. Recover stamina, healing, marches and queues immediately.
Alliance communication rule
Use one event clock and UTC times.
Publish roles, targets, rally leads, approved joiners and reserve assignments before the event starts.
During combat, use short timestamped calls instead of burying orders in chat.
If a rule is state-specific, the state rule overrides a generic guide recommendation.
Use /ac guide immediately. Anyone can browse the guide without a site account. To show alliance plans, your R4/R5 opens Alliance → Discord settings and adds each member’s unique Discord username, one per line. Use account usernames, not display names or server nicknames. One hosted bot serves many alliances and servers; no hosting, guild IDs or advanced configuration is required for basic use.
Existing site members may use /ac link with their site linking code. Alliance replies are private. Username-list members receive viewing access only; site leadership permissions still require a linked authorized site account. Advanced channel feeds are optional.
Command
Purpose
/ac help
Show all commands
/ac setup
Simple alliance setup instructions
/ac guide
Browse topic dropdowns; search is optional
/ac profile
Show your linked identity and alliance
/ac link
Enter your site linking code
/ac plans
Public published plan summary
/ac bear
Public Bear Trap plan and PNG; options: png
/ac territory
Public Territory plan
/ac castle
Public Castle plan
/ac members
Alliance roster
/ac votes
Alliance vote board
/ac state
State info; options: notice or rules
/ac alliance
Alliance notices
/ac council
Council information
/ac rules
Published state rules
/ac president
President information
/ac election
Election information
/ac appointments
Minister appointments
/ac codes
Gift code directory
/ac rt
Rally timers; options: 2 10
/ac svs
SVS command room
/ac subscribe
Optional channel feed; options: state or alliance
/ac unsubscribe
Stop a feed; options: state or alliance
/ac vote
Open your state election website to vote
/ac redeem
Redeem a gift code using existing account checks
Enter arguments in the options field shown by Discord. For a rally timer, use /ac rt with options 2 10. Watcher commands and generic ! commands are retired. /ac vote opens the protected election board. /ac redeem retains existing account checks.
Use /ac-rickroll to post Rick Astley’s GIF and music video publicly. Bear, Territory, Castle and Plans requests also post publicly in the current channel. Members select their own alliance through their linked account or the simple Discord username list; multiple alliances can share a state server. No server ID is needed for these requests.
Linking and permissions
Install once per Discord server. Every member’s request follows their current site alliance and state, or their alliance’s simple username list. No Guild Link or Discord role mapping is needed. A shared state server can contain several alliances.
Leadership must link with a one-time code from Alliance → Linking using /ac link (options: code). Use /ac-admin to open controls authorized by the linked site account: alliance administration, council, president, minister appointments and Master Control. Username lists grant viewing access only.
Guide and Rickroll are public. Requested plans post in the requesting channel. Account information and leadership controls stay private. Editing and voting use the existing protected website pages.
Copy/Paste Alliance Messages
Message Creator
0 / 300
Messages are split at word/line breaks when possible.
Sources
Sunfire Castle: current 2026 sources report 5-hour maximum duration and 2.5-hour consecutive occupation for an immediate win, with longest cumulative occupation as fallback. The change is associated with the later update that reduced the earlier 6-hour / 3-hour format.
Foundry: the Whiteout Survival Help Center states that leaving and returning can heal injured troops, the return takes 12 minutes, and the battle lasts 1 hour.
Hero Gear: current WOS Guru material documents the four Hero Gear slots, priority pieces, Enhancement/Mastery progression.
Exploration/Arena: current Arena and Exploration references support the Season 1 F2P five of Sergey, Jessie, Molly, Bahiti and Gina, and the Gen 1 spender lineup of Jeronimo, Natalia, Molly, Bahiti and Zinman.
Research: current Research Center references confirm the Growth, Economy and Battle trees, prerequisite gates and the value of Research Speed/Construction Speed early in progression.
Bear Trap: current Bear Trap references agree that only the first hero's first Expedition skill from a joiner enters the joiner-skill pool and that four eligible joiner skills are selected. Current Season 1 Bear Trap practice uses Jessie, Jasser, Seo-yoon and Jeronimo as the key offensive joiner options, with Jeronimo generally better reserved as a rally captain when available.
Current official client/update reference: the August 17, 2026 client notes include the Auto-Join “Only Auto-Join After Exiting Game” option, up to 12 Squad presets under qualifying conditions, troop-ratio presets, improved World Map facility information, and other alliance-war interface improvements.
Official Tundra rule: Tundra contains Alliance Steel/Iron; Alliance HQ may be built on Icefield or Tundra, not Fertile Land.
Battle reports: official Combat FAQ and Special Bonuses documentation were cross-checked with current WoS Guru and community battle-report analysis; supplied screenshots are used as examples.
Farm creation: current 2026 community references confirm Profile → Settings → Characters → Create New Character and selecting the target state; official support confirms separate character progression and up to 6 march queues.
Gift codes/Monument: live WSCO/WOS Rewards trackers and current 2026 Monument references were checked; codes are intentionally not hard-coded because they expire.
Teleport reference: current community references distinguish Advanced, Alliance and Territory Teleporters; Territory Teleporters now allow landing adjustment before confirmation.
Web verification used: official Whiteout Survival Help Center Combat FAQ and Foundry Battle return guidance; current 2026 Bear Trap references from Whiteout Survival Wiki, WoS Guru, Whiteout Battlemaster and WOS Logs; and community discussions on Bear Trap joiners, troop ratios and preset organization. Current Bear Trap guidance was cross-checked rather than copied from one source.
2026 mechanics refresh: Tundra HQ placement, Alliance Auto-Help, hero-generation roadmap, current Gen 17 planning, squad preset improvements and current Bear Trap joiner guidance were cross-checked against official game/update material plus current community databases and discussions. Community tips are labeled as such; exact in-client numerical hero stats should be treated as live-game data.
2026+ Watchlist — Prepare Before the Content Arrives
Frostdragon Tyrant: current September 2026 references describe a major cross-state alliance battlefield with limited combatant slots, rallies and a new Dawn Honor achievement layer. Read the live event rules when it opens.
Fire Crystal Age city layer: current rollout adds Wish Station, Wish Sigils/Wish Shop and entertainment facilities that produce daily rewards. Rollout is state-dependent.
Experts: current community roadmaps place Justus after Gen 6 in October 2026; do not spend around an unconfirmed future kit.
Hero generations: the roughly 80-day cadence remains a useful planning model, but future hero names, skills and acquisition routes should be treated as unconfirmed until announced.
T12 / Flame Tech: once your state reaches this era, research materials expand beyond basic FC. Keep Steel, FC Shards, RFC and RSS in your long-term planning budget.


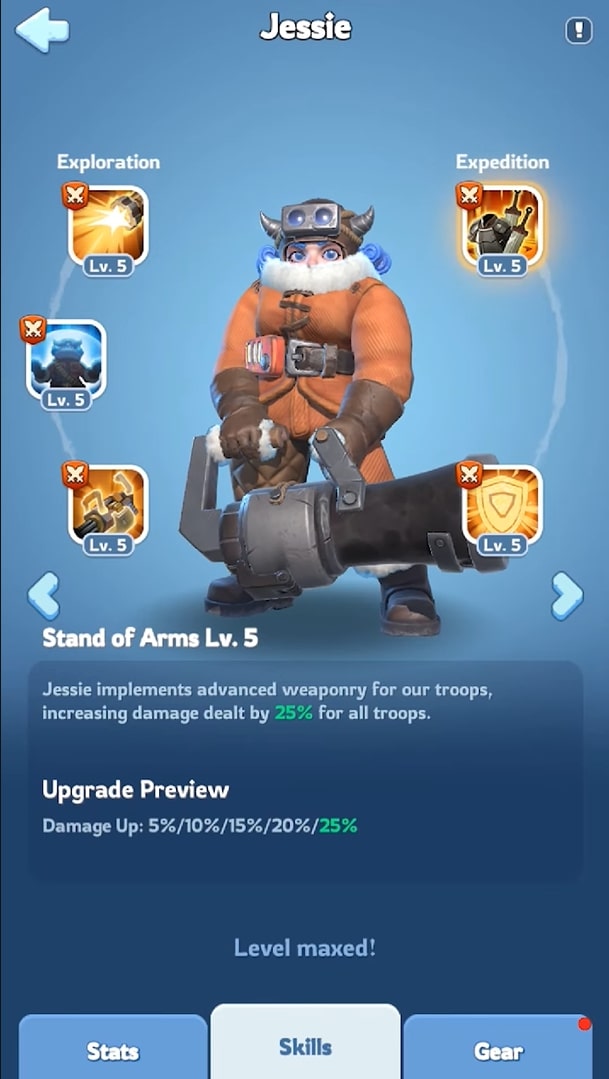
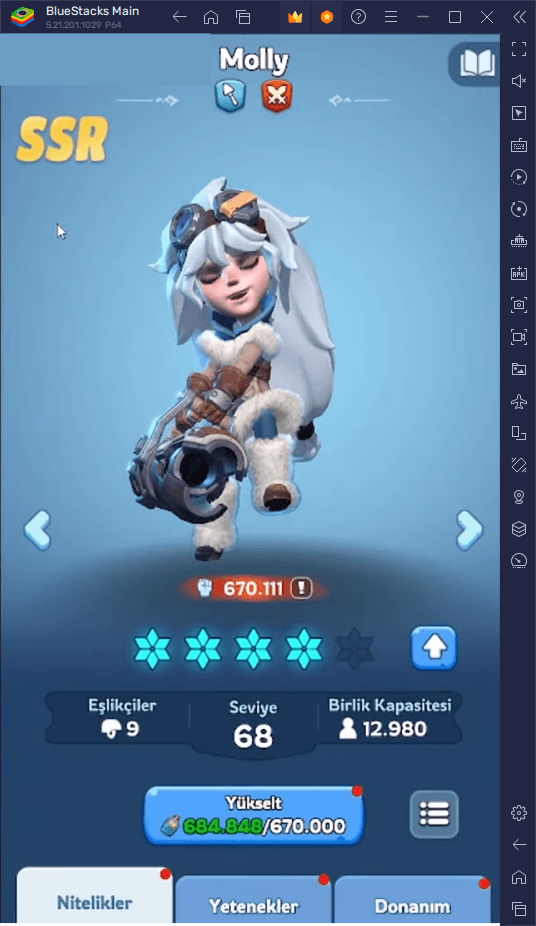
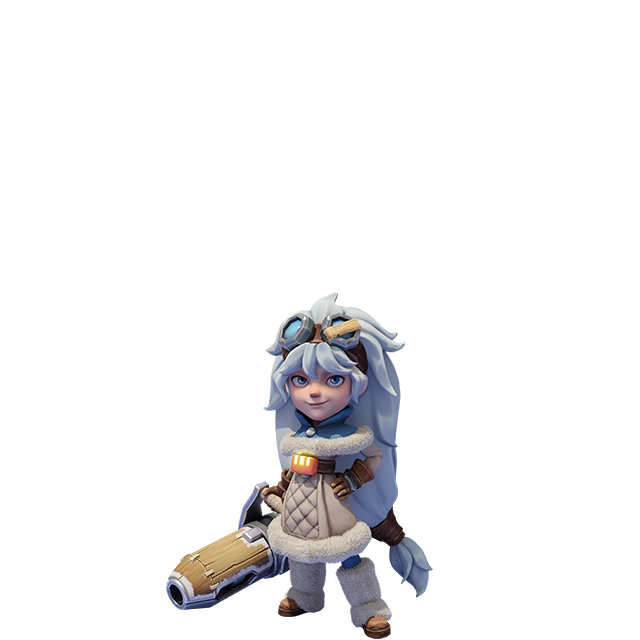

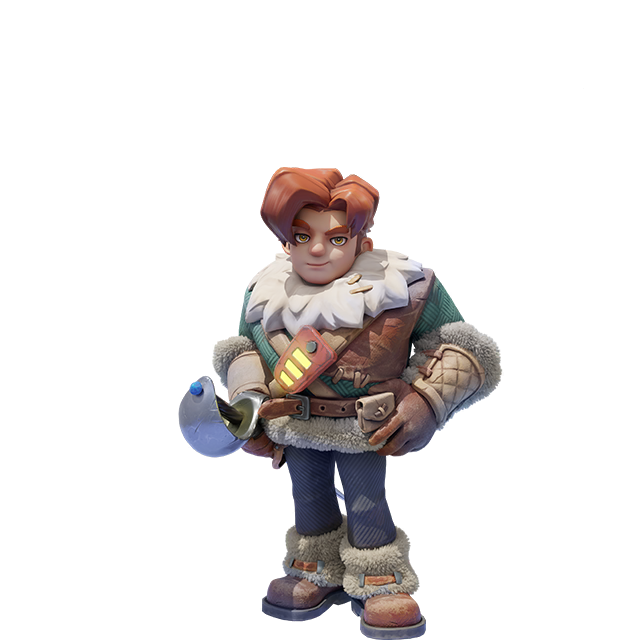
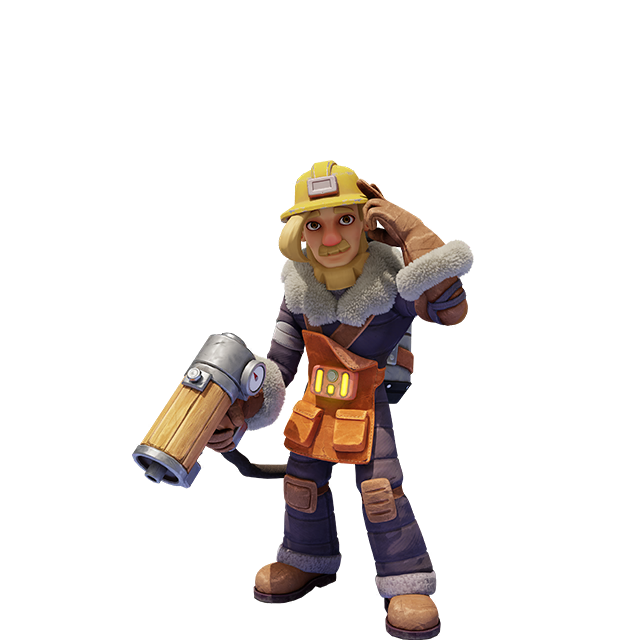
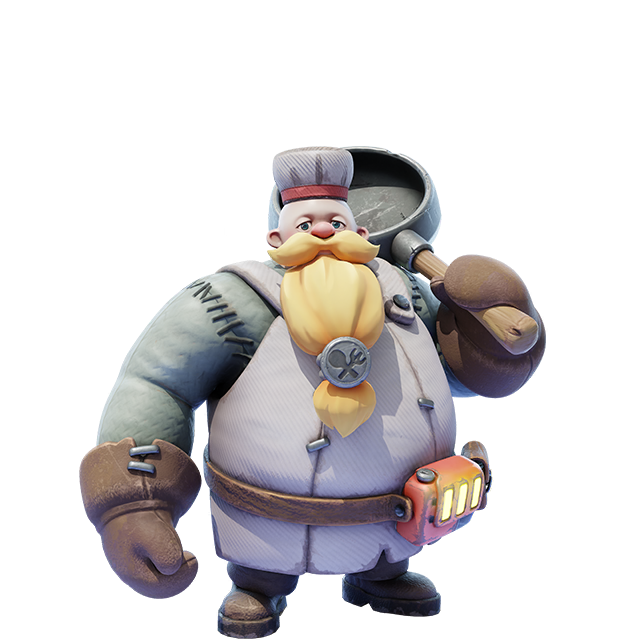
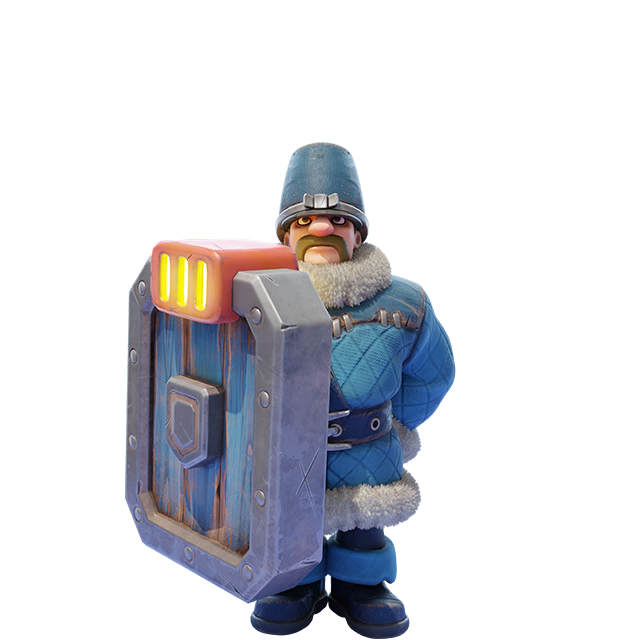
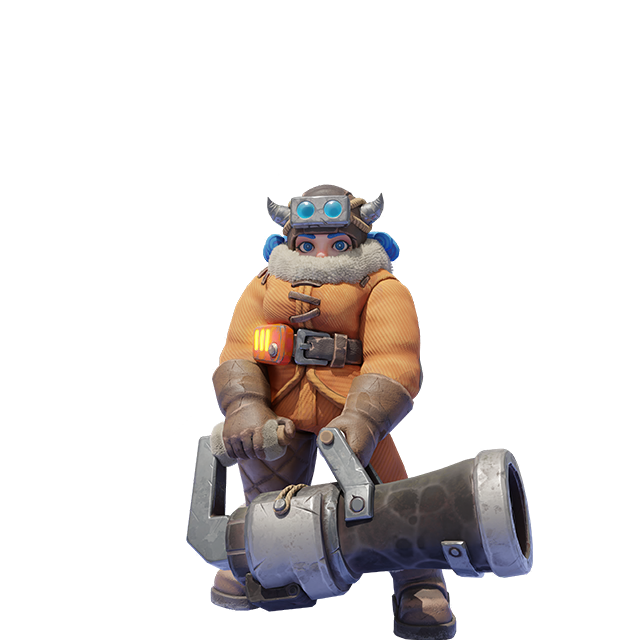

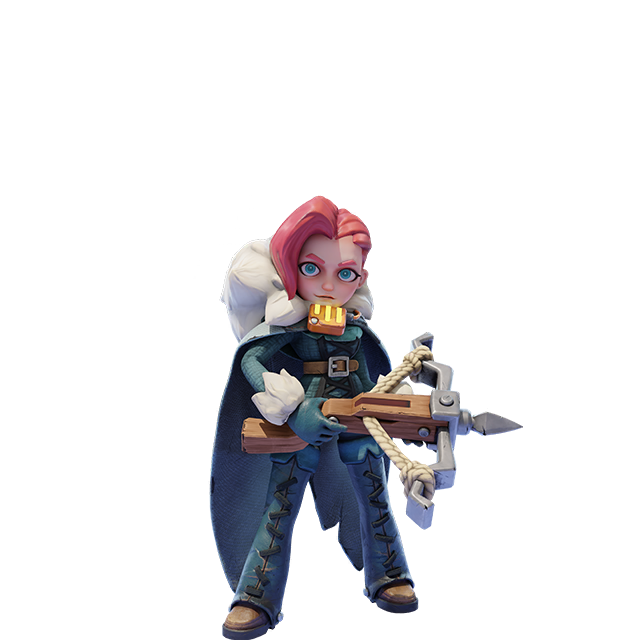

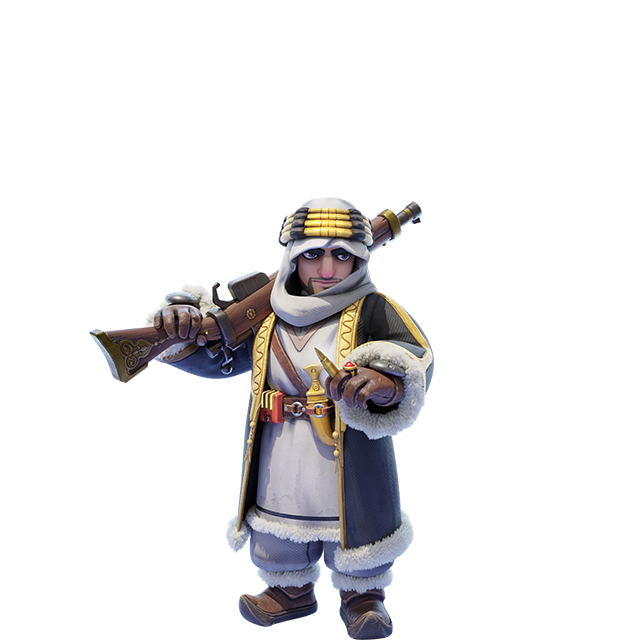
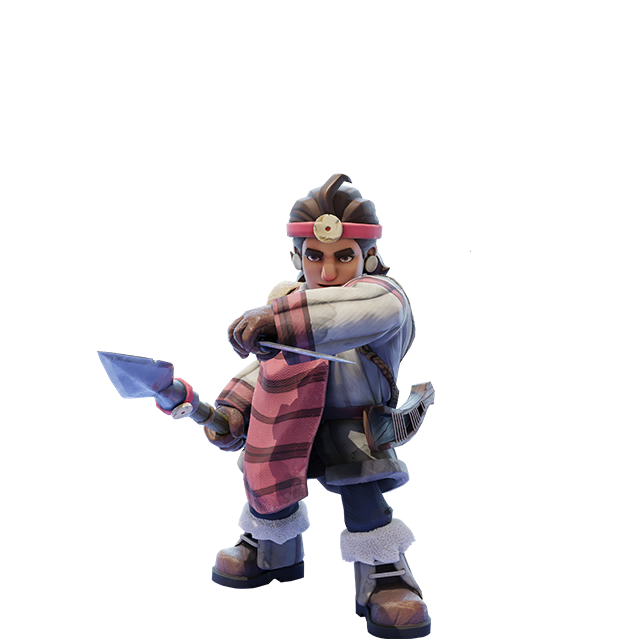
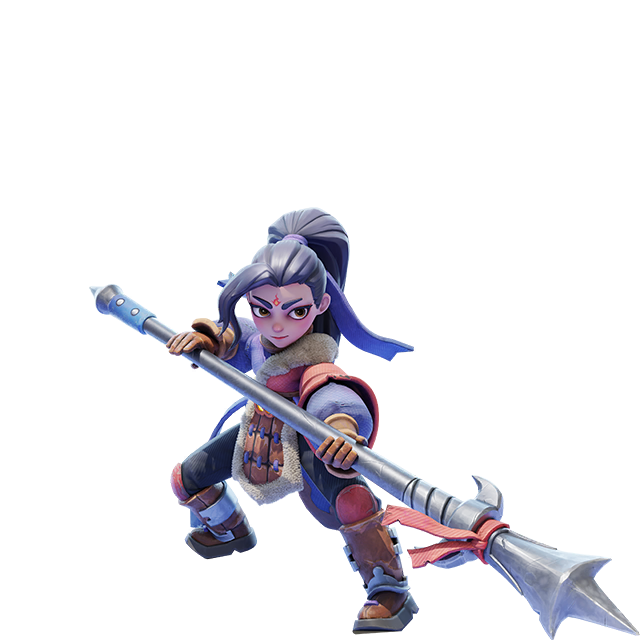
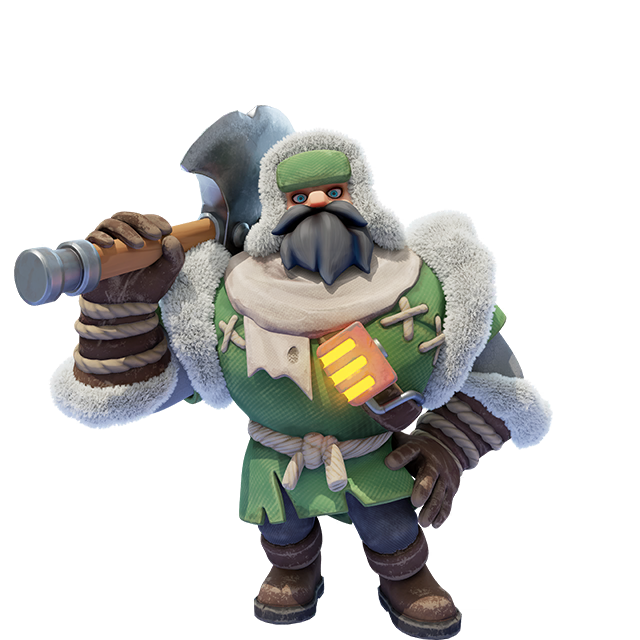
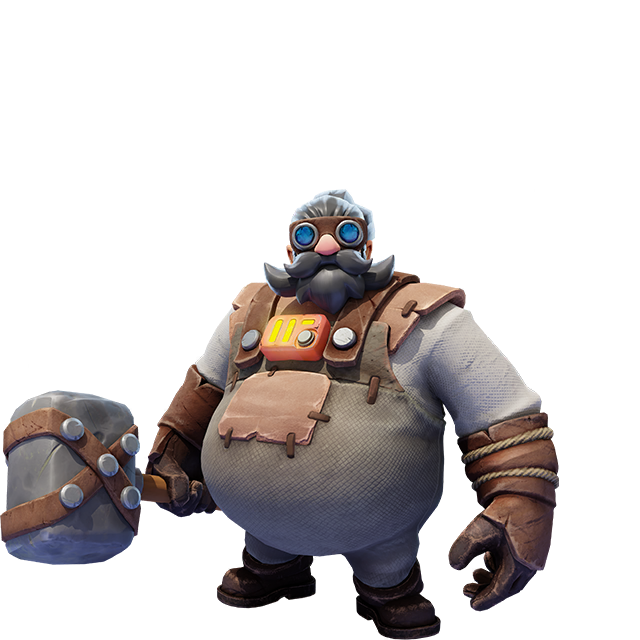
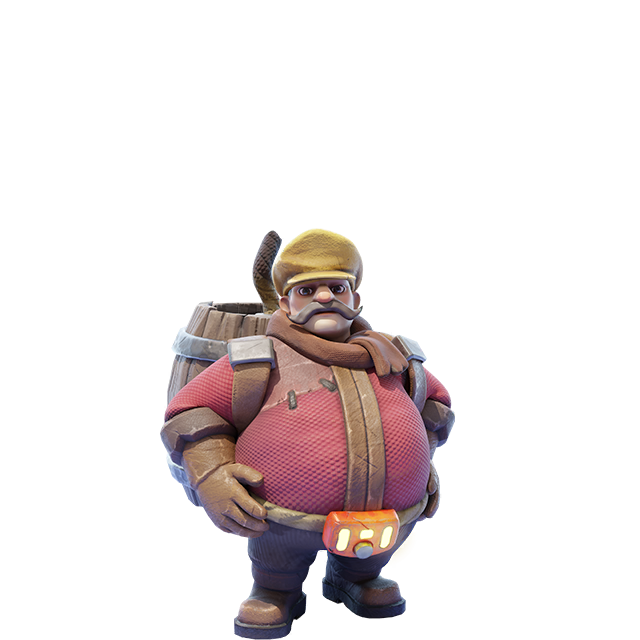
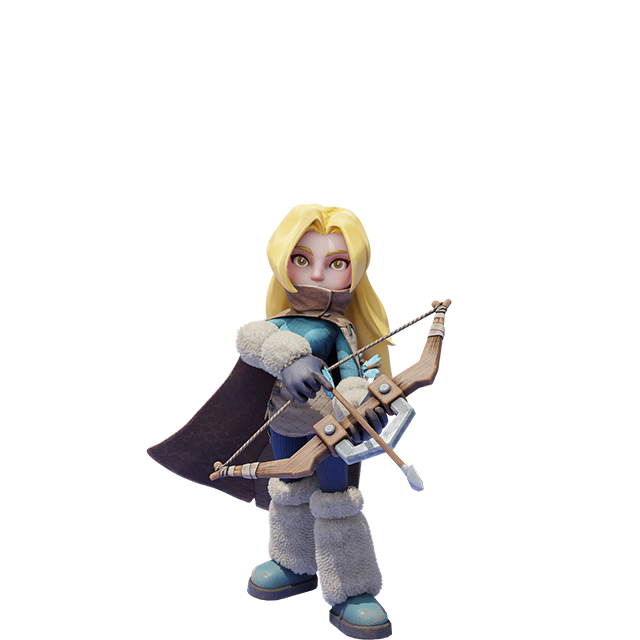
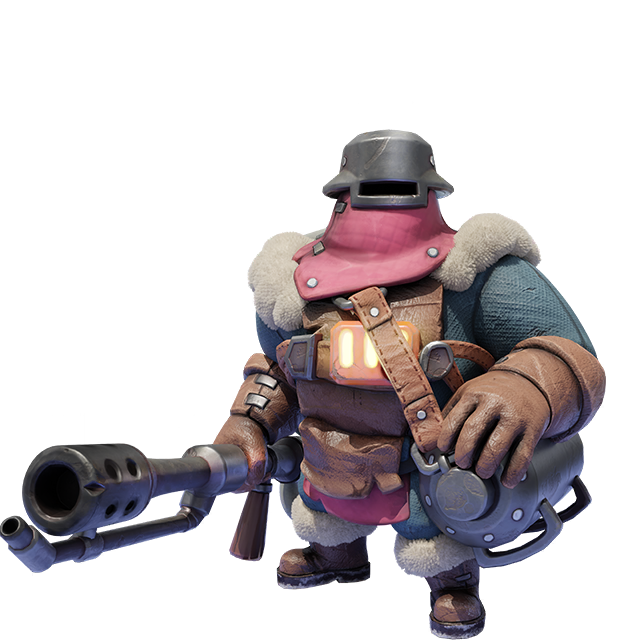
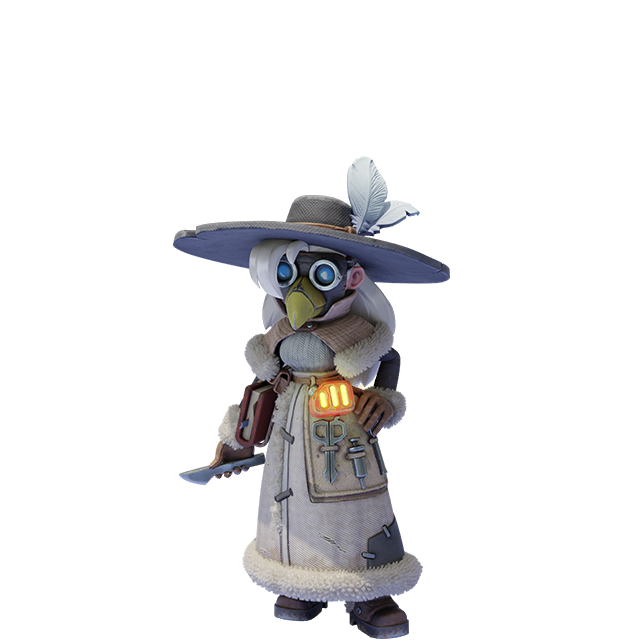
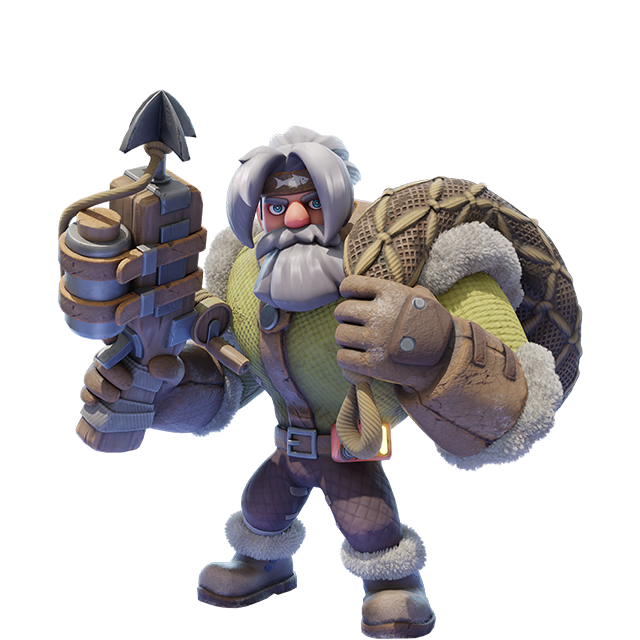
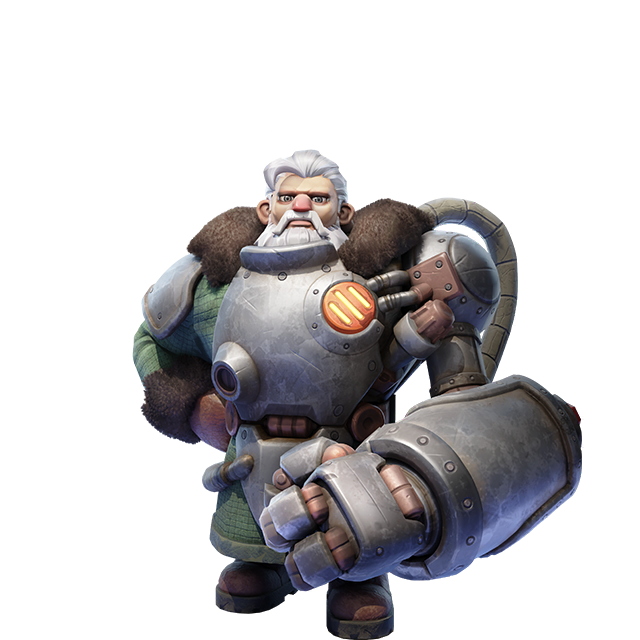

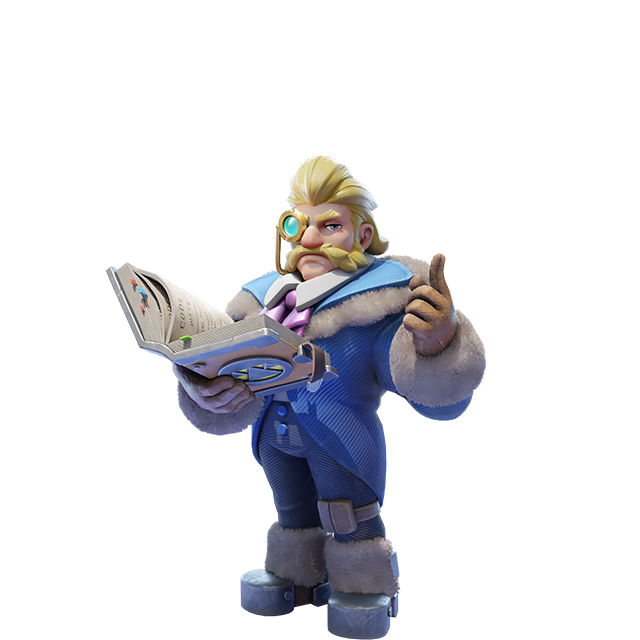
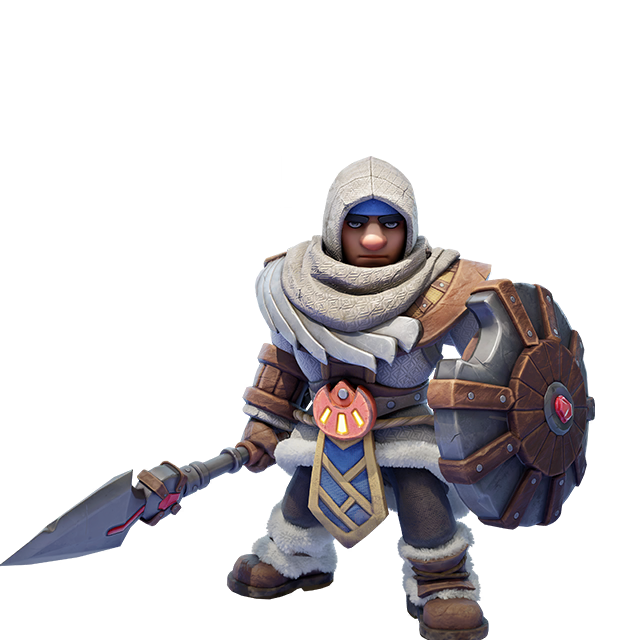

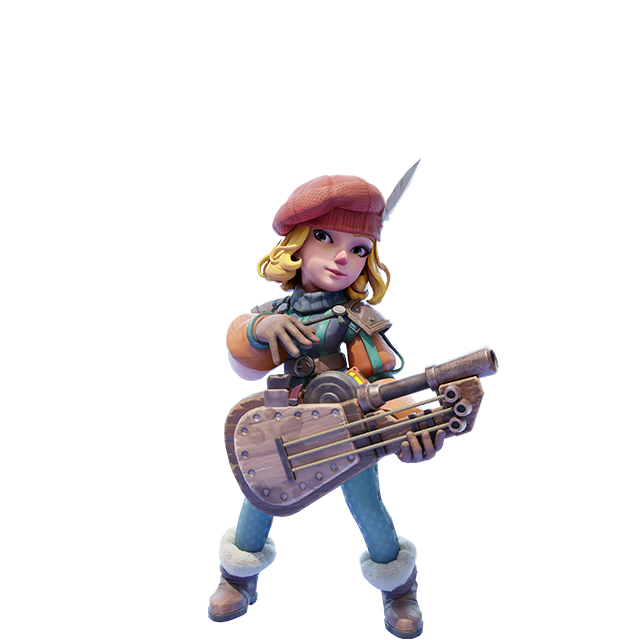
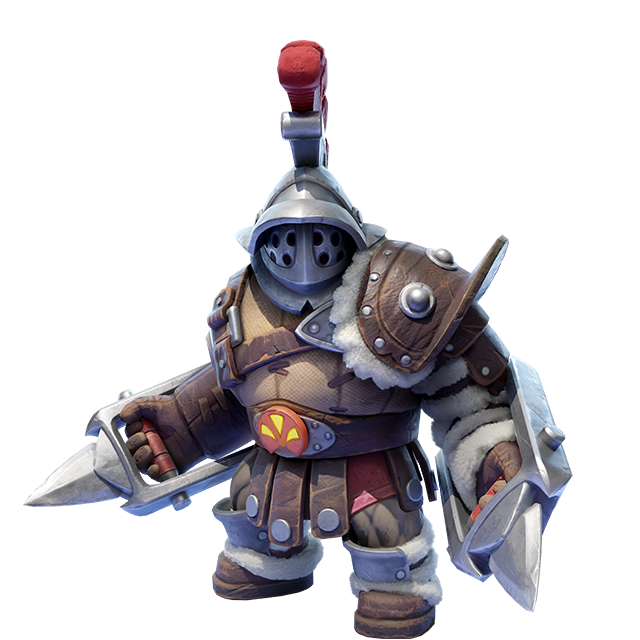
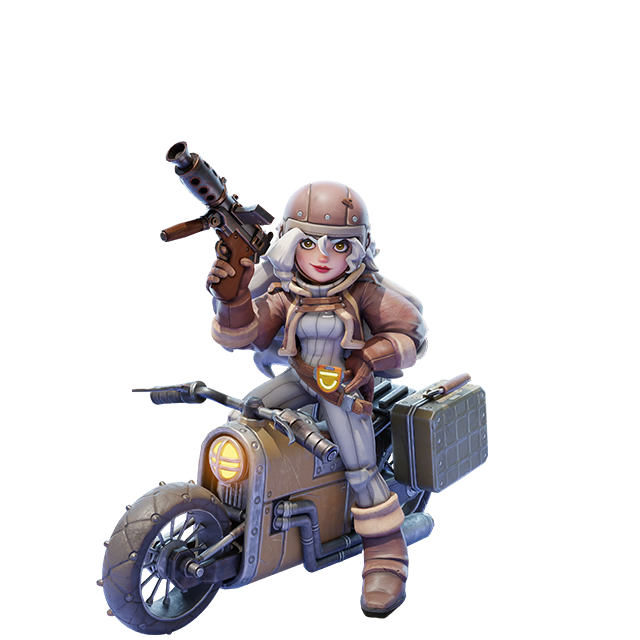


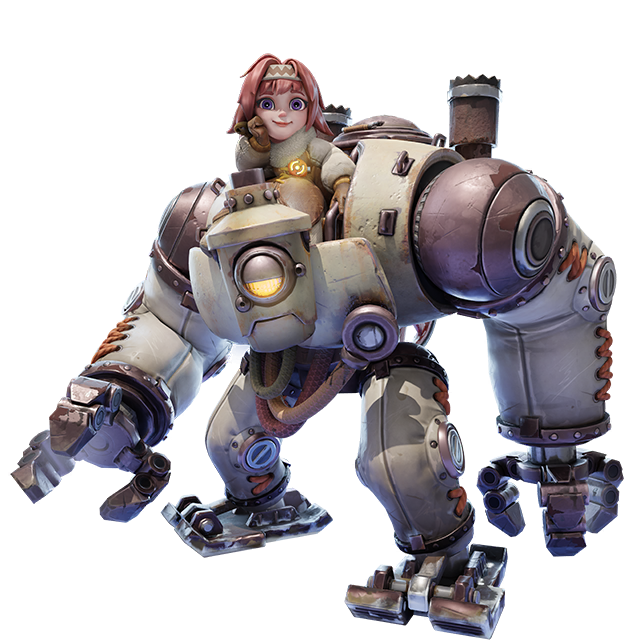
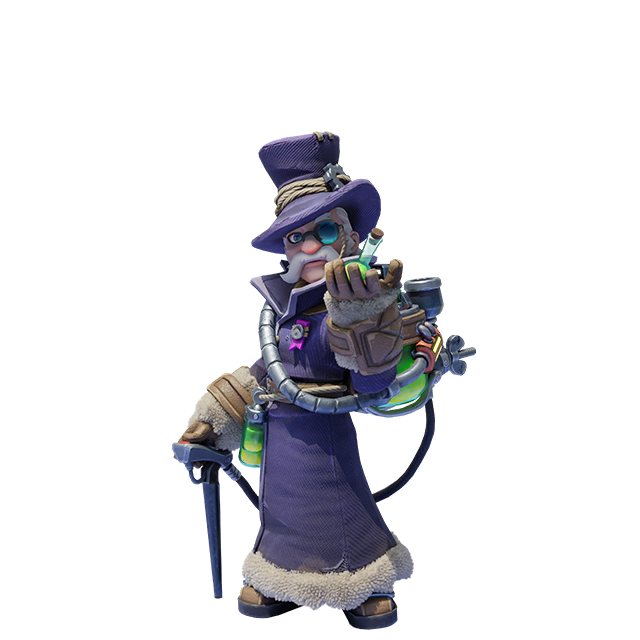
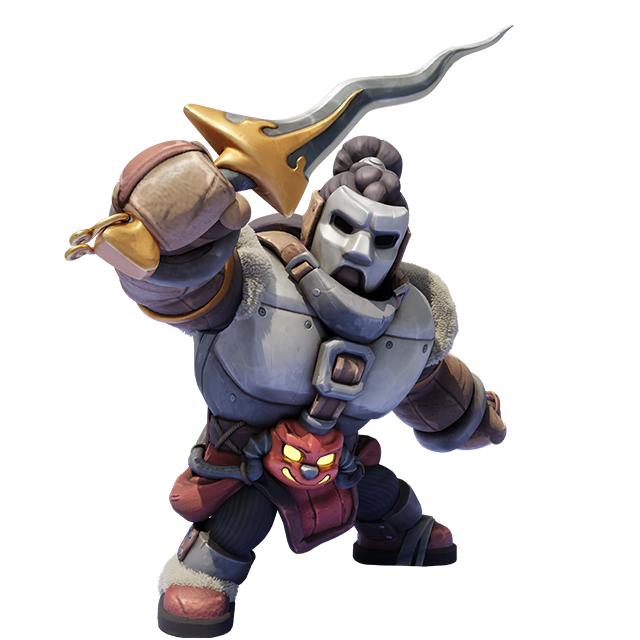
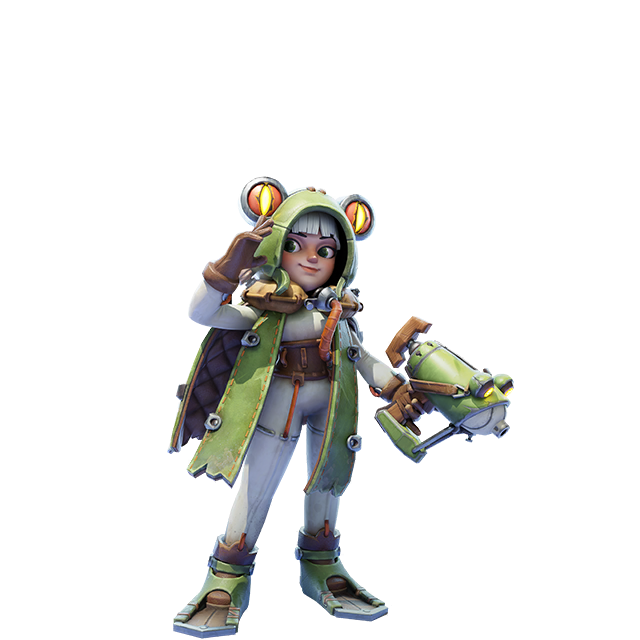
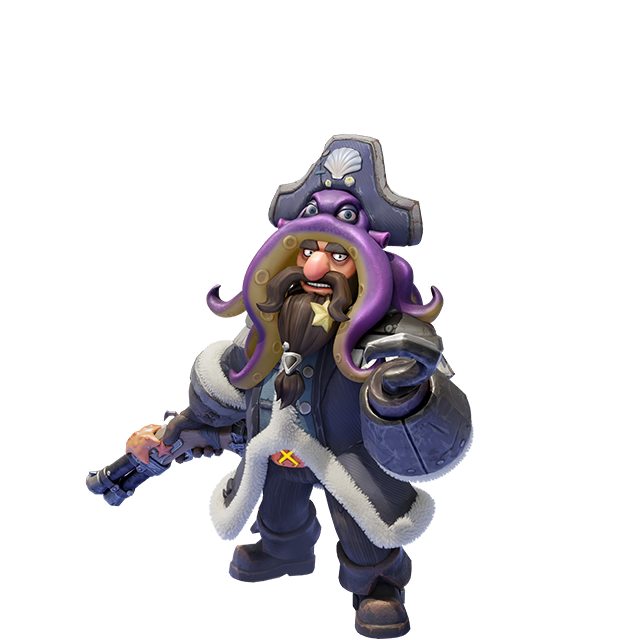
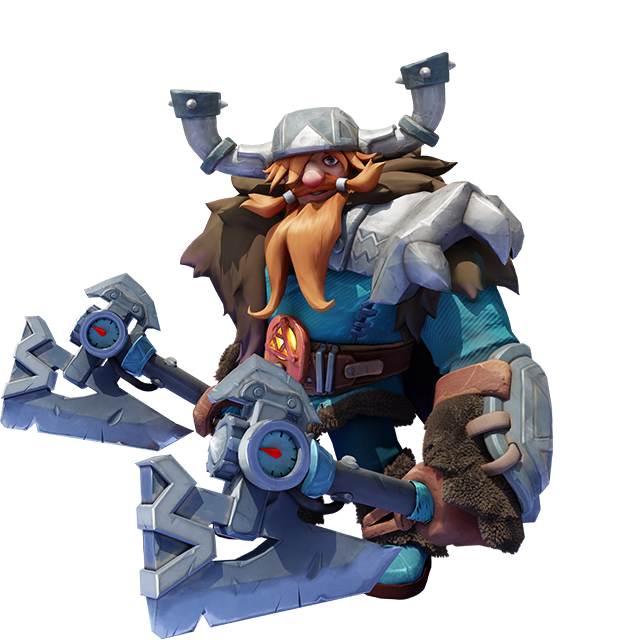
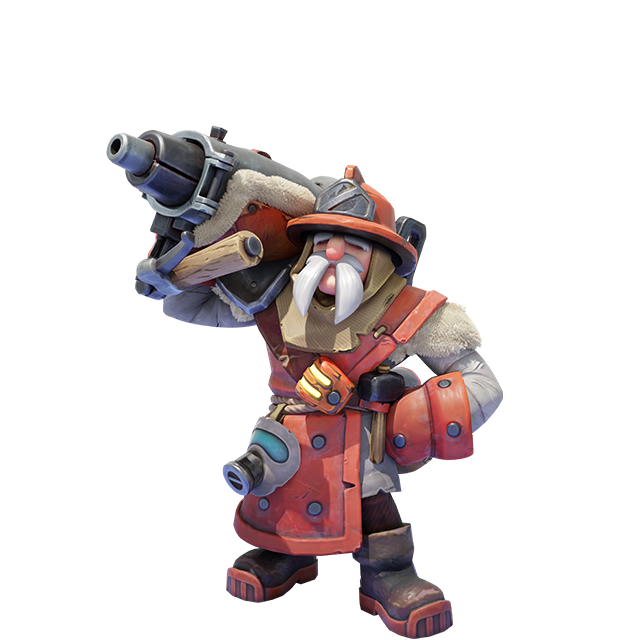
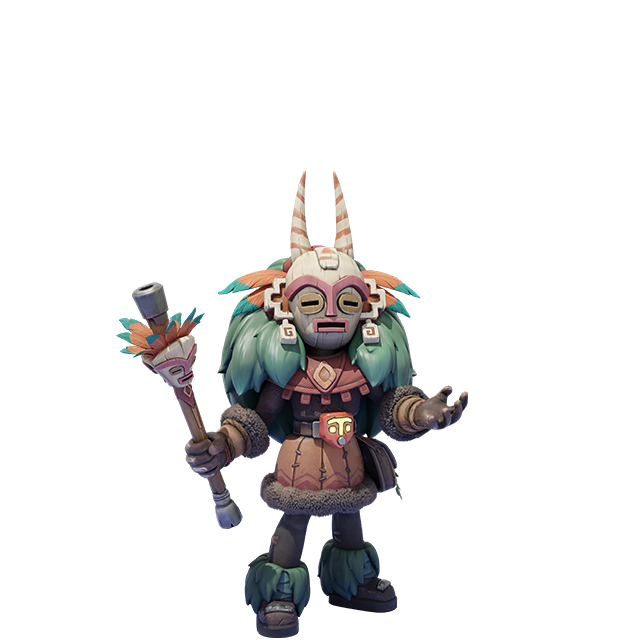
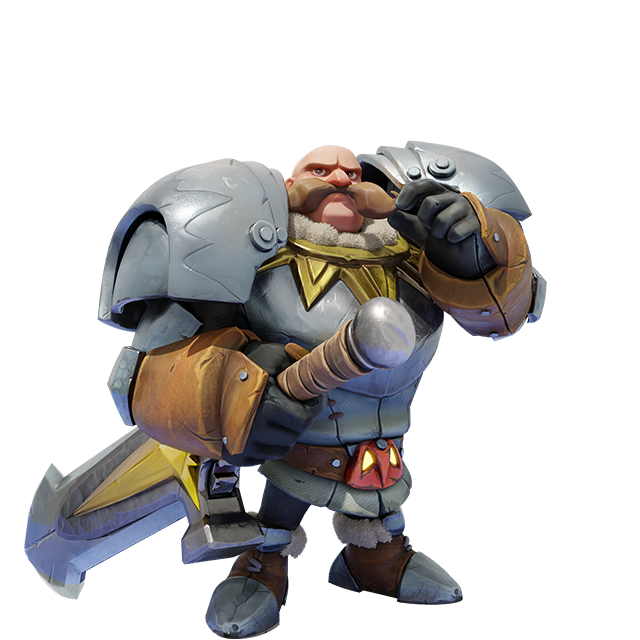
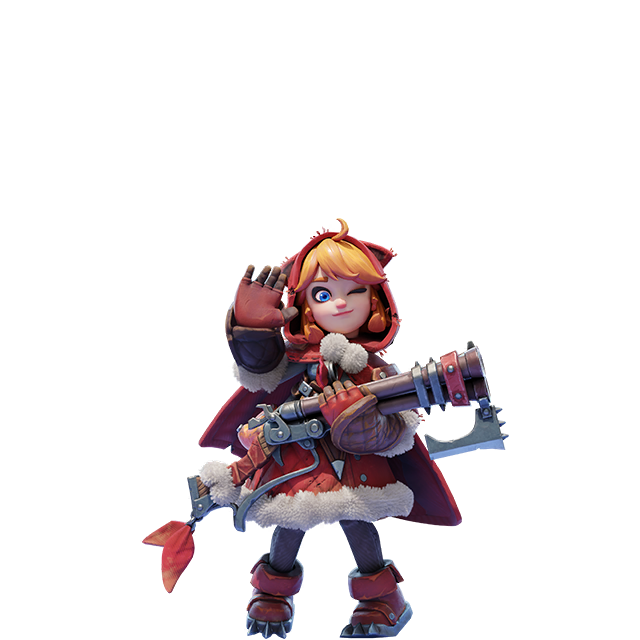
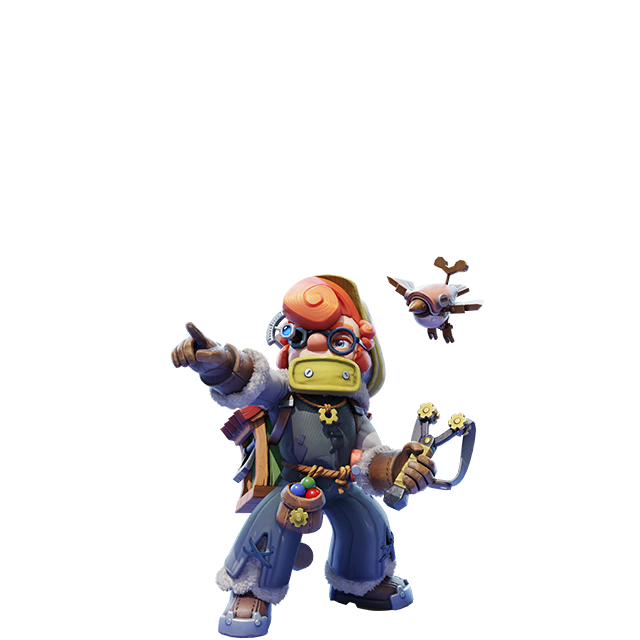
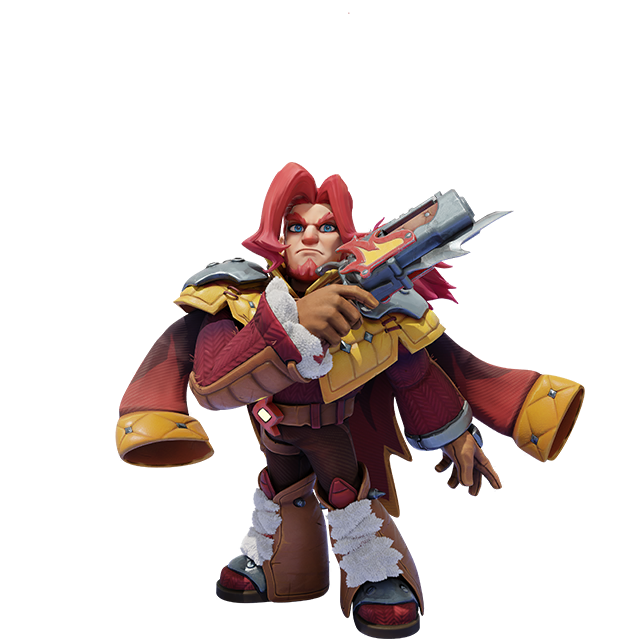
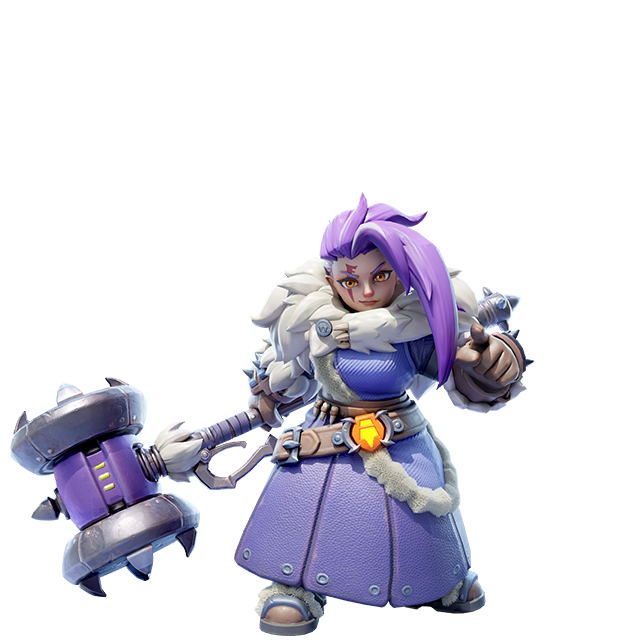
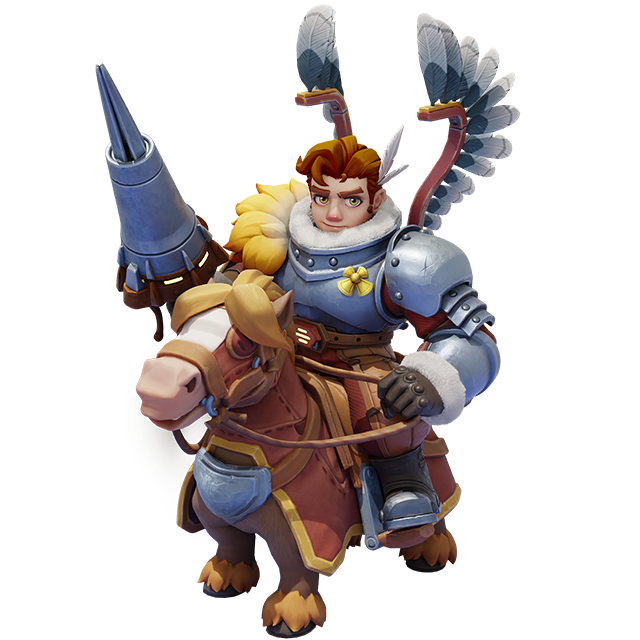

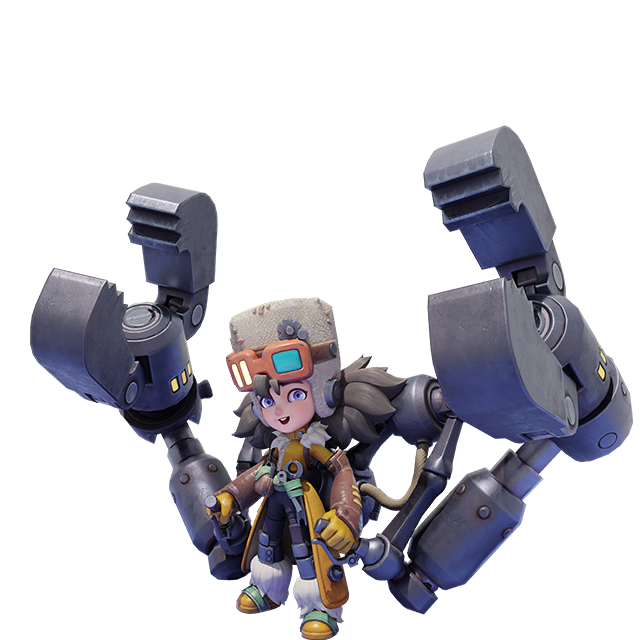
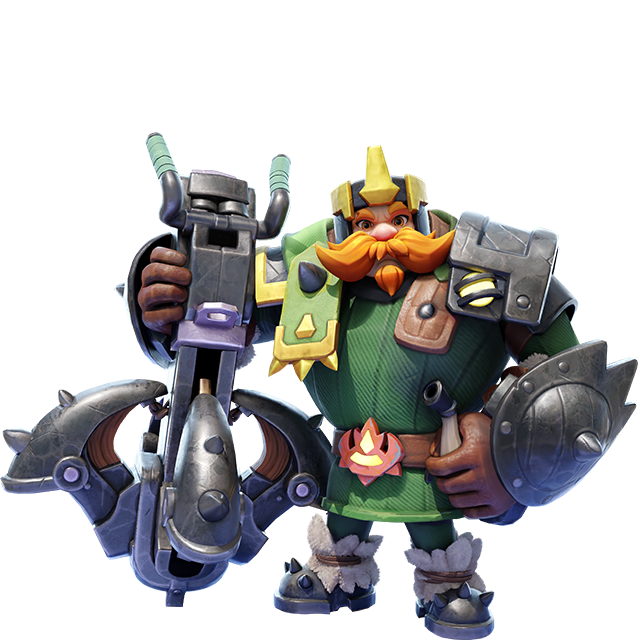

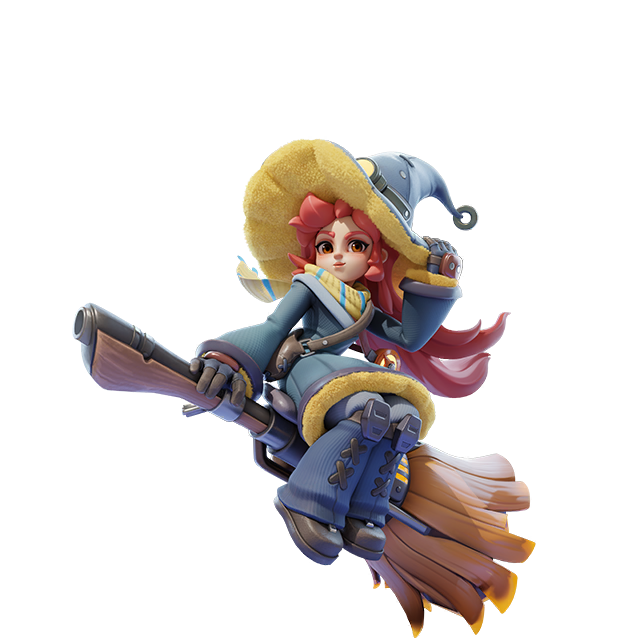
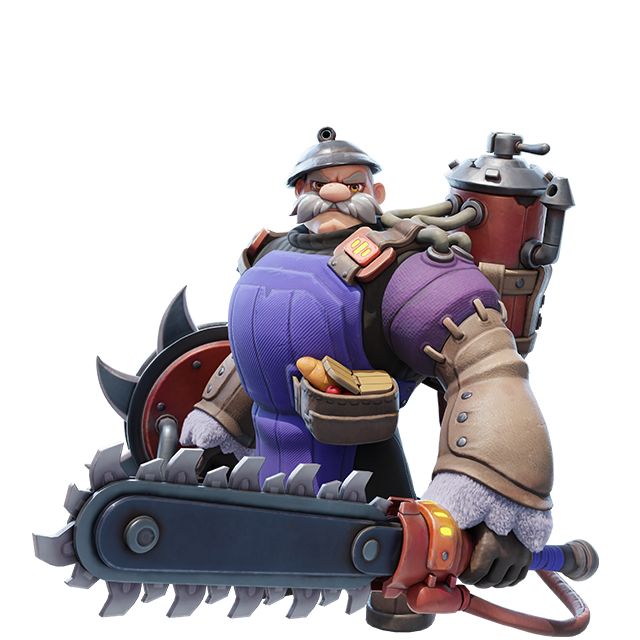
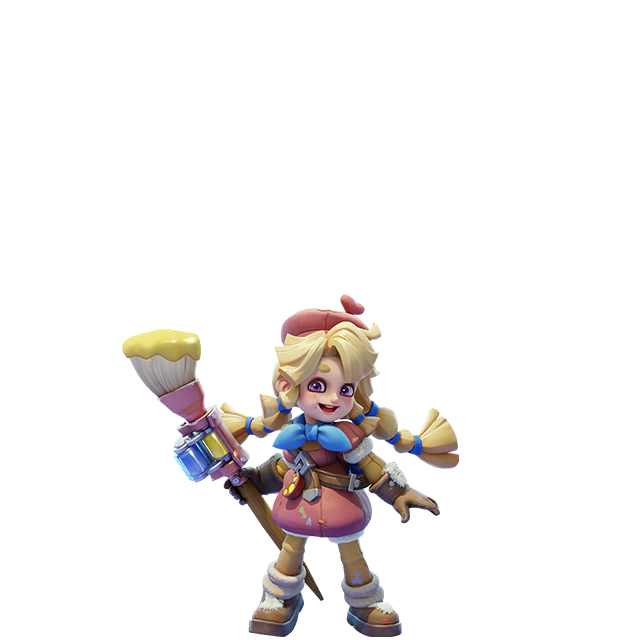
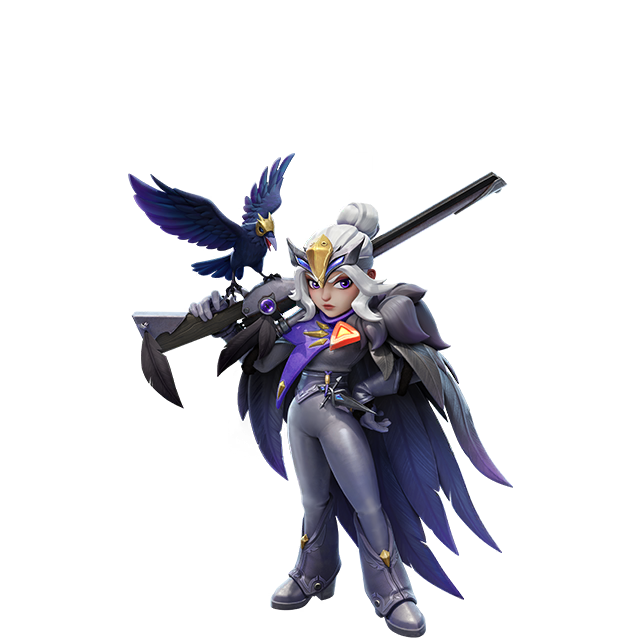
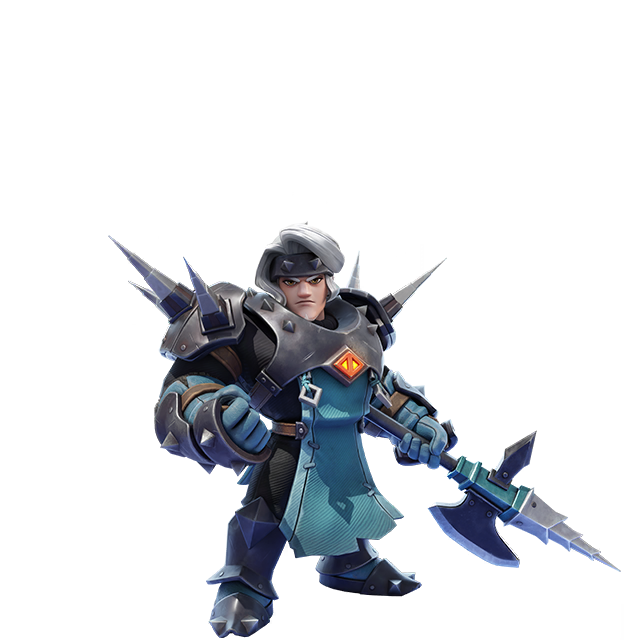
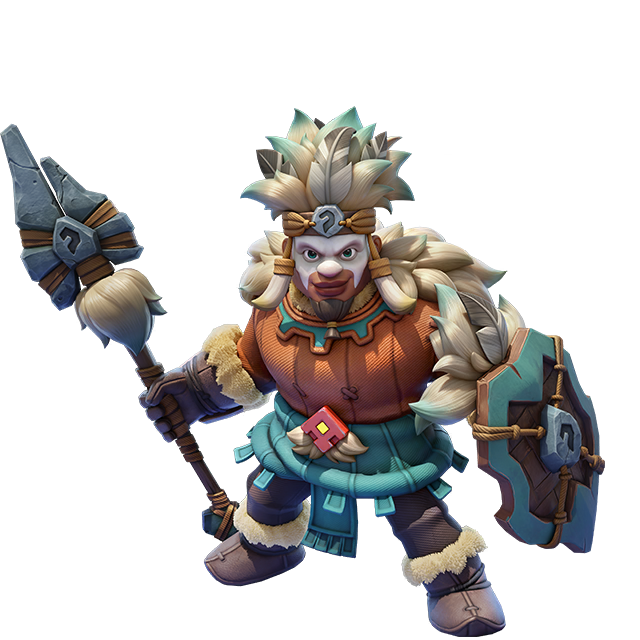
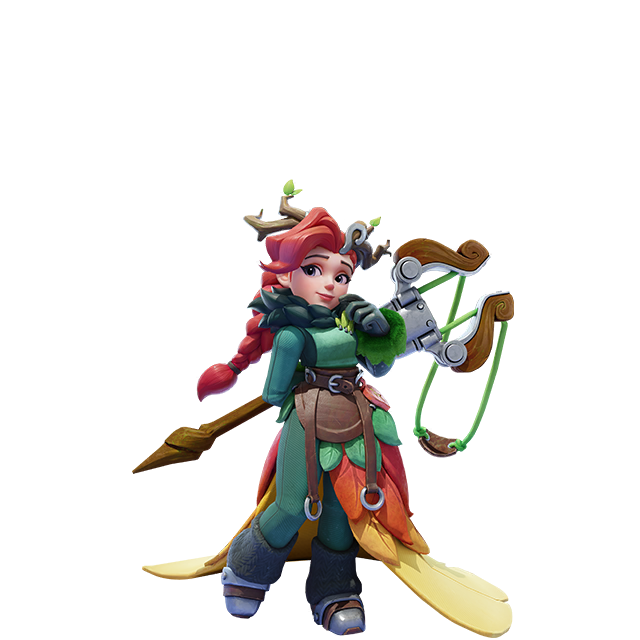
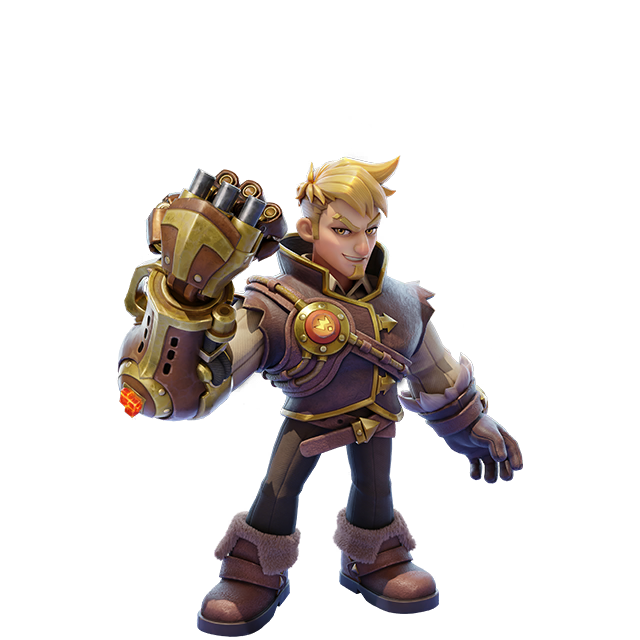

 Agnes
Agnes Cyrille
 Holger
 Romulus
 Baldur
 Fabian
 Valeria
 Ronne
Ronne Kathy
Kathy Gareth